Introduction
There may be times when you need to post a full VAT only journal to record a VAT adjustment. In these scenarios you want no effect in the General Ledger, but wish to have an adjusting VAT entry appear on the VAT statement.
In this post, I’ll walk through the necessary steps for setting up VAT for these scenarios. Once the setup is complete, I’ll explain the process for posting the VAT only journal.
VAT Setup
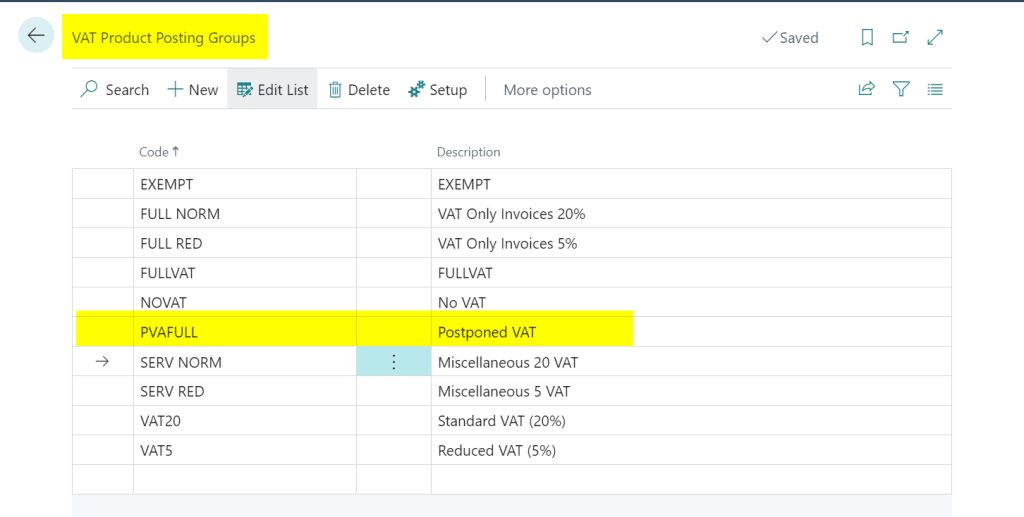
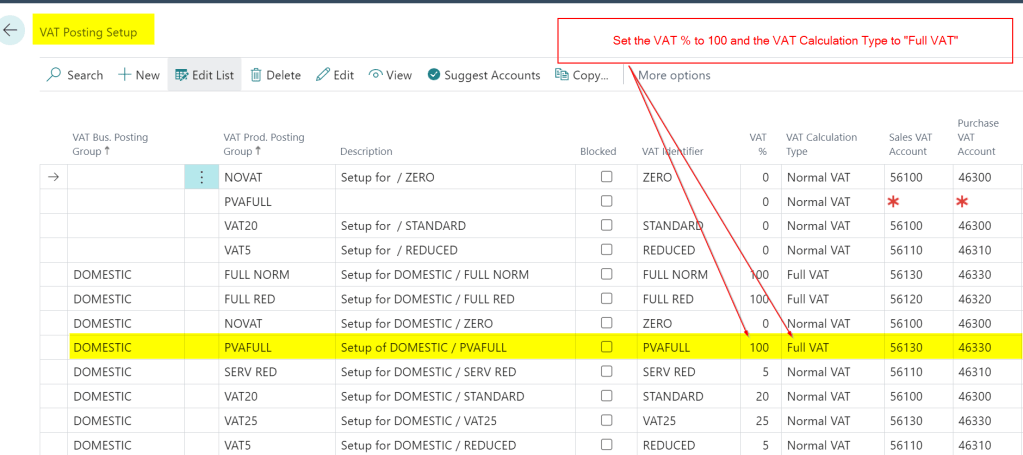
First, we need to add the necessary VAT combination in the VAT Posting Setup window. For this I go to the “VAT Posting Setup” window.
In this window I add the following VAT combination.
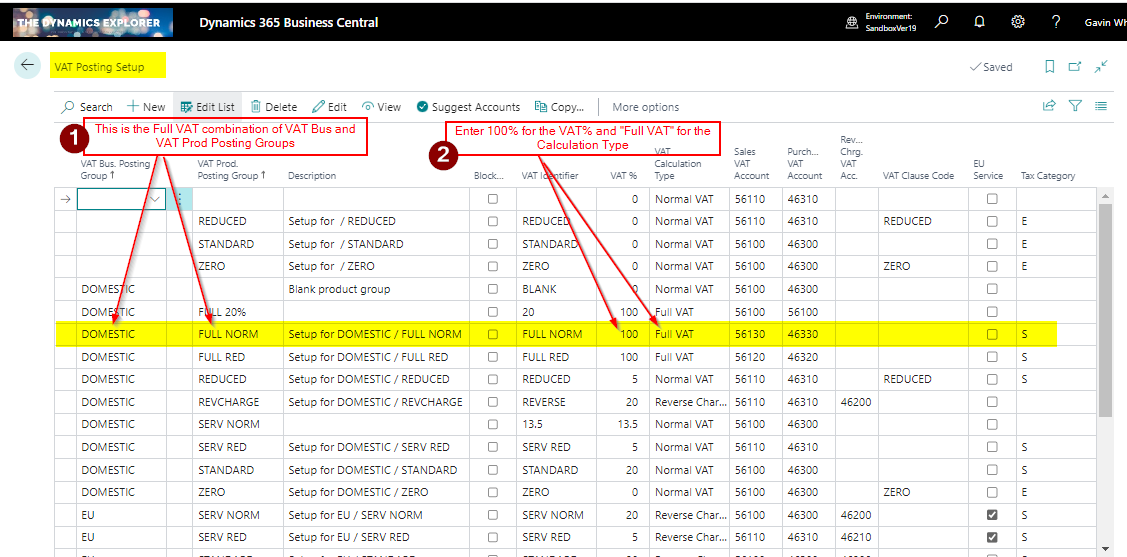
Now if I use the combination of “Domestic” and “Full Norm” in a journal this should calculate full VAT at 100%.
VAT Journal
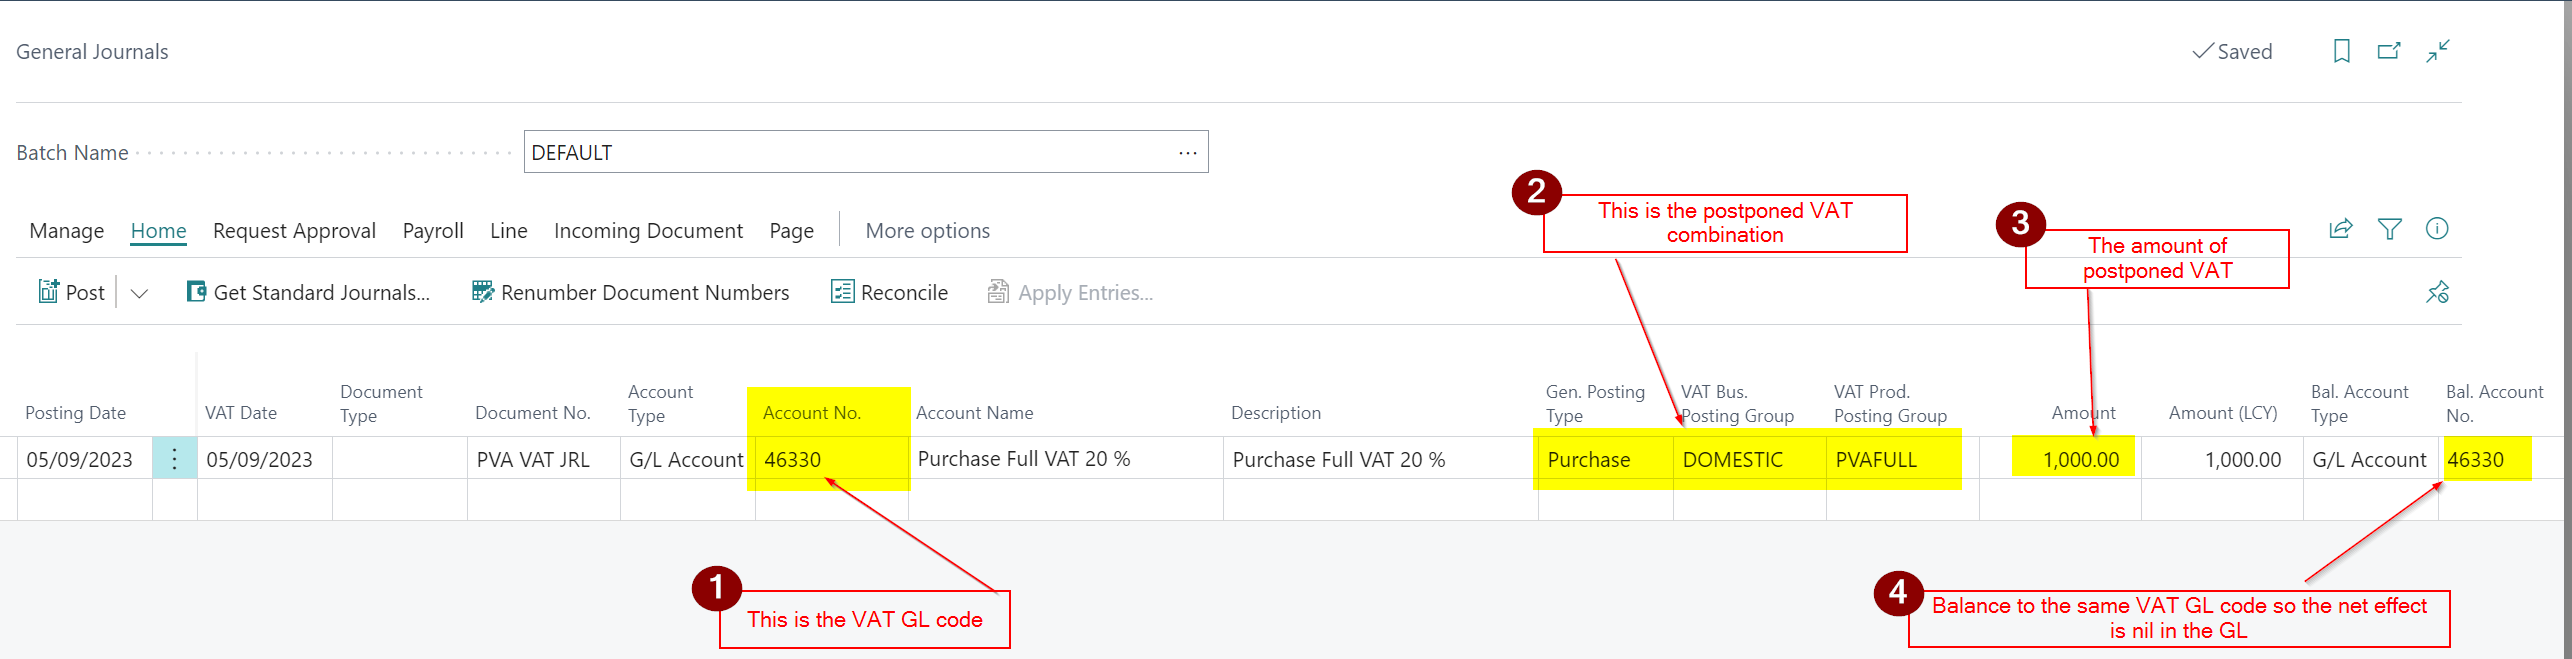
Now the VAT Posting Setup is complete, I’ll post the correcting VAT adjustment journal using the “General Journal” page as per the screen shot below.
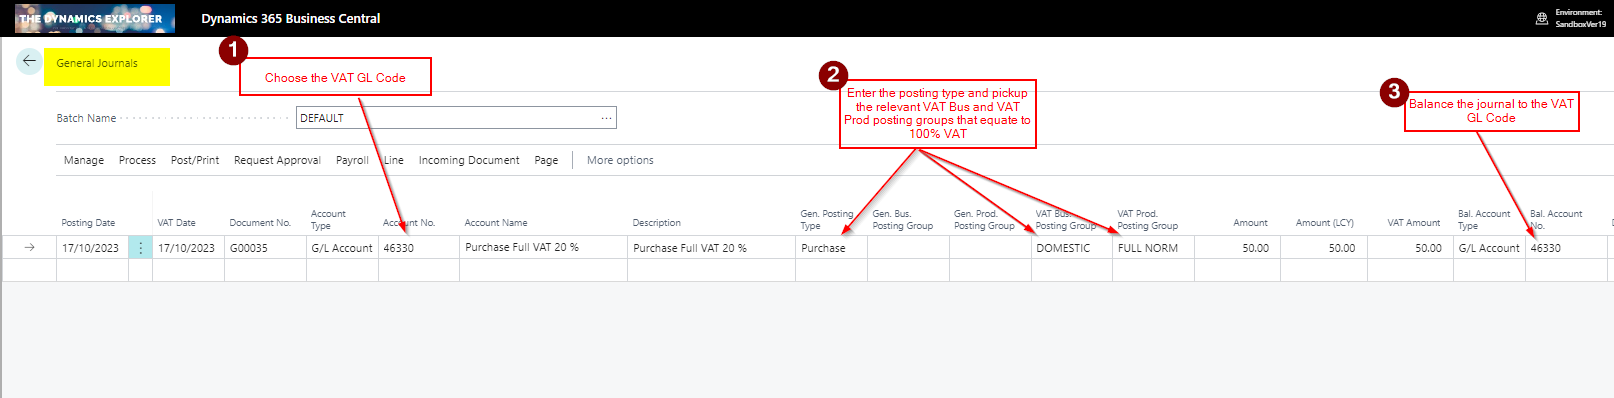
In this journal I’m doing the following:
1) First I’m selecting the VAT GL Code
2) Then I’m selecting the relevant VAT Business and VAT Product Posting Group for the Full VAT combination
3) Lastly, I’m balancing the journal to the same VAT GL code
This produces the following GL Entries. As you can see there is no effect in the General Ledger.

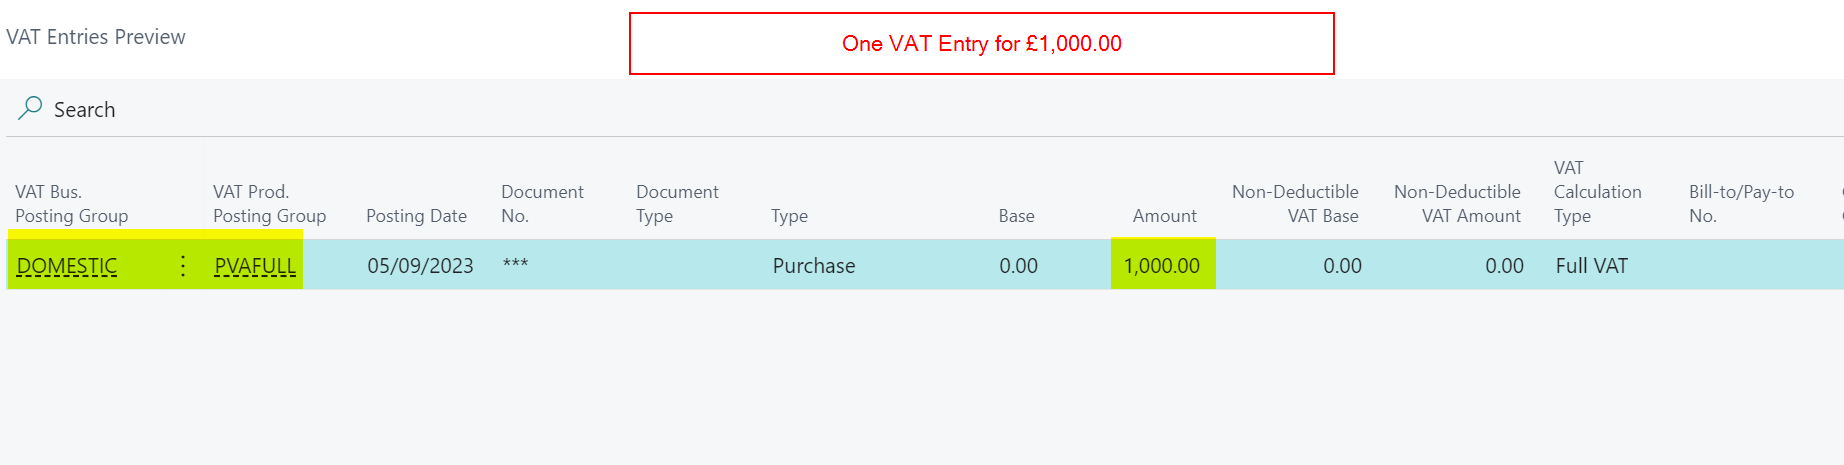
The posting also creating this VAT Entry

Therefore, although we have no effect in the General Ledger, we have a VAT entry to record the adjustment on the VAT Statement. We just need to edit the VAT statement to pickup the VAT Business and VAT Product posting combinations
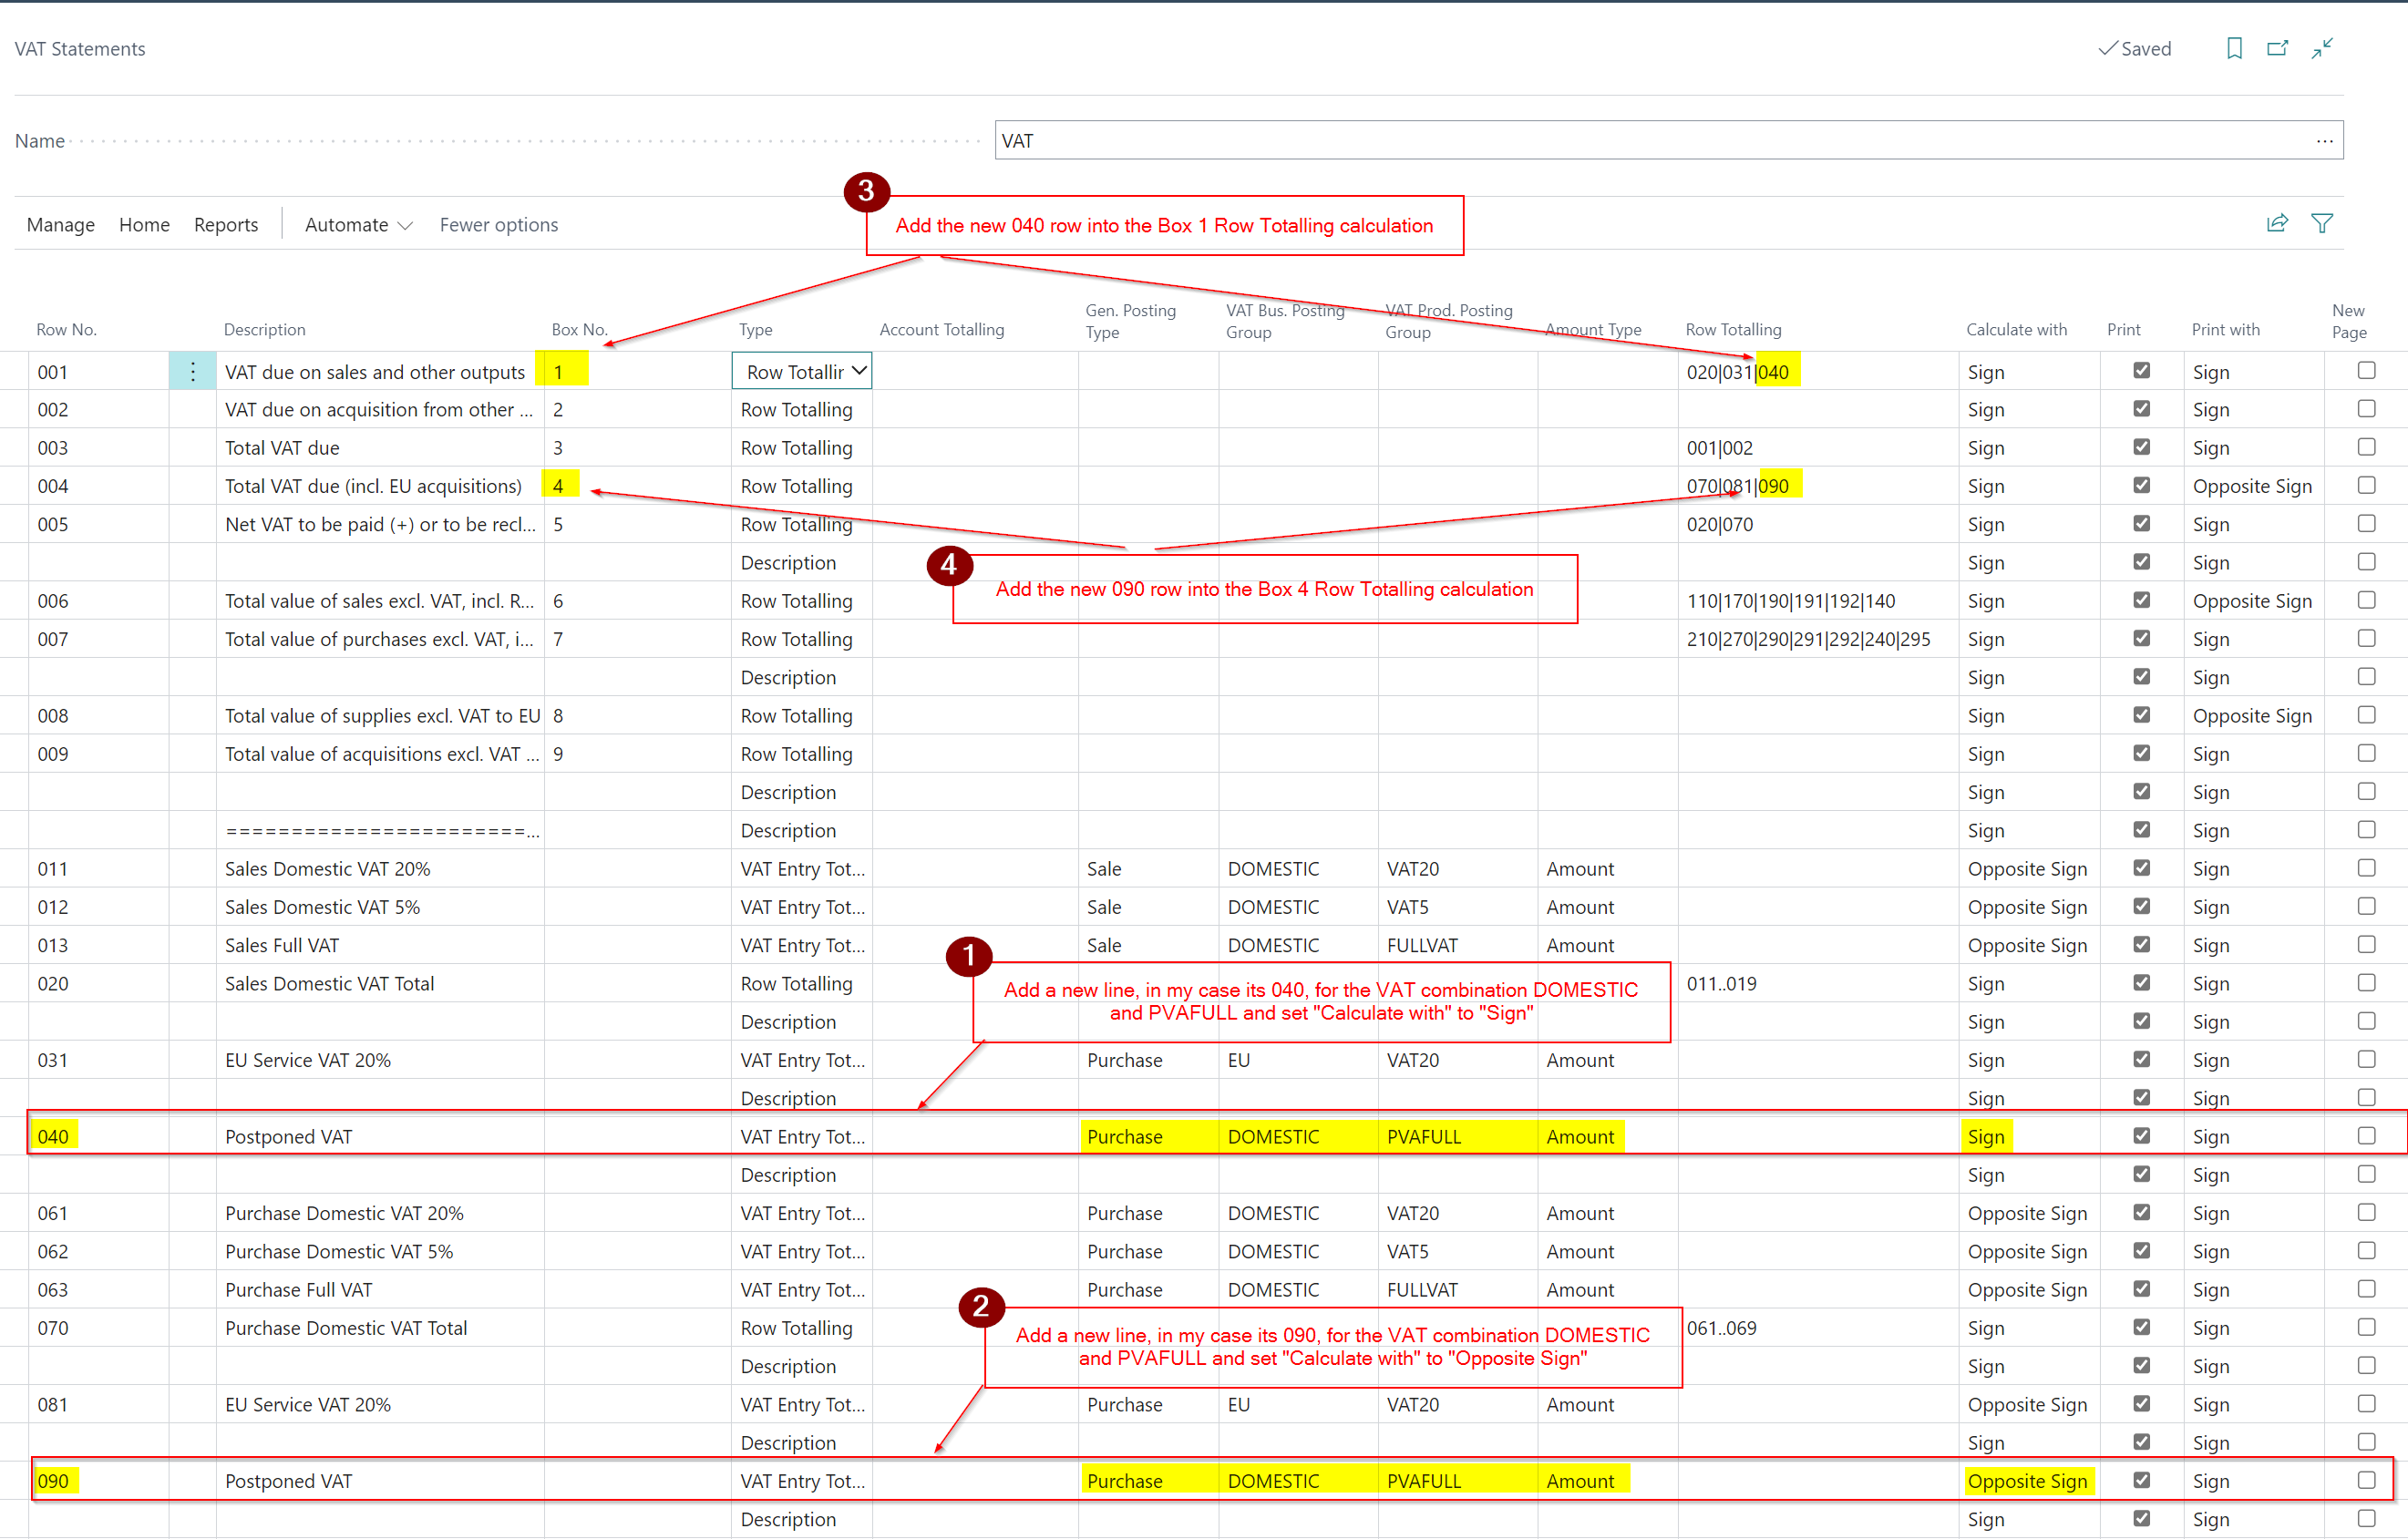
VAT Statement
To ensure this is picked up on the VAT Statement go to the VAT Statement page and add the combination:

Conclusion
This post shows how you can setup Business Central to post VAT adjustments that won’t affect the General Ledger but do create adjusting VAT entries.
Thanks for reading!