When creating new Customers it may be necessary to automatically set them as “Blocked” to prevent them from being immediately used. Additionally, this would give you the option to create a workflow that is triggered when a user changes the status from “Blocked” to “Unblocked” (blank).
This post will show how you can automatically set any new Customers to “Blocked” using Customer Templates and a Number Series.
Step 1 – Create a Customer Template
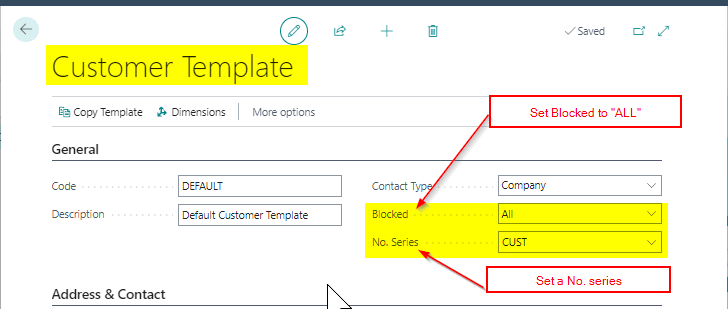
To streamline the creation of new customers, Business Central provides the capability to create “Customer Templates”. You can set certain defaults on a Customer Template, like Posting Groups, Currencies, payment terms, and notably the “Blocked” status along with a Number series.
To implement this solution we need at least one Customer Template, so I’ll create one called “DEFAULT”. I’ll also set the Blocked status to “ALL” and a Number Series of “CUST” as per below
Step 2 – Number Series
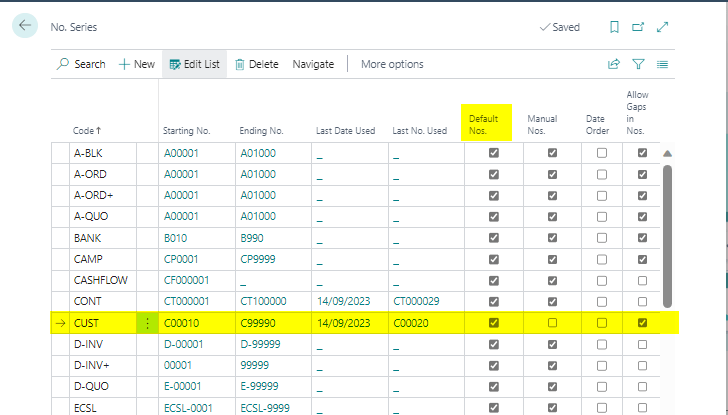
Next, we need to ensure “Default Nos” is switched ON on the Number Series we selected on the Customer Template above.
Step 3 – Test Creating a New Customer
With all the components configured, we can now test the creation of a new customer. Since the customer template includes a number series with default numbers, the template will be applied automatically, resulting in the customer being blocked.
Conclusion
In summary, two key factors are enabling the functionality. Firstly, you need a number series with the “Default Nos” option activated. If default numbers aren’t activated the template won’t be applied automatically. Secondly, a customer template is required, configured to automatically set the “Blocked” option to “All.”
You could now improve the customer onboarding process by implementing an approval workflow that triggers when the status changes from “All” to blank, allowing you to enforce customer approval.
Thanks for reading!
Need help with Business Central? You can subscribe or contact me below
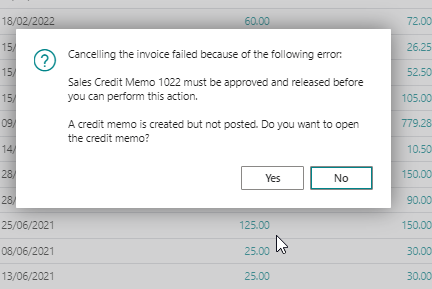
I ran into a situation when trying to “Correct” or “Cancel” a Sales invoice generated the following error:
“Cancelling the invoice failed because of the following error:
Sales Credit Memo must be approved and released before you can perform this action.”
The error was occurring because I had a workflow configured for Sales Credit Memos however the client only wanted the workflow to trigger for manual credits, not for cancellations or corrections.
Therefore in order to prevent this I had to tweak the workflow condition as I’ll explain further in this post.
The Error
When trying to cancel or correct a posted sales invoice I’m presented with the following error:
I then have to open the credit memo and send it for approval. However in the clients scenario they want to bypass the workflow when creating a credit off the back of an invoice, so the credit note posts automatically.
The Fix
In order to prevent the error I had to figure out a way of bypassing the existing Sales Credit workflow by adding a condition to the workflow.
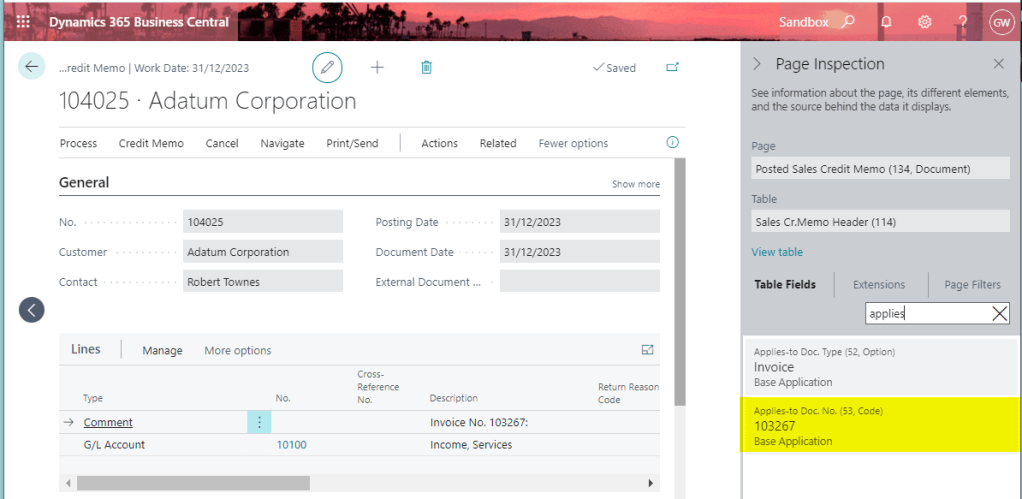
As part of my investigation I switched off the workflow and posted a correction on a Sales Invoice successfully. I then noticed the “Applies-to Doc. No.” field is automatically populated on the “Sales Cr. Memo Header” table as part of the correction process:
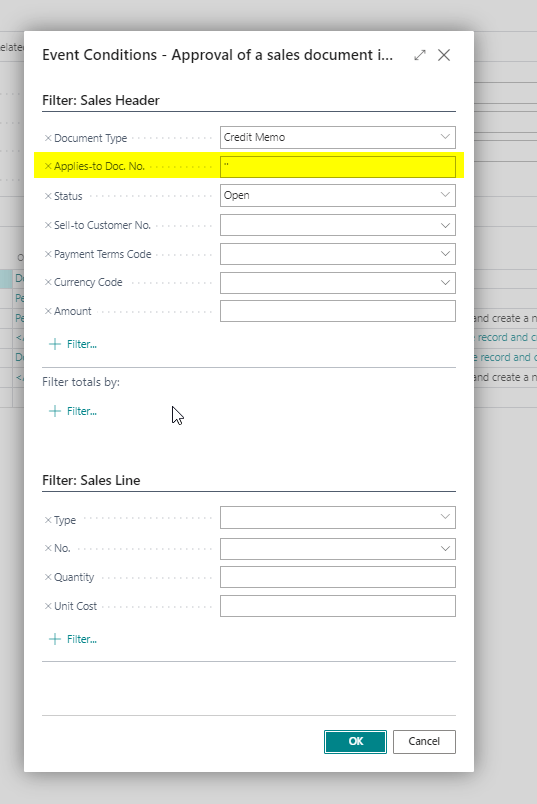
I therefore added the following condition to the workflow:
Now when cancelling or correcting an invoice the Sales Credit Workflow isn’t activated and the credit is created successfully.
Conclusion
Although it seems you overcome this situation by getting creative with the workflow conditions, I’d be interested to know if there are any other workarounds for this scenario.
Within Dynamics 365 Business Central you have the ability to create Vendor Approval Workflows which can be triggered on certain conditions. I’ve found that although this is really cool functionality you get right out of the box, it does have a downside.
The issue being if you use the standard Vendor Approval template as the basis of your Workflow, the user has to request that the new Vendor is approved, otherwise the Workflow is skipped. Obviously this gives this functionality massive drawbacks as users can go ahead and create Vendors and never click the “Request Approval” button.
In this blog I’ll explain how I’ve managed to get around this by adding conditions and changing the Vendor Approval Workflow.
** Please note there’s also one caveat in the at the end of the post 🙂
Vendor Approval Workflow from the Template
To demonstrate the problem with the Vendor Approval Workflow created via the Template let’s add a new one.
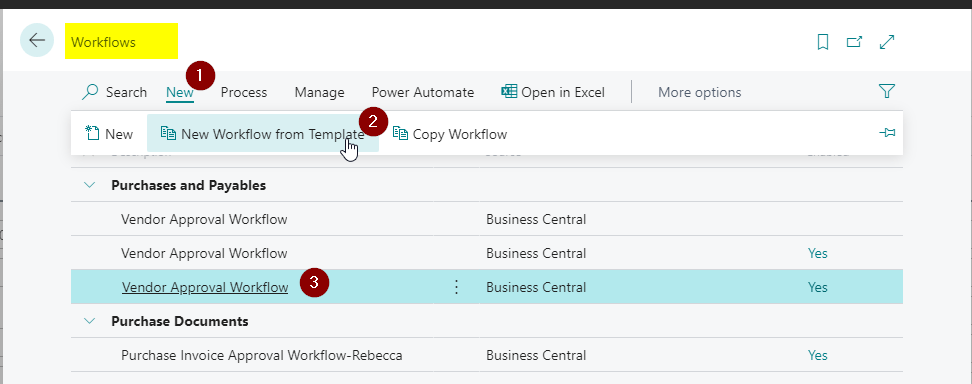
To do this search for “Workflows” and then on the Workflows page click “New > New Workflow from Template” and select “Vendor Approval Workflow” as per below:
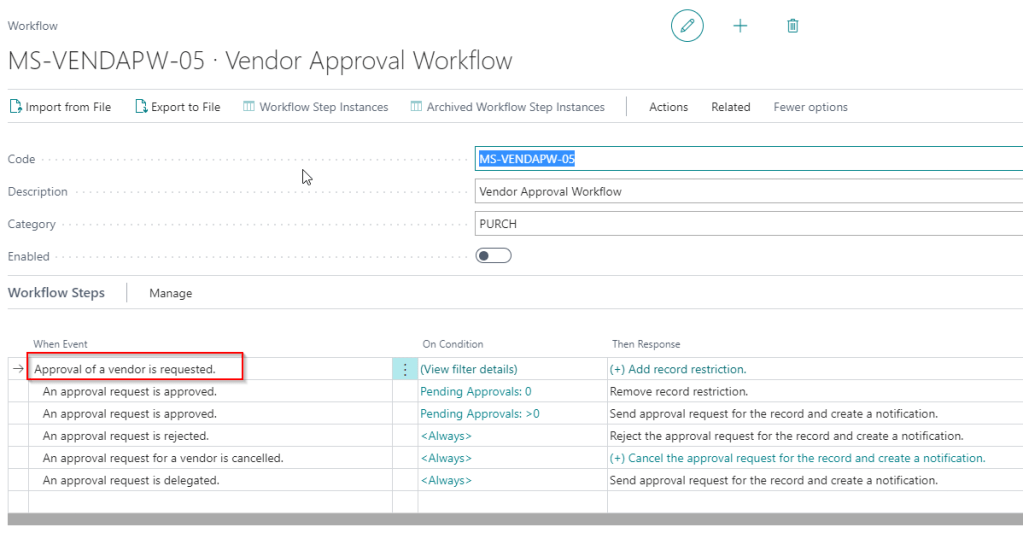
This opens up a new Vendor Approval Workflow based on the template. However as you can see the first event in the approval sequence is “Approval of a vendor is requested”
This means for the Workflow to start the user must click “Request Approval” after creating the new Vendor.
Therefore no matter what conditions we add, and complex approval hierarchy’s we implement, if a user forgets to request approvals the approval workflow will never start.
So the obvious question is how can we get around this restriction? Can we force the system to automatically send approvals when users create new Vendors.
Changing the Vendor Approval to Force Approval
For this to work we have to get a little creative with its setup and conditions.
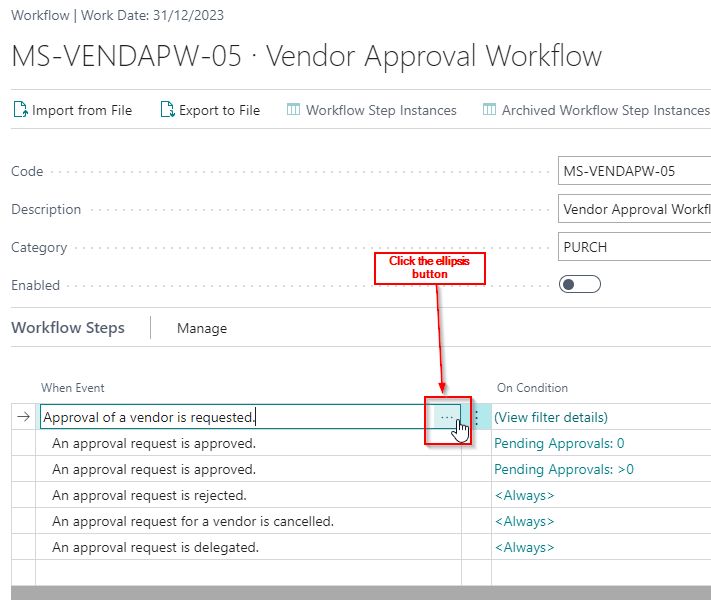
Firstly, after adding the Vendor Approval you can edit the default events and sequence. So rather than start with “Approval of a vendor is requested” lets change this to “A vendor record is changed”.
You can do this by clicking the ellipse button next to “Approval of a vendor is requested”
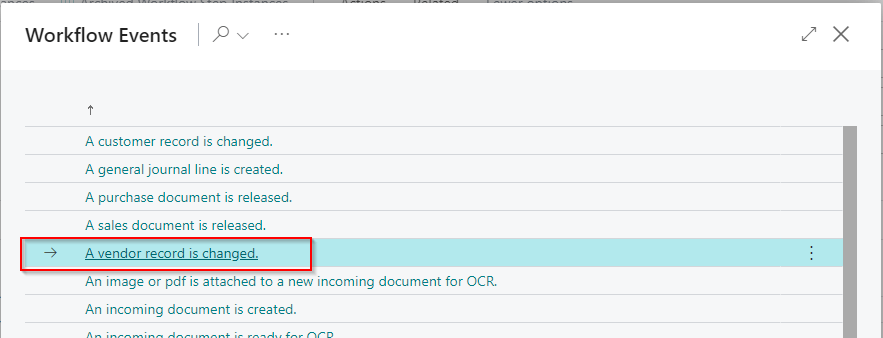
Then select “A vendor record is changed”
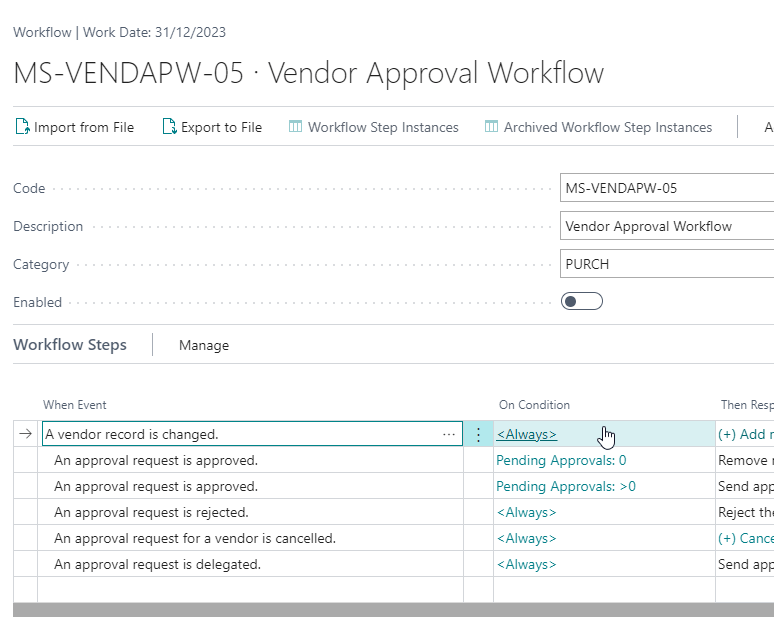
The workflow will now look like this:
As this stands the Workflow will trigger whenever a Vendor record is changed, however this isn’t exactly what we want. We only want this to trigger for new Vendors, therefore we need to add some conditions.
Now lets click the <Always> condition so we can filter down when the Workflow will be triggered.
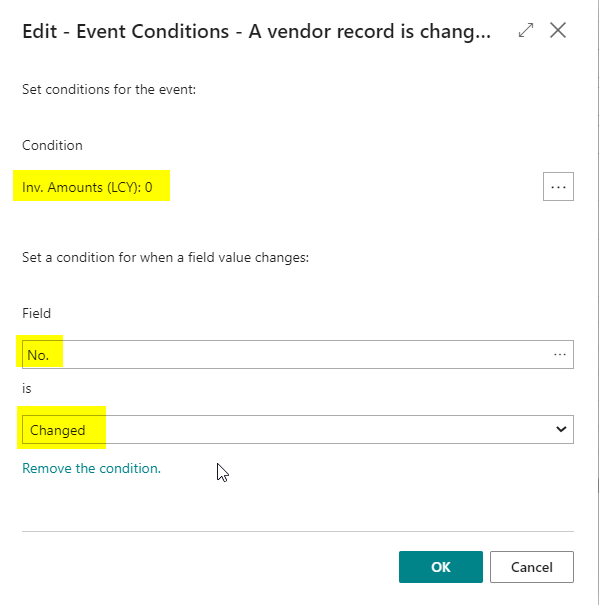
This will open the “Edit – Event Conditions” page where we can add the following conditions:
Let’s break down what the conditions are saying:
The first condition is – “Inv. Amounts (LCY):0”. This means the Workflow will only trigger if the Vendor has never had any Invoices posted onto it.
The next condition is – Only trigger when the No. is Changed: This means the Workflow will only trigger when the Vendor No. is changed.
Therefore the Workflow will only trigger if the Vendor has had no activity AND the Vendor No. is changed (which happens when a new one is added).
Hopefully this captures all new Vendors although it will also trigger if someone changes the Vendor No. and the Vendor has never had any invoices posted. (hopefully this will be unusual unless there was a mistake setting up the Vendor)
Let’s test the Workflow
Now to test if this works 🙂
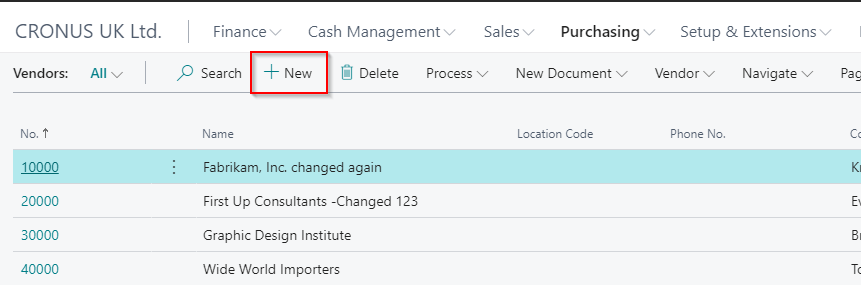
First go to “Vendors” and click “New”
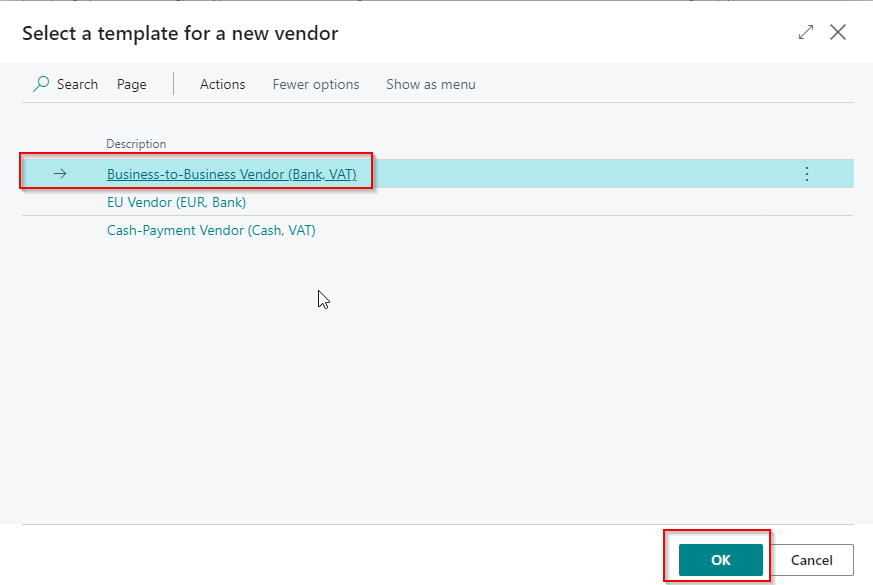
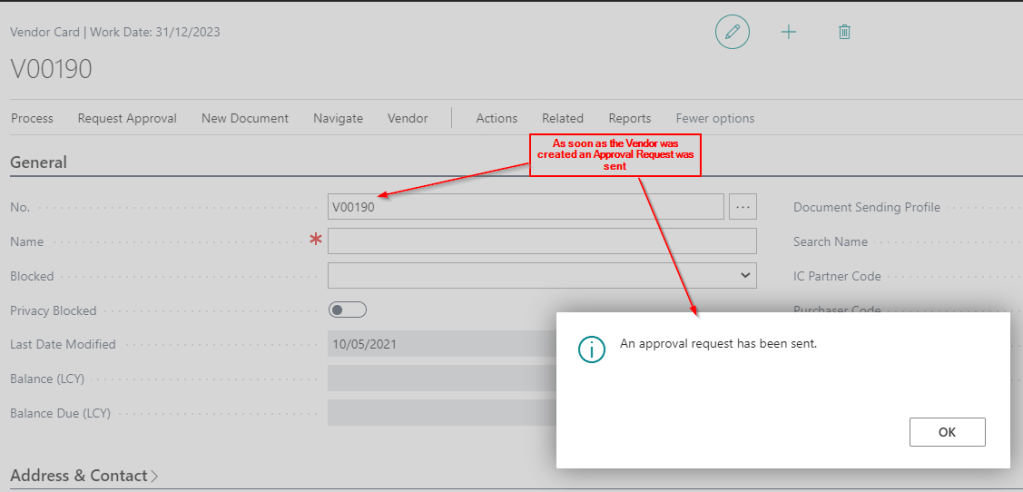
Select a Template and click OKNow the Vendor page opens and the Workflow automatically triggers and sends an approval request:
Therefore we have successfully forced the Workflow approval to trigger automatically when a new Vendor has been created 🙂
Conclusion
Although I’ve found this to be a great way to configure automatic approvals for new Vendors it does have one disadvantage :(.
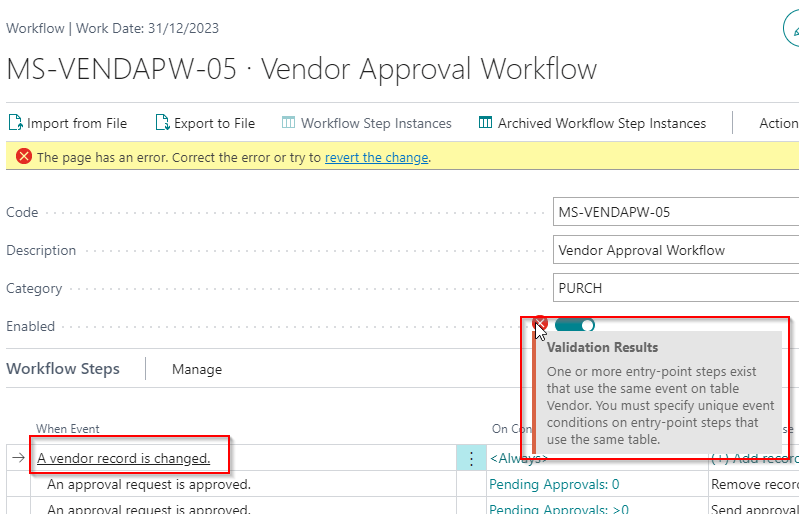
Unfortunately you can only have one Workflow which starts with the same event. Therefore if I wanted to create another approval that started with “A vendor record has changed” the system would prevent this as per below
Just something to bear in mind if you wanted to implement this solution 🙂