This is the fourth video in the video series “Making the most of your Business Central Trial”. This video series is intended to help new users on their journey with the Business Central Trial, although it may also prove helpful for those already familiar and using Business Central.
In this video I go through how to configure different email accounts in Business Central. I walk through setting up email for “Current User” and “Shared Mailbox”.
With regards “Shared Mailbox”, I go through creating a new Shared Mailbox in the Microsoft Admin Centre and granting users permissions to use the Shared Mailbox before then completing the setup in Business Central.
Once the email accounts are both configured I show how you then have the option of sending from either when you choose “Send Email” in Business Central.
I also touch on how you can use “Email Scenarios” to default certain email accounts when sending emails. (I only mention this at the end. In hindsight I probably should have shown an example of this)
By default, users can only see their own sent emails via the Sent Emails page, however there may be a requirement for some users to view all emails that have been sent in Business Central. In this post, I’ll go through how this can be achieved via the “User Email View Policies” page.
Sent Emails
When you open the “Sent Emails” page, you will only see what emails you have sent. For example, if I open the Sent Emails page as my admin user, the page is blank.
Email Policies
If you search “User Email View Policies” you can change the permissions to Sent Emails on a user by user basis.
I therefore change this for my ADMIN user to “View all emails”
Now, when I go back to “Sent Emails” page, I can see all emails that have been sent via Business Central.
Problem solved :). Now my admin user can see all emails sent from Business Central.
Business Central provides users with the ability to email from a Shared Mailbox. For example, if you want to email all Sales Invoices from the generic email address “AccountsReceiveable@CompanyName.com” rather than an individuals email address.
This blog walks through the steps to add a Shared Mailbox in the Microsoft 365 Admin Centre called “Accounts Receivable” and subsequently integrating the Shared Mailbox into Business Central so users can email using the Shared Mailbox.
Add the Shared Mailbox in the Microsoft 365 Admin Centre
The first step is to create the Shared Mailbox in the Microsoft 365 Admin Centre and grant the users permissions to the Shared Mailbox.
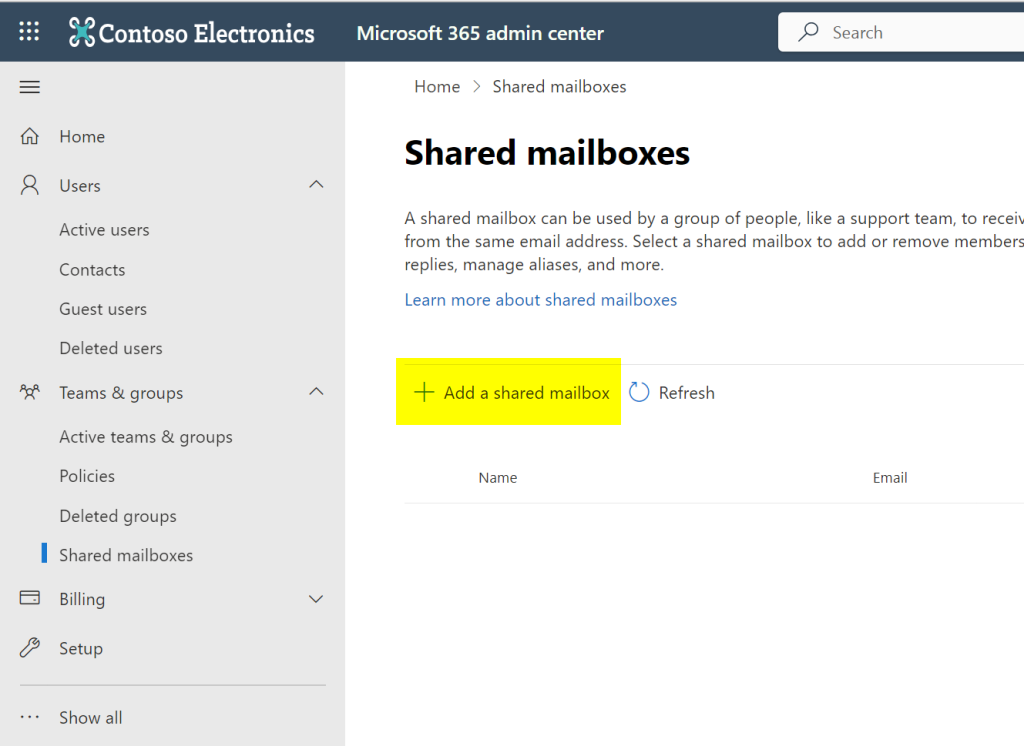
Therefore log into the Microsoft 365 Admin Centre as an administrator and click “Shared mailboxes”.
Next click “Add a shared mailbox”
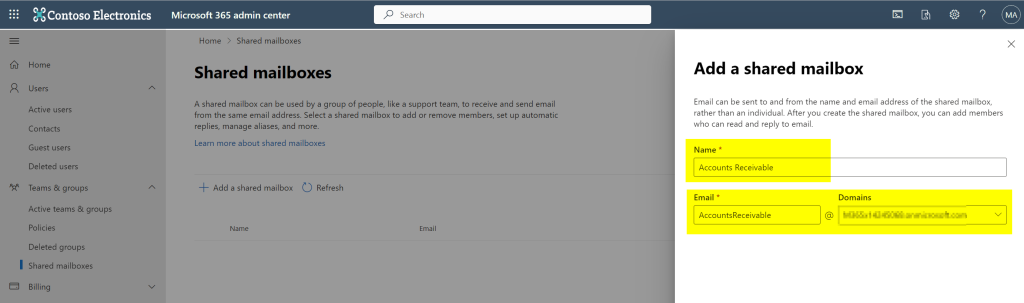
Enter the Name of “Accounts Receivable” and an email address of “AccountsReceivable@yourdomain.com” and click “Save Changes”
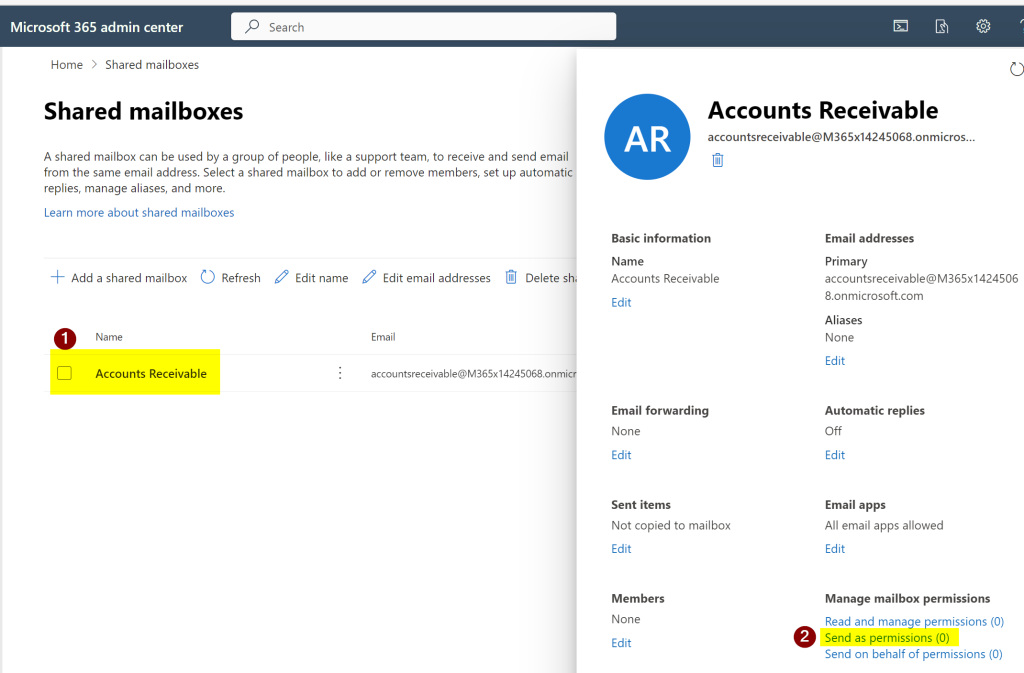
Next we need to grant the users the “Send As” permission to the Shared Mailbox
To do this click “Accounts Receivable” and then “Send as permissions”
Next click “Add Permissions” and select the users you wish to be able to send from this mailbox
The Shared Mailbox has now been created in the Microsoft 365 Admin Centre.
Adding the Shared Mailbox in Business Central
Now the Shared Mailbox has been created in the Microsoft 365 Admin Centre we can add it in Business Central so we can use it to send emails from.
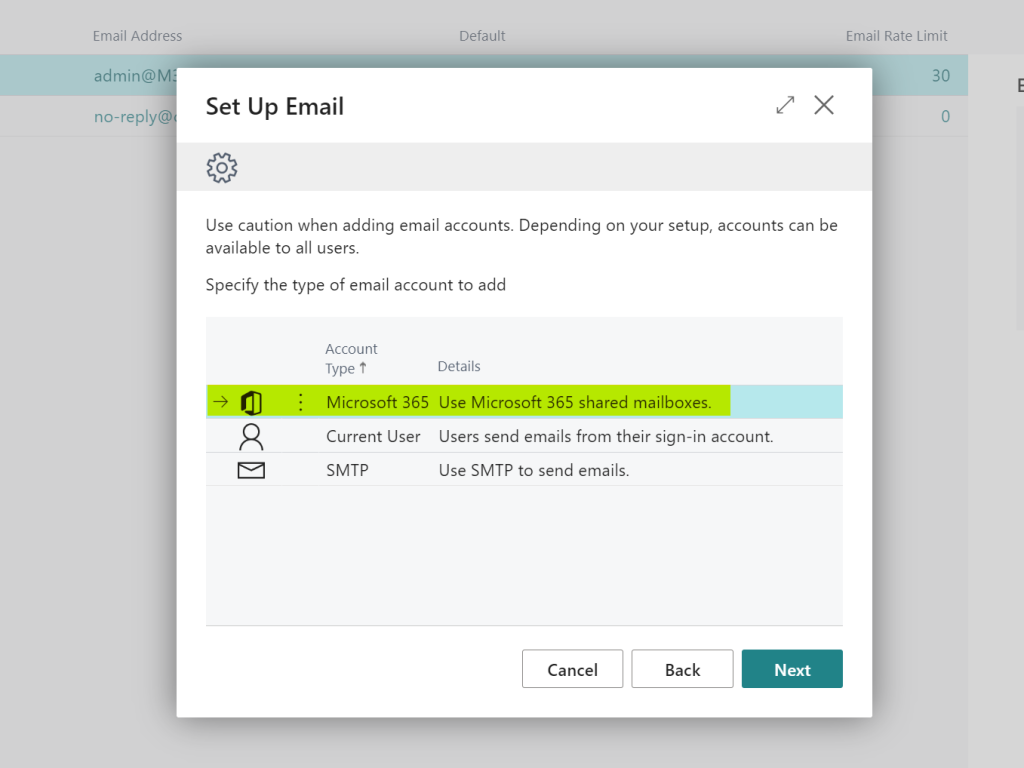
To do this log into Business Central as a user who has the “SUPER” permission or the “EMAIL – ADMIN” permission and search for “Email Accounts” and click the link “Email Accounts”
Next click “Add an Email Account”
Now select the “Account Type” of “Microsoft 365” as per below
Enter the details of the Shared Mailbox you have created and click “Next”
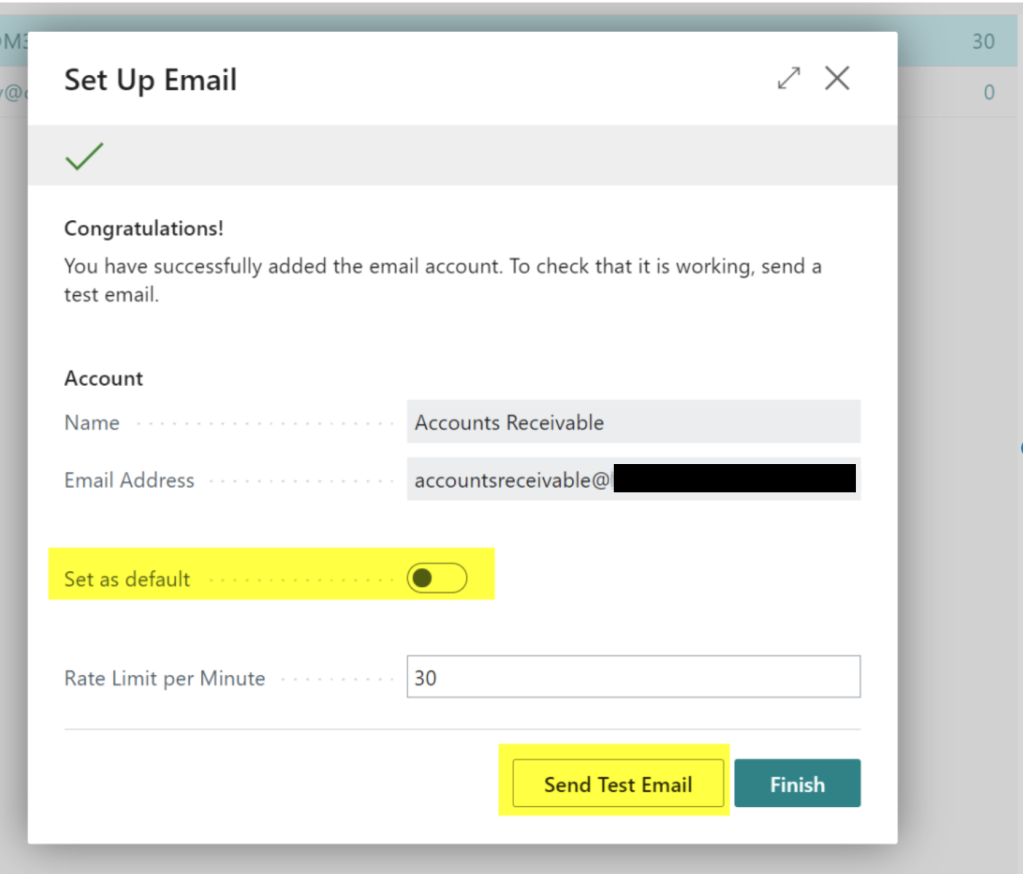
Finally you can choose to “Set as default” (this is optional) and then “Send Test Email” to test if everything is working as expected.
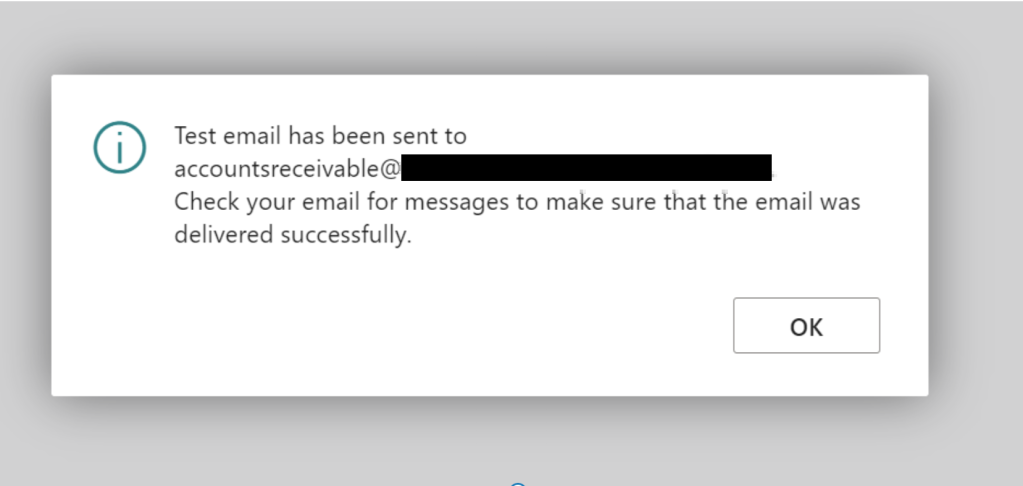
I selected the mailbox in question and clicked “OK” and I receive a notification to say the email is sent
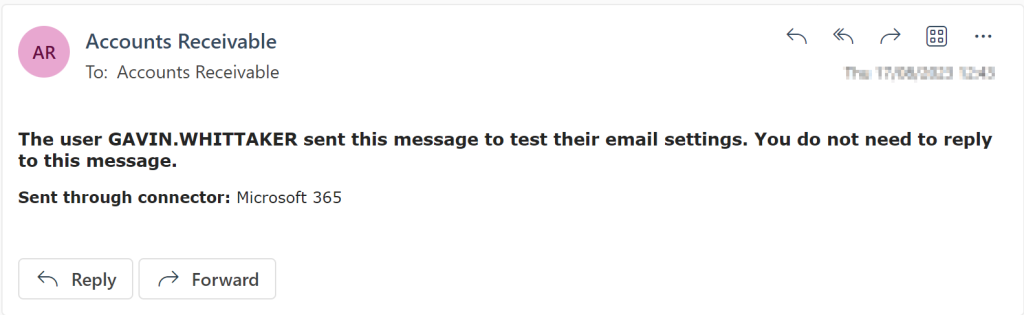
I check the emails and Success! I received the email
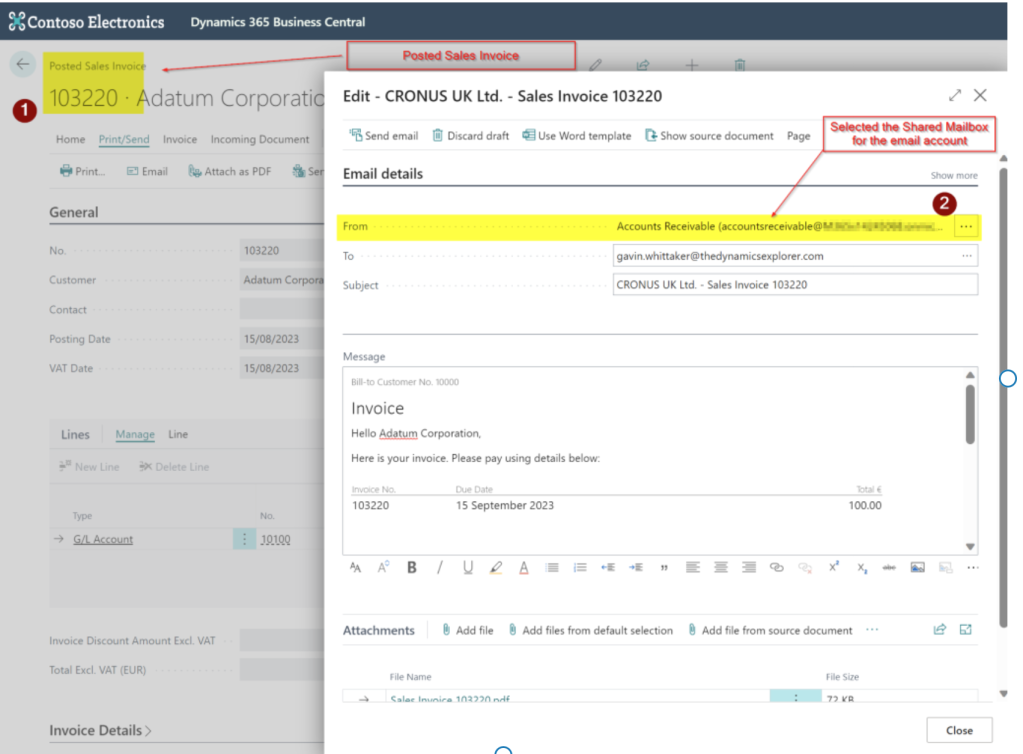
I can now use this to send Sales Invoices and Customer statements etc
I can also setup email scenarios so the Shared Mailbox is used as a default 🙂
Conclusion
Shared Mailboxes are extremely useful when sending documentation such as Sales Invoices and Sales Credits. I hope this walk through helps you configure them on your system.