Sometimes when you select “Smartlist” off the menu in Dynamics GP nothing appears to happen? Smartlist doesn’t load but you don’t get any errors. When you look at the Windows toolbar, smartlist appears to be open but you can’t select it. Its all very strange.
We get this scenario quite often on the support desk and although solutions are documented online I wanted one I could quickly refer to so decided to write this blog :).
I also wanted to show a solution I use to resolve this rather than using a SQL script which is also sometimes recommended.
Fixing using keyboard shortcuts
Most of the time when this happens smartlist has actually loaded however its opened off the viewable screen. To fix this, and bring it back on screen, you can use a series of keyboard shortcuts.
The exact steps I follow are:
Click on smartlist on the menu bar (even though this won’t load smartlist you now have focus on it)
Press ALT+SPACE
Press M
Press the right cursor key
Wriggle the mouse to drag the smartlist window back on screen.
For clarity by pressing ALT+SPACE you are using the keyboard shortcut to load the menu on the smartlist window i.e.
Pressing M selects “Move” off the menu.
Pressing the right cursor moves the smartlist window slightly
Moving the mouse controls the window and you can bring it back on screen.
Conclusion
When this happens it can prove to be a pain so hopefully these simple steps will help anyone else struggling with this issue.
Thanks for reading!
Thinking of making the move to Business Central? We can help
Within Dynamics 365 Business Central you have the ability to create Vendor Approval Workflows which can be triggered on certain conditions. I’ve found that although this is really cool functionality you get right out of the box, it does have a downside.
The issue being if you use the standard Vendor Approval template as the basis of your Workflow, the user has to request that the new Vendor is approved, otherwise the Workflow is skipped. Obviously this gives this functionality massive drawbacks as users can go ahead and create Vendors and never click the “Request Approval” button.
In this blog I’ll explain how I’ve managed to get around this by adding conditions and changing the Vendor Approval Workflow.
** Please note there’s also one caveat in the at the end of the post 🙂
Vendor Approval Workflow from the Template
To demonstrate the problem with the Vendor Approval Workflow created via the Template let’s add a new one.
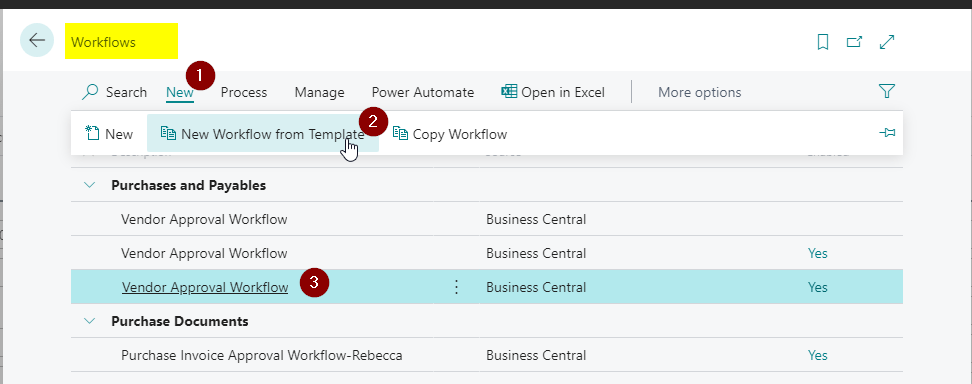
To do this search for “Workflows” and then on the Workflows page click “New > New Workflow from Template” and select “Vendor Approval Workflow” as per below:
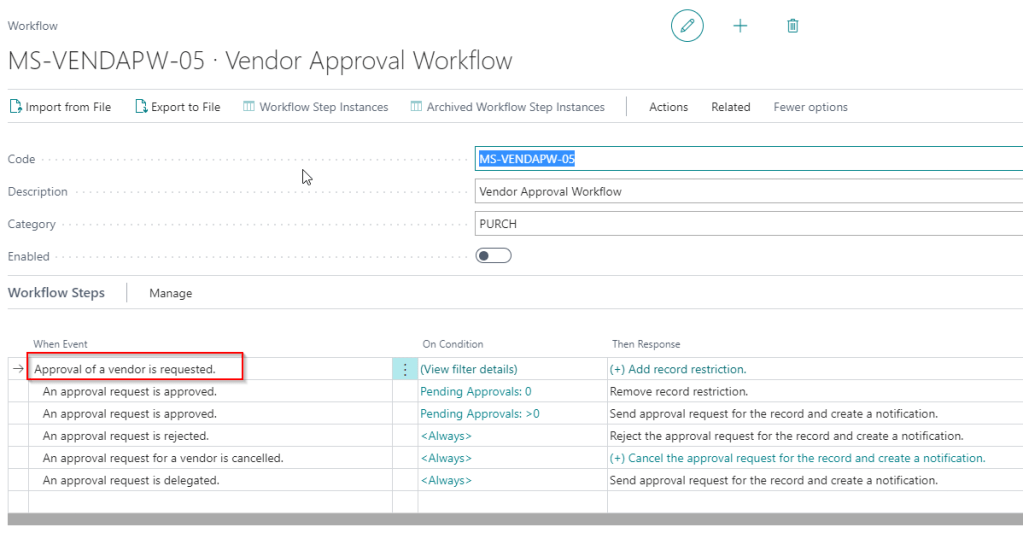
This opens up a new Vendor Approval Workflow based on the template. However as you can see the first event in the approval sequence is “Approval of a vendor is requested”
This means for the Workflow to start the user must click “Request Approval” after creating the new Vendor.
Therefore no matter what conditions we add, and complex approval hierarchy’s we implement, if a user forgets to request approvals the approval workflow will never start.
So the obvious question is how can we get around this restriction? Can we force the system to automatically send approvals when users create new Vendors.
Changing the Vendor Approval to Force Approval
For this to work we have to get a little creative with its setup and conditions.
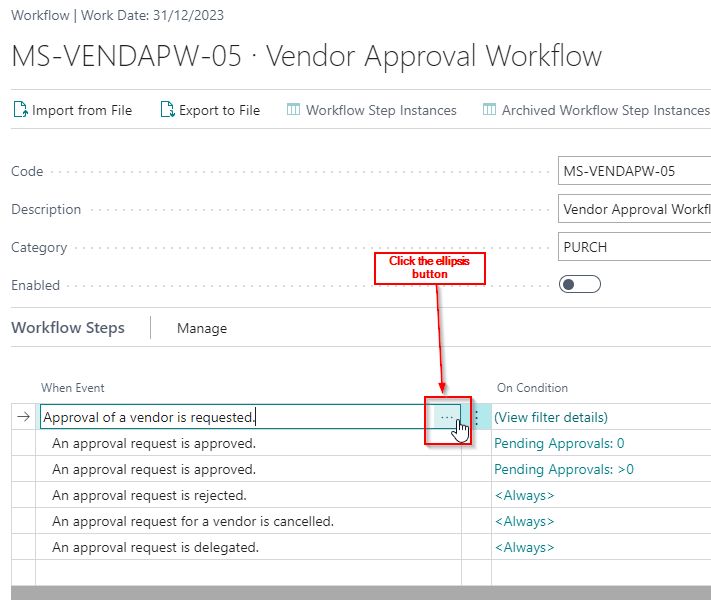
Firstly, after adding the Vendor Approval you can edit the default events and sequence. So rather than start with “Approval of a vendor is requested” lets change this to “A vendor record is changed”.
You can do this by clicking the ellipse button next to “Approval of a vendor is requested”
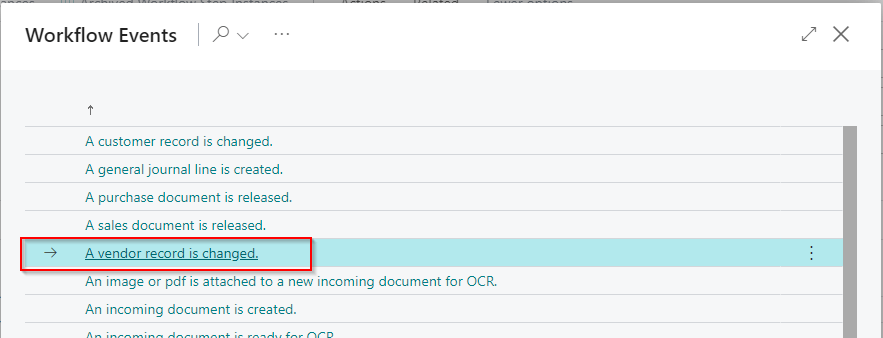
Then select “A vendor record is changed”
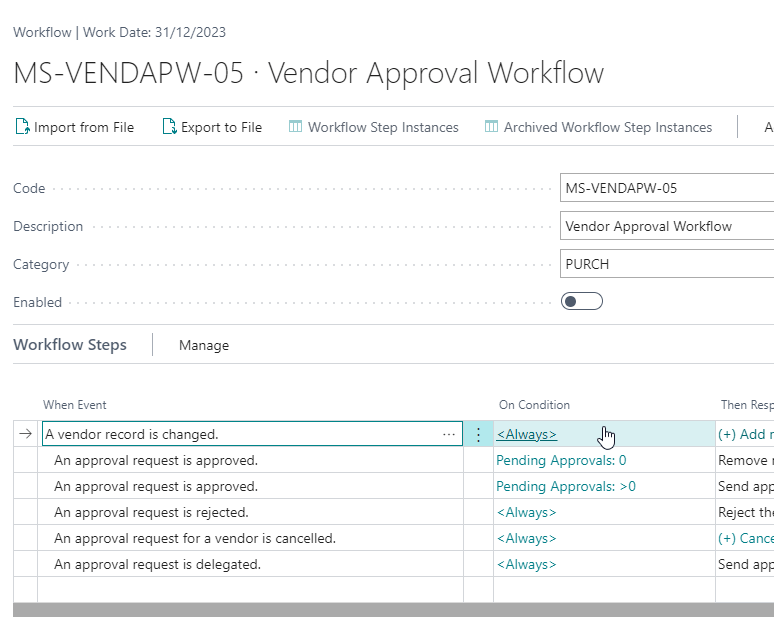
The workflow will now look like this:
As this stands the Workflow will trigger whenever a Vendor record is changed, however this isn’t exactly what we want. We only want this to trigger for new Vendors, therefore we need to add some conditions.
Now lets click the <Always> condition so we can filter down when the Workflow will be triggered.
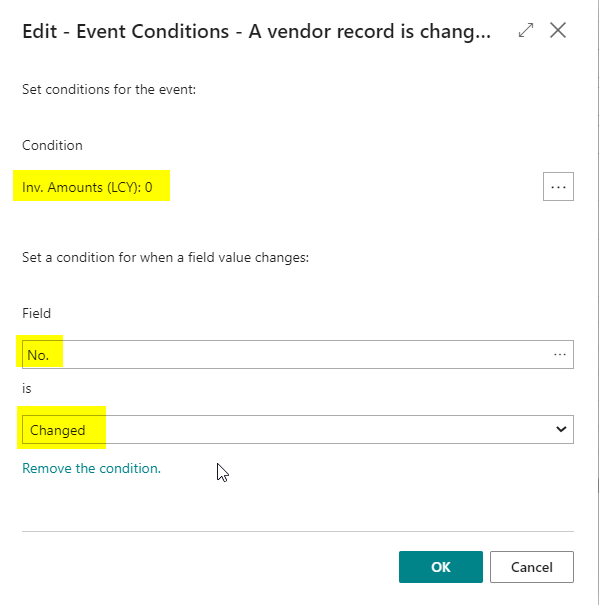
This will open the “Edit – Event Conditions” page where we can add the following conditions:
Let’s break down what the conditions are saying:
The first condition is – “Inv. Amounts (LCY):0”. This means the Workflow will only trigger if the Vendor has never had any Invoices posted onto it.
The next condition is – Only trigger when the No. is Changed: This means the Workflow will only trigger when the Vendor No. is changed.
Therefore the Workflow will only trigger if the Vendor has had no activity AND the Vendor No. is changed (which happens when a new one is added).
Hopefully this captures all new Vendors although it will also trigger if someone changes the Vendor No. and the Vendor has never had any invoices posted. (hopefully this will be unusual unless there was a mistake setting up the Vendor)
Let’s test the Workflow
Now to test if this works 🙂
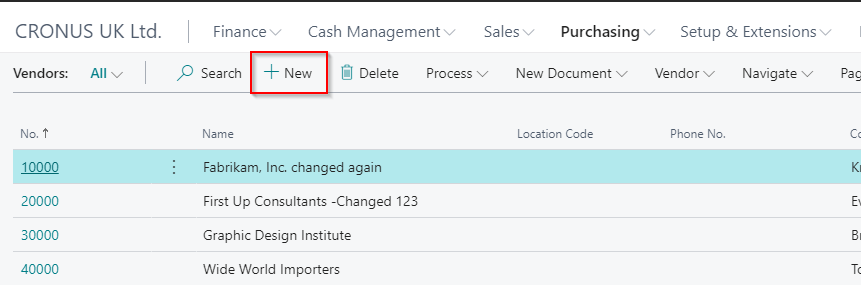
First go to “Vendors” and click “New”
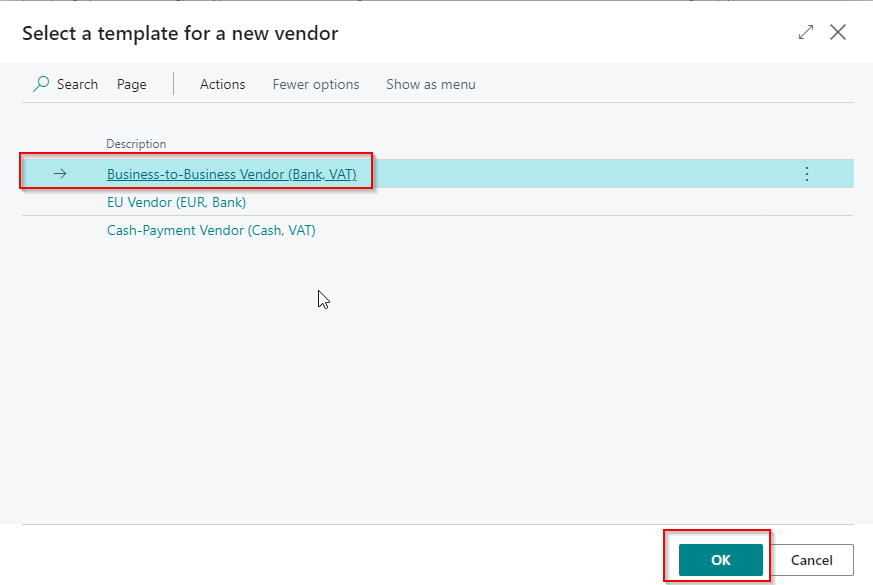
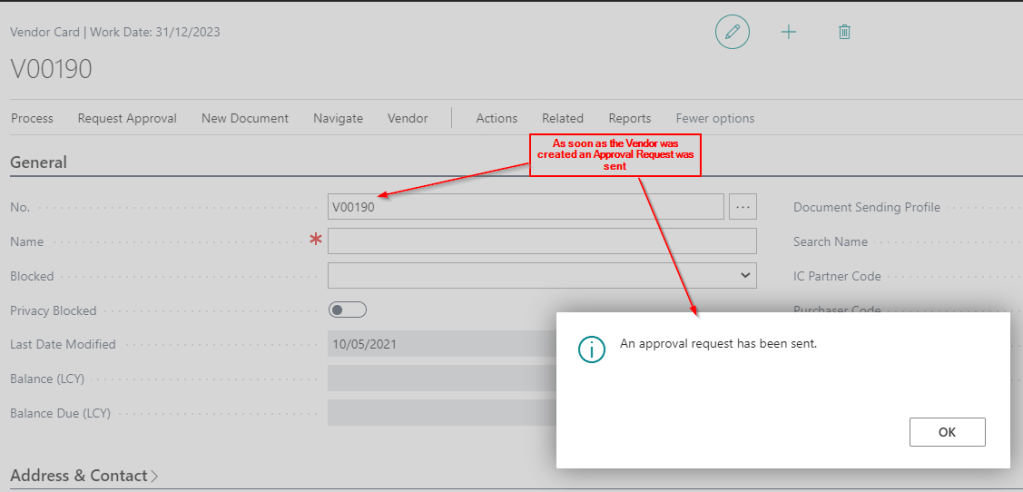
Select a Template and click OKNow the Vendor page opens and the Workflow automatically triggers and sends an approval request:
Therefore we have successfully forced the Workflow approval to trigger automatically when a new Vendor has been created 🙂
Conclusion
Although I’ve found this to be a great way to configure automatic approvals for new Vendors it does have one disadvantage :(.
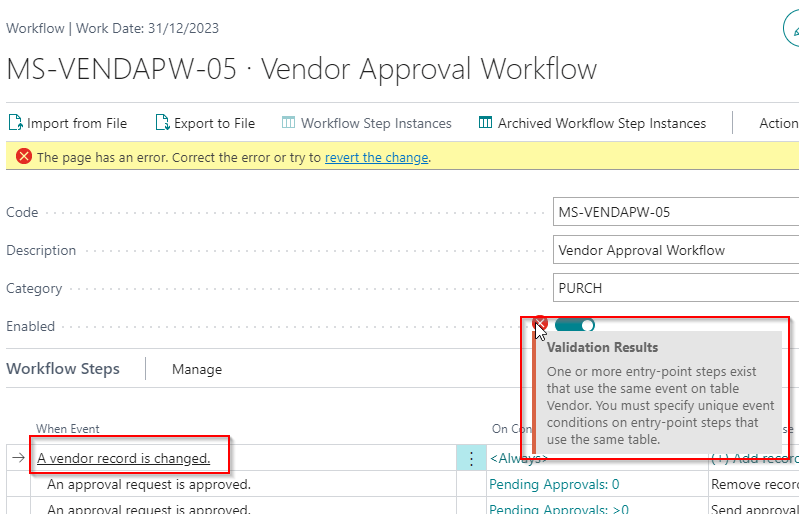
Unfortunately you can only have one Workflow which starts with the same event. Therefore if I wanted to create another approval that started with “A vendor record has changed” the system would prevent this as per below
Just something to bear in mind if you wanted to implement this solution 🙂
This is another blog in a series I’ve been writing comparing functionality in Dynamics GP to Dynamics 365 Business Central.
In this post I’ll compare how purchase holds work in both Dynamics GP and Dynamics 365 Business Central. Both products offer solutions for applying holds at a document and Vendor level, however there are differences which we can explore.
Dynamics GP
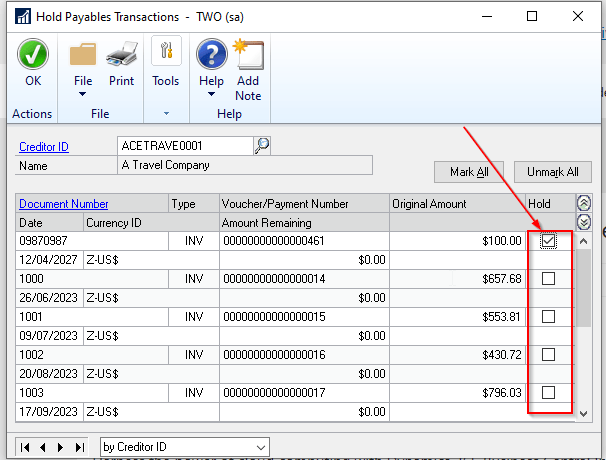
In Dynamics GP you apply holds to individual transactions via the “Transactions > Purchasing > Holds” window.
By placing the document on hold you won’t be able to pay this via a manual payment or the automated “Select Cheques” routine (the Dynamics 365 Business Central equivalent being “Suggested Payment” batch job).
Therefore you must remove the Hold via this window in order to pay the document.
You can also produce a list of documents on Hold via a Smartlist prior to creating a payment run to assist with the process.
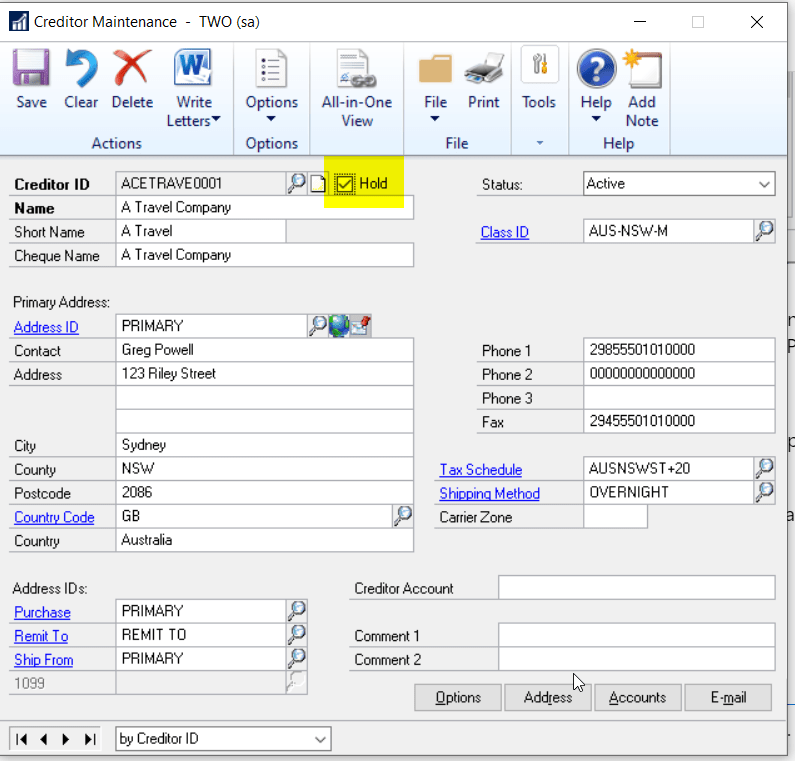
If you wish to prevent any documents from being paid on a particular Vendor you can tick the “Hold” flag on the Vendor Maintenance window as per below:
Placing the Vendor on Hold will prevent any payments being issued however you will still be able to enter and post transactions other than payments.
Dynamics 365 Business Central
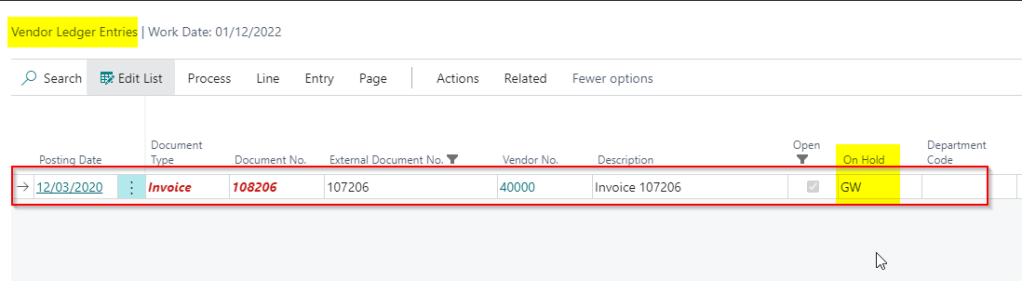
To place a document on hold you go to “Vendor Ledger Entries” and click “Edit List”.
You then enter any 3 characters in the “On Hold” field to indicate the document is on hold. For example below I’ve entered the characters “GW” in the On Hold column.
Although you can use any 3 characters we tend to suggest using users initials as this gives the added benefit of knowing who has placed the document on hold. You can also filter the “Vendor Ledger Entries” either on initials or whether the field is blank or not to identify which documents are on hold (i.e. add a filter for On Hold <>’)
When you add the 3 characters to the On Hold field this excludes the document from being picked up by the “Suggest Payments” batch job in the Payment Journal however you can still pay and apply the document manually. This is different to Dynamics GP which requires the Hold flag to be removed before it can paid.
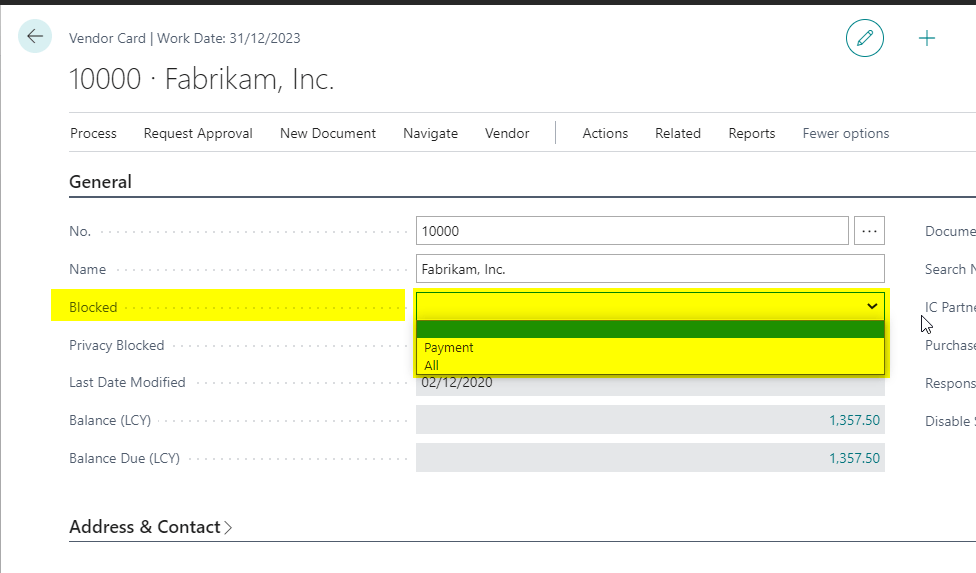
You can prevent any payment to the Vendor via the “Blocked” field on the Vendor Page.
You can prevent all payments from being made by selecting “Payment” or prevent any transaction from being posted on the Vendor by choosing “All”. This differs to Dynamics GP as even if a Vendor is placed on Hold you are only prevented from posting payments.
Conclusion
Both Dynamics products offer robust solutions for applying document and vendor holds. The main difference seems to be that Dynamics GP gives the user the ability to ensure a single document won’t be paid, even via a manual payment, and Dynamics 365 Business Central gives flexibility to prevent all document types being posted against a blocked Vendor.
Thanks for reading!
Thinking of making the move to Business Central? We can help