Dynamics 365 Business Central – How long does the Free Trial of Business Central last?

Introduction

I always assumed the free trial of Business Central lasted 30 days, with a potential extension to 60 days (90 days if a partner relationship has been made), however if you dig into the details of the trial FAQ you’ll see this isn’t the case.

In this post I’ll go through the Microsoft FAQ documentation to highlight how every trial of Business Central will essentially last forever. (small caveat that I highlight below)

Microsoft Trial FAQ

When you create a trial of Business Central, the trial will effectively last forever.

This is explained in the Microsoft Trial FAQ here and below is a snippet from the FAQ explaining this.
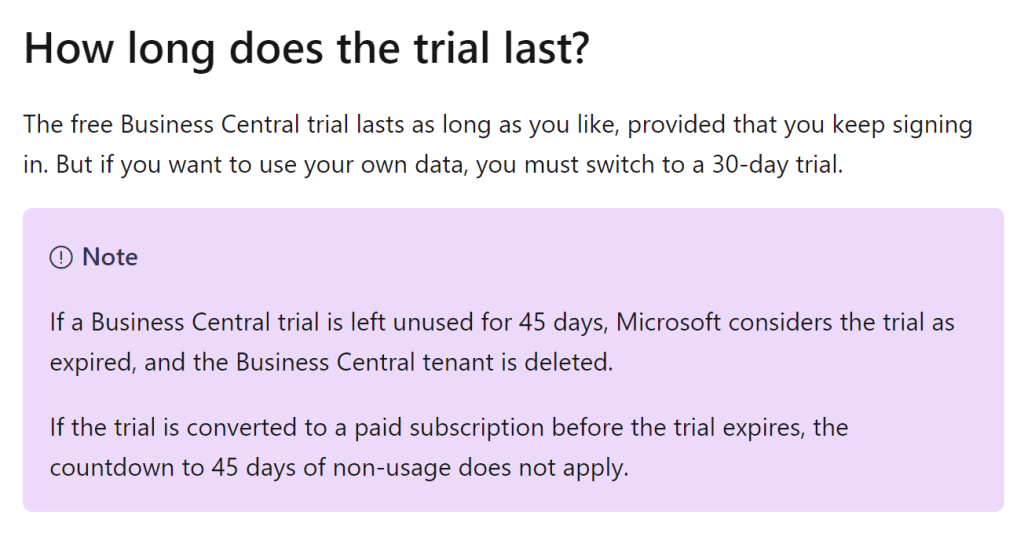
This allows you free, unlimited access to experiment with and test all the amazing features of Business Central within the demo company, Cronus.

However, as soon as you create a new blank company the 30 day trial will begin as explained in the FAQ I referenced above and explained below.
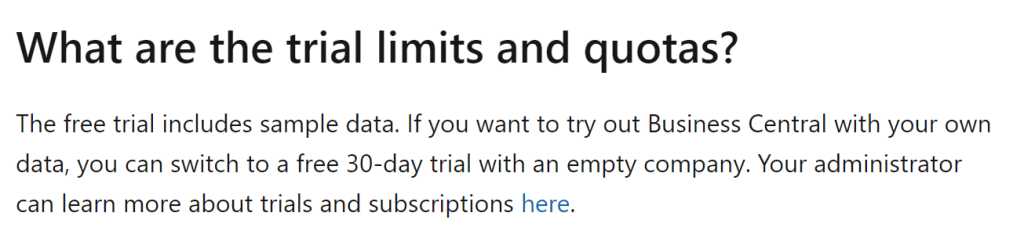
I’ve also found that even if you do create a new company and activate the trial, its only that company that will no longer be accessible once the trial expires. You’ll still be able to log in and access the Cronus demo company.

The 30 day trial only seems to affect production

Finally on investigation it seems the 30 day trial limit is only initiated if you create a blank company in the Production environment of Business Central.

I tested this by creating a new company in the Production environment and selecting “Production – Setup Data Only” and the message of the trial period is displayed

Production Environment

However when I select the same option in the Sandbox environment the trial message doesn’t appear.

Sandbox Environment

Conclusion

In summary, as per Microsoft’s Trial FAQ, once the trial of Business Central is activated its available indefinitely. (If not left unused for 45 days)

Thanks for reading!
Dynamics 365 Business Central – How I post opening balances for reducing balance Fixed Assets

Introduction

When posting opening balances for reducing balance assets things can sometimes prove a little challenging.

In this post, I’ll walk through how I post opening balances for reducing balance assets, and the best practices I follow.

In this example I’m posting opening balances for a reducing balance asset as at 31/08/23 in the financial year 2023.

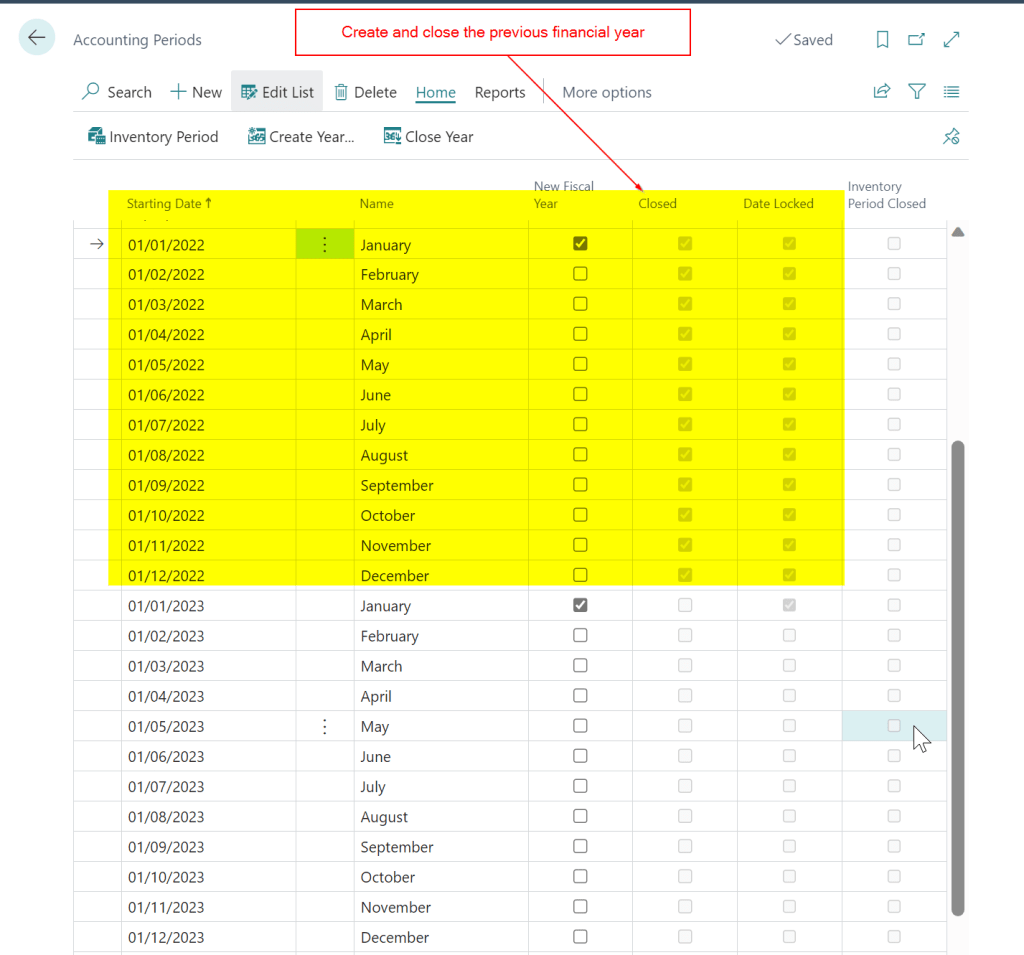
Step 1 – Create a close the previous Financial Year

When creating a new company in Business Central its common to only create the financial year you are posting opening balances for. However, when posting opening balances for fixed assets that have a depreciation method of “Reducing-Balance”, I’ve found a slightly different approach is needed. In such cases, I also create the preceding year and then close it.

Therefore, for my example, I go to “Accounting Periods” and ensure the previous financial year has been created and also closed. I’m posting the opening balance for 2023 so I’ve also created the year 2022 and closed it.

Step 2 – Depreciation Book Setup

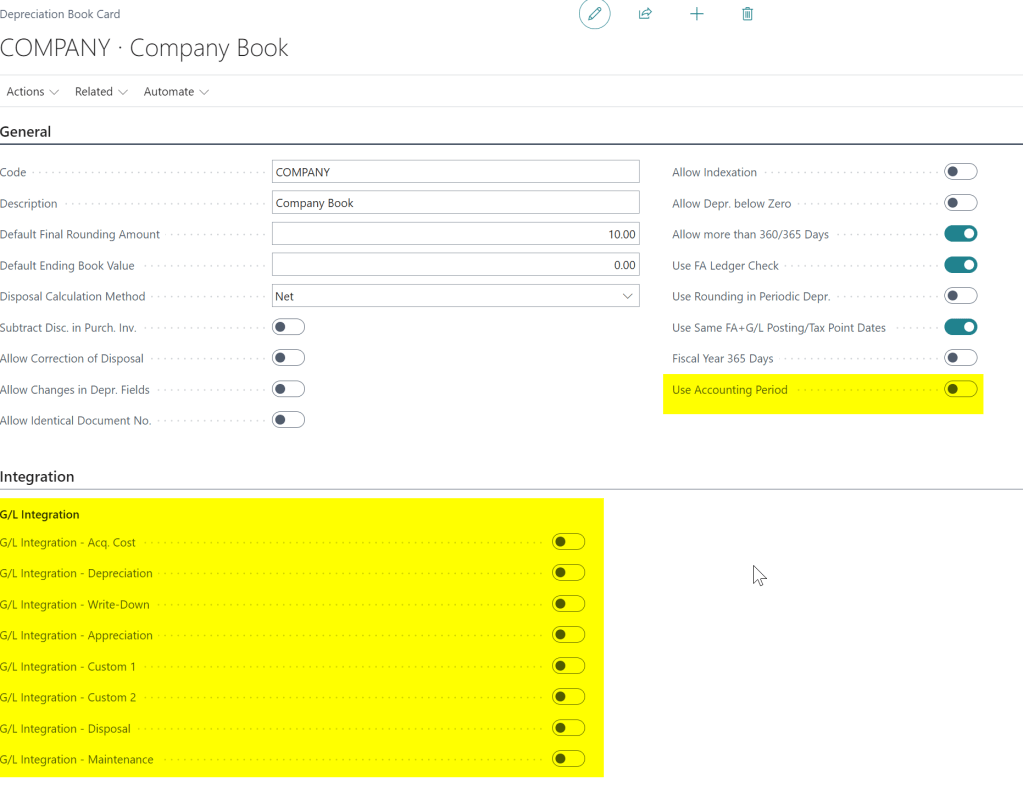
The next thing to do is to ensure the option “Use Accounting Period” is off in the Depreciation Setup and also switch off the GL Integration.

**I’ve already posted the opening position for the Asset Cost and Accumulated Depreciation in the General Ledger so I switch off GL Integration

Step 3 – Post the opening balance as at the end of 2022

As reducing balance depreciation is calculated on the carrying amount of the asset at the start of the financial year, you must post the opening balance at the end of the previous financial year, regardless of when you are going live with Business Central.

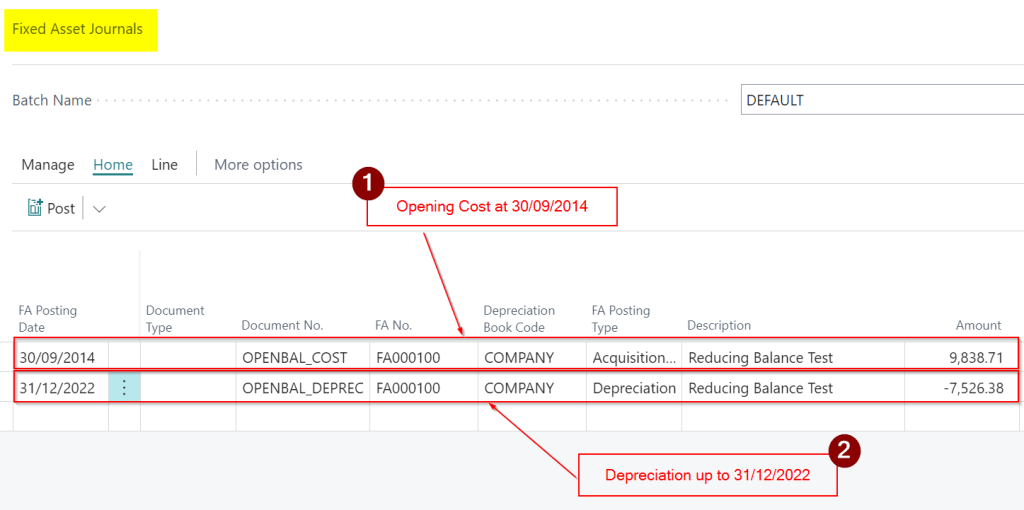
The asset in my example has an original cost of £9838.71 as at 30/09/2014, with accumulated depreciation as at the 31/08/2023 of £7,757.61.

However in order to post this correctly, and have the system create the correct depreciation, I need to post the depreciation at the end of 2022 which is £7526.38, giving a carrying amount (Net Book Value) as at the beginning of 2023 of £2312.33.

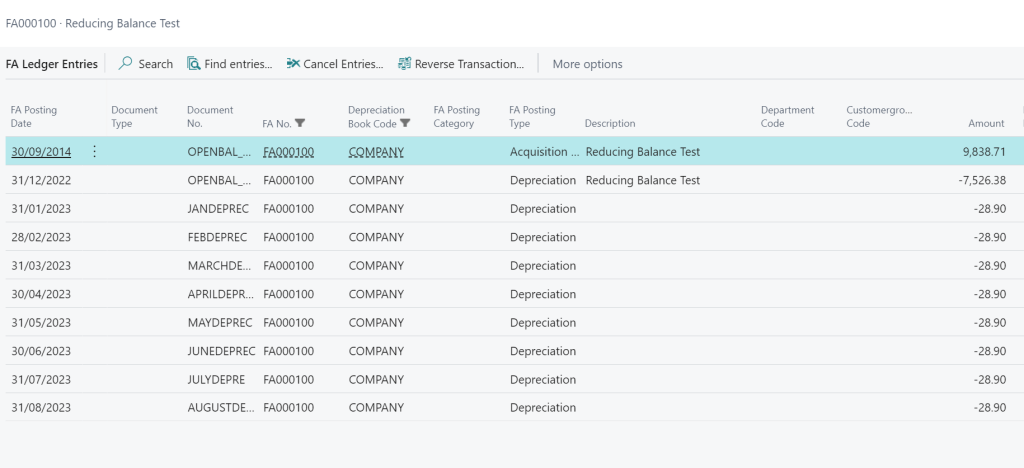
I’ll then post the depreciation for January through to August separately, to get the exact opening position of £2,081.13.

I therefore enter a Fixed Assets Journal as per below ensuring to use the original place in service date for the Opening Cost and the end of the previous financial year for the accumulated depreciation to give me the correct Net Book Value.

Step 4 – Run Depreciation and Check the Amount

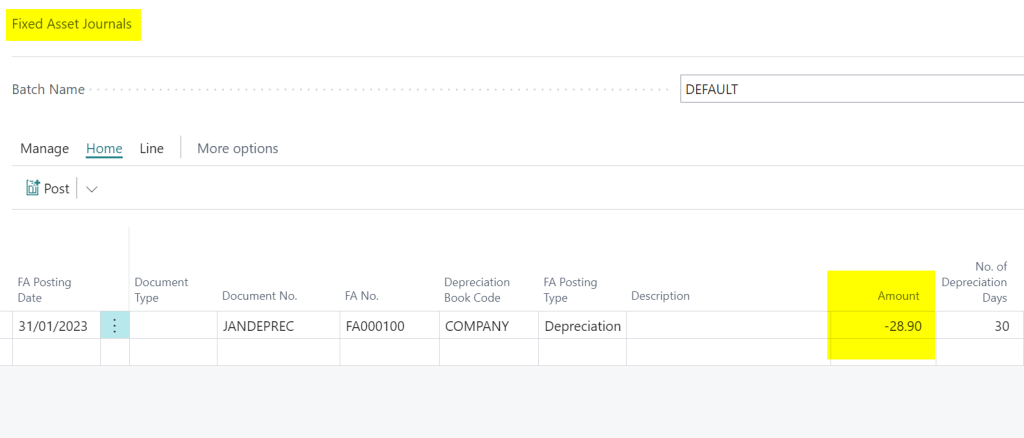
After posting the opening entries, I then run the Calculate Depreciation job with a date of 31/01/2023 and this gives me depreciation of £28.90, which is exactly what I was looking for 🙂

I then run the depreciation for January through to August as per below to get the opening position as pf the end of August.

Conclusion

The main takeaways are to create the previous financial year and close it, and also post the opening cost using the assets original place in service date, and post the depreciation on the last day of the previous financial year.

Thanks for reading!

Want further help with Business Central?

If you’d like more help with Business Central, I also run Rapid365, which provides Business Central implementation and support services for UK businesses, supporting you through setup and go-live.

Dynamics 365 Business Central – View all Sent Emails by modifying Email Policies

Introduction

By default, users can only see their own sent emails via the Sent Emails page, however there may be a requirement for some users to view all emails that have been sent in Business Central. In this post, I’ll go through how this can be achieved via the “User Email View Policies” page.

Sent Emails

When you open the “Sent Emails” page, you will only see what emails you have sent. For example, if I open the Sent Emails page as my admin user, the page is blank.

Email Policies

If you search “User Email View Policies” you can change the permissions to Sent Emails on a user by user basis.

I therefore change this for my ADMIN user to “View all emails”

Now, when I go back to “Sent Emails” page, I can see all emails that have been sent via Business Central.

Problem solved :). Now my admin user can see all emails sent from Business Central.

Thanks for reading!

Need help with Business Central? Contact me