Introduction
In this post I’ll walkthrough a method I use to quickly find all VAT entries that have been closed on a previous VAT statement using the G/L Registers page.
You can then export the entries to Excel and recalculate the submitted VAT return by summing each VAT Business and VAT Product posting group combination.
I use this technique if I’m investigating a VAT issue following the “Calculate and Post VAT Statement” routine and I want to see the detailed VAT entries that were closed.
G/L Register
The G/L Register page records an entry for every posting that is made in Business Central, including the posting that’s created when you run the “Calculate and Close VAT Statement” process. As a side note, It also happens to be one of my favourite pages in Business Central 🙂
Therefore if you open the “G/L Register” page and then filter on “Source Code” equal to VATSTMT you get a list of all G/L registers that have been created when closing the VAT statement.
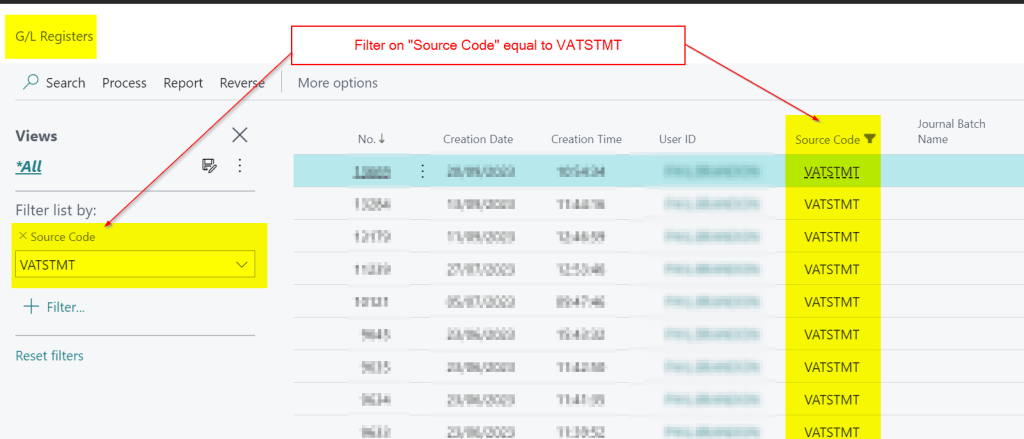
Now you can highlight the G/L Register that relates to the VAT Statement you want to view closed entries for and select “Process > VAT Entries”

This lists the “Settlement” VAT entries that were created when the “Calculate and Close VAT Statement” was ran.

Now take the Entry No’s shown in the filter and create a new filter using the same range but using the “Closed by Entry No” column
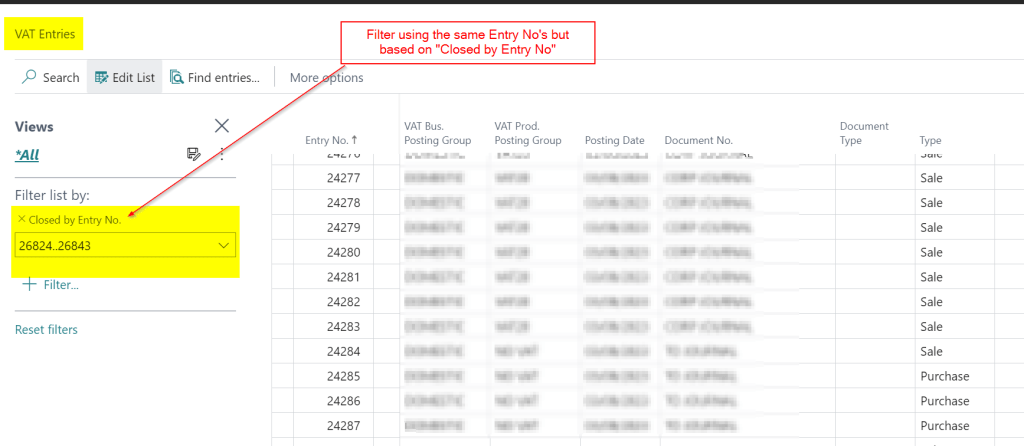
This will list all VAT entries closed by the settlement entries, which is effectively a reprint of the VAT statement 🙂
You can now take this to Excel and continue your investigations.
Conclusion
This is just one technique you can use to get a list of the closed VAT entries however I find it the quickest and it also gives me an excuse to use the G/L Register page 🙂
Thanks for reading!