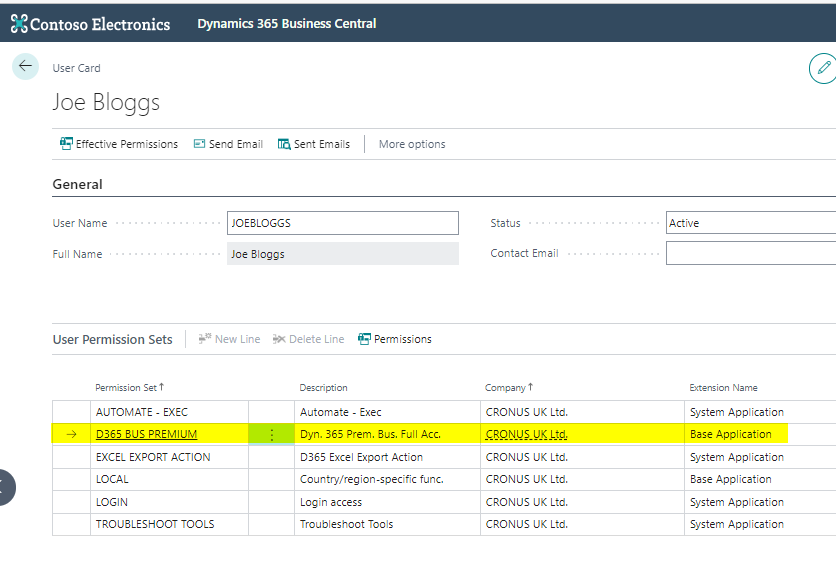
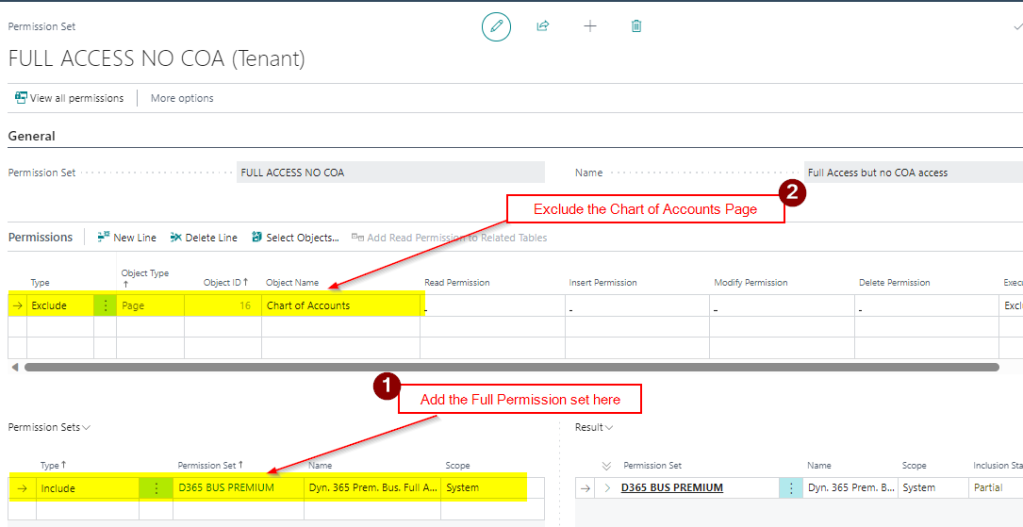
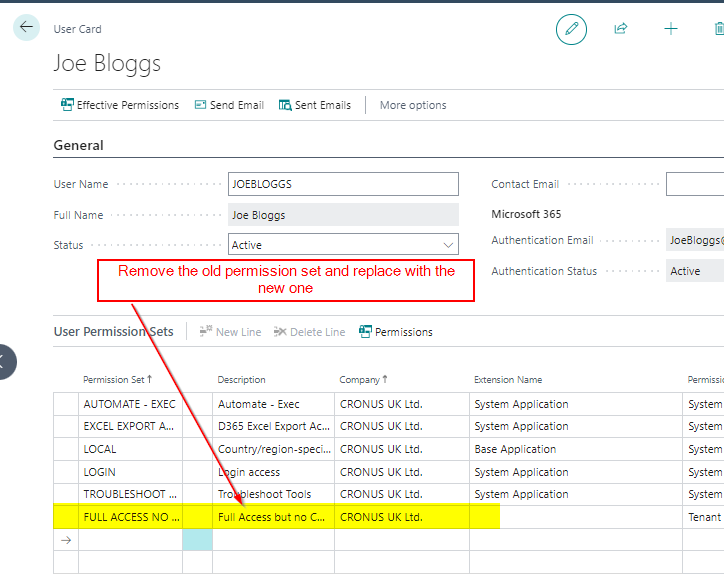
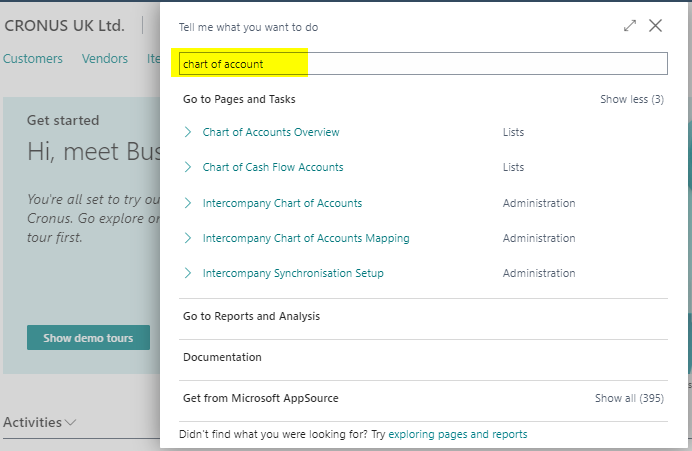
Introduction
When you import goods into the UK, you have to pay VAT if the goods are over a certain amount. You can either pay this immediately, and then reclaim it later on your VAT return, or declare and recover on the same VAT return, using the postponed VAT method.
This post goes through how to setup Business Central if you use the Postponed VAT scheme. I’ll then post a journal to record the Postponed VAT and show it on the newly configured VAT statement.
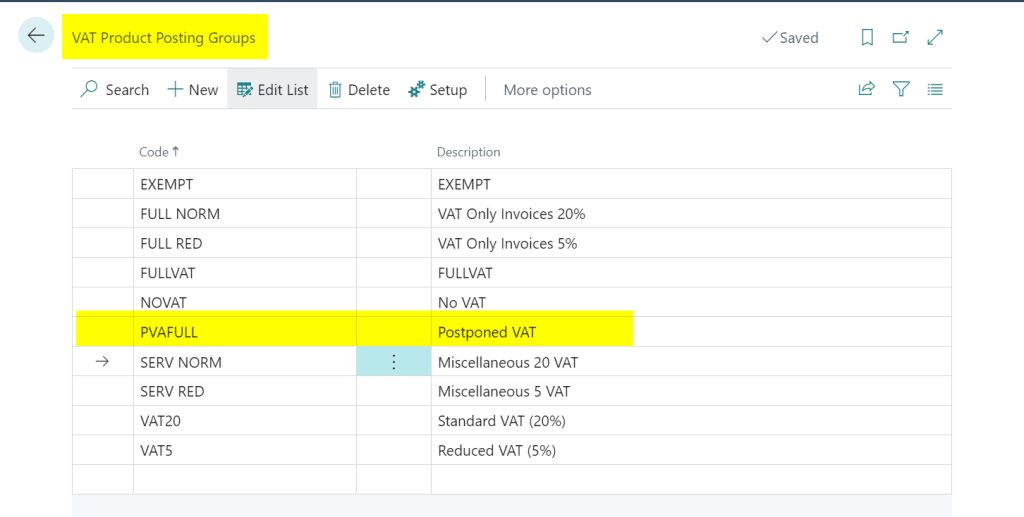
VAT Product Posting Group
The first thing to do is to configure a new VAT Product Posting Group. I’ve created one below called “PVAFULL” with a description of “Postponed VAT”
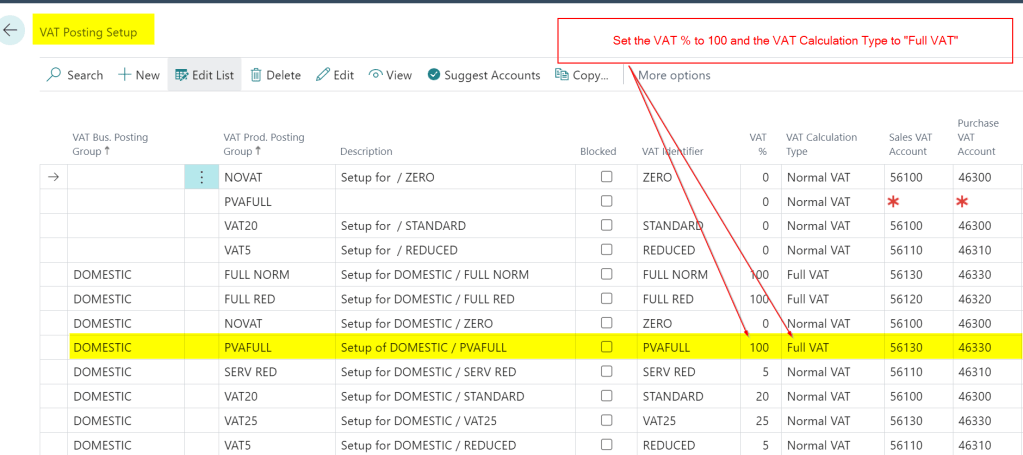
VAT Posting Setup
I then add the new VAT Product Posting Group into the “VAT Posting Setup” as per below. The key thing to note is that is set as 100% VAT and the VAT Calculation Type is “FULL VAT”
VAT Statement Configuration
The final thing to do is to add the new combination to the VAT Statement so any transactions posted to the PVAFULL posting group are recorded on the VAT return.
With postponed VAT you both declare this in Box 1 of the VAT return as an amount due, and also in Box 4 as an amount owed.
Therefore the VAT Statement is configured as per below
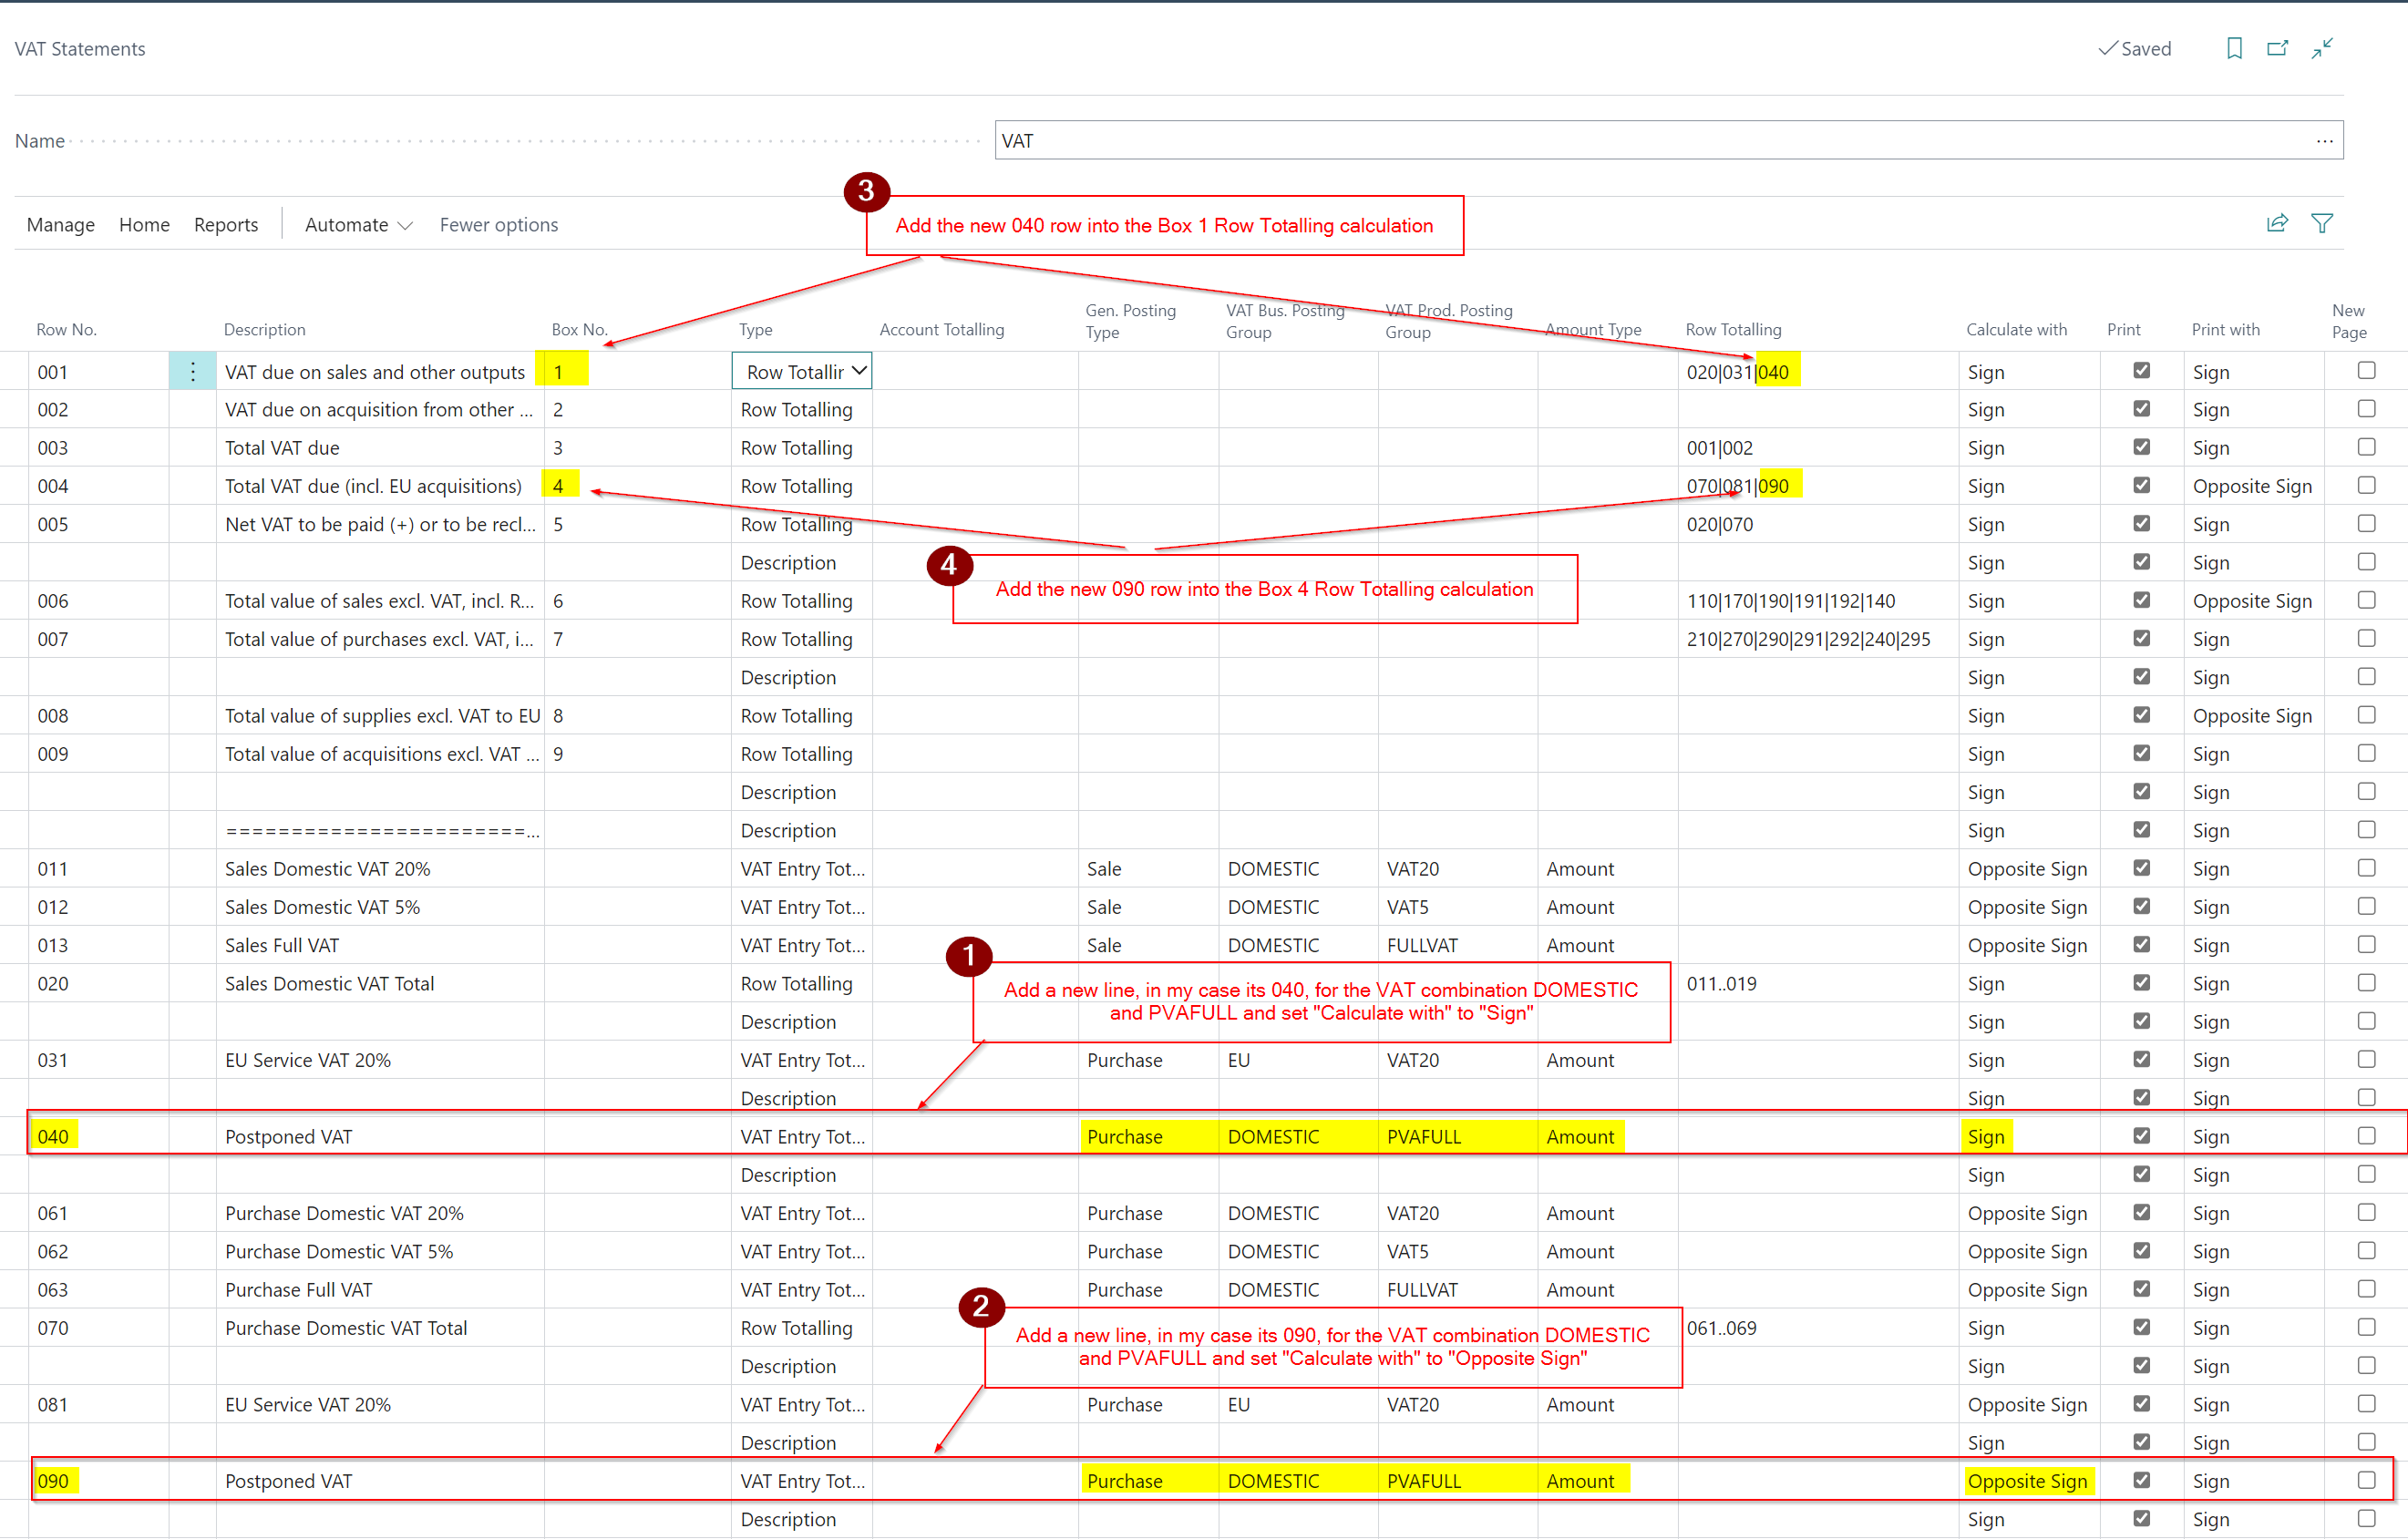
In the first and second step I add the new VAT combination to the detail of the report, and then in the third and fourth steps I included the added lines in the Box 1 and Box 4 calculations.
Test by posting a Postponed VAT Journal
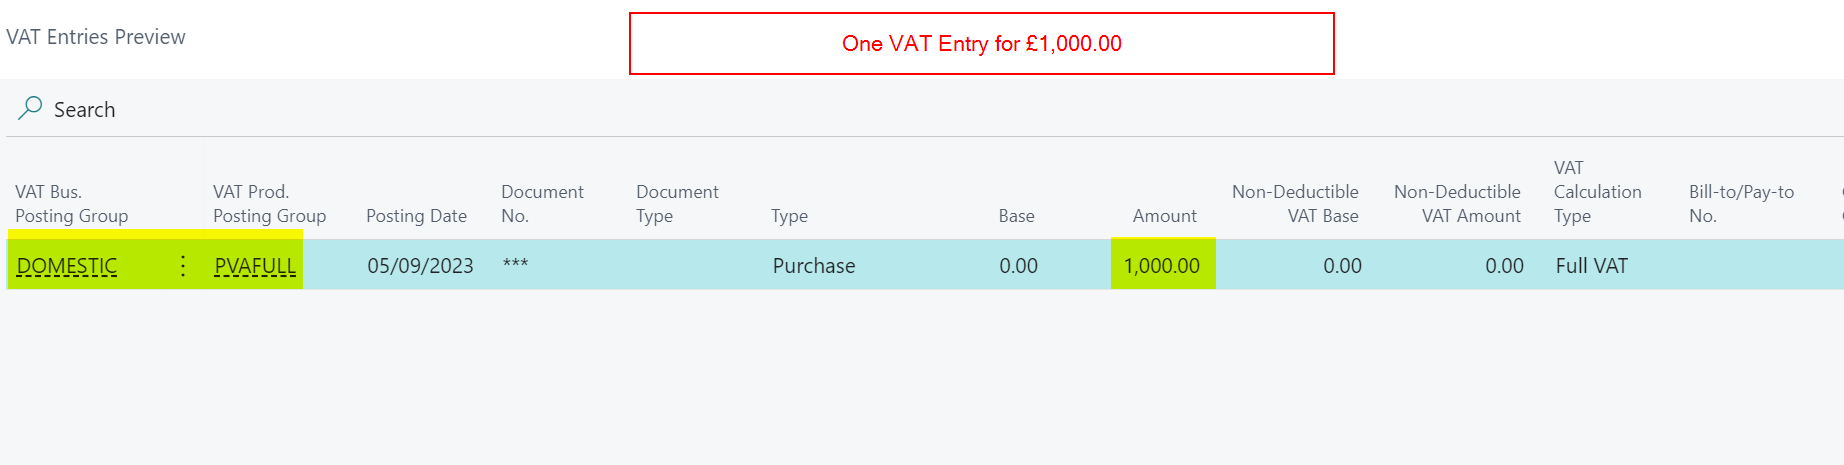
Now to test the configuration I’ll post a VAT only journal for Postponed VAT as per below
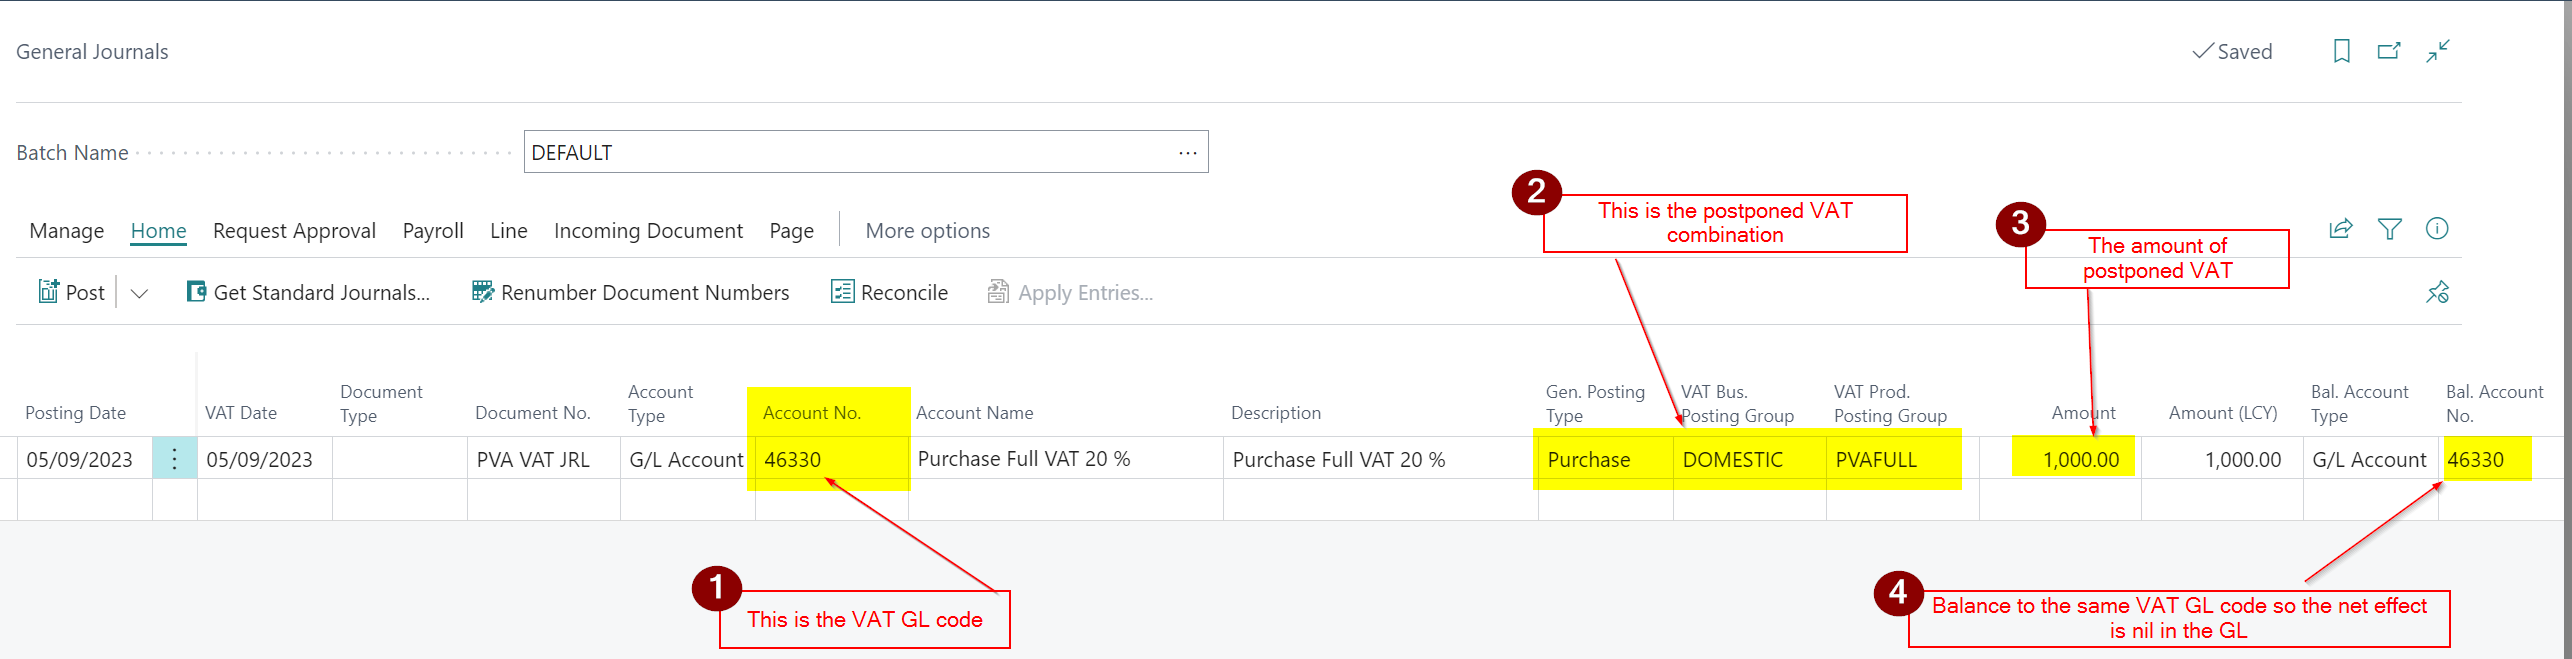
This gives the following GL entries which give a net effect of nil in the GL.

We also get the following VAT entry which is picked up the VAT statement.
Now when I test the VAT Statement I can see the £1000.00 amount appearing in both Box 1 and Box 4 and the amount owing to HMRC in Box 5 is £0.00

Conclusion
I hope this post helps anyone who needs to configure Business Central to work with Postponed VAT. As always please ensure you test thoroughly before implementing and then submitting the VAT return.
Thanks for reading!
Need help with Business Central? Contact me