This is the fourth video in the video series “Making the most of your Business Central Trial”. This video series is intended to help new users on their journey with the Business Central Trial, although it may also prove helpful for those already familiar and using Business Central.
In this video I go through how to configure different email accounts in Business Central. I walk through setting up email for “Current User” and “Shared Mailbox”.
With regards “Shared Mailbox”, I go through creating a new Shared Mailbox in the Microsoft Admin Centre and granting users permissions to use the Shared Mailbox before then completing the setup in Business Central.
Once the email accounts are both configured I show how you then have the option of sending from either when you choose “Send Email” in Business Central.
I also touch on how you can use “Email Scenarios” to default certain email accounts when sending emails. (I only mention this at the end. In hindsight I probably should have shown an example of this)
This blog was inspired by a forum post I answered recently that you can find here. The OP had issues reconciling their bank accounts because the opening balance hadn’t been posted. It also follows on nicely from other blogs I’ve posted with regards to posting opening balances. These are below:
In this blog I’ll show the steps I use when posting opening balances for bank accounts.
Preparation
When going LIVE with Business Central I always recommend reconciling all the outstanding bank entries in the source system. This is much easier nowadays as most payments are made electronically. Therefore there tends to be less “Unpresented Cheques” delayed by either the postal service or waiting to be deposited in the bank. This includes cash received from customers or payments made to suppliers.
If everything has been reconciled, it makes posting the opening balance much easier and cleaner.
Method for Posting the Opening Balance
When going LIVE with Business Central, I’ll usually have been provided with an opening trial balance, which includes the reconciled bank account balance which has been posted to the GL. I’ll use this as the basis of the bank account opening balance journal.
Its worth noting you could post the bank account opening balance at the same time as the GL opening trial balance, however I prefer keeping the two entries separate. Also, there are situations where an opening trial balance might not be available, whereas the opening bank position has been provided. (in the forum post the client had gone LIVE without a bank opening position, and this method can also be used to post a retrospective bank opening position)
For the bank account opening balance, I then need to post an entry that posts a Debit and Credit to the same Bank account GL code, but also creates a Bank Account Ledger Entry.
Worked Example
In this example I have a bank account that has an opening balance of £1000.00, which has already been posted to the GL. Therefore the GL code has a balance of £1000.00, however the Bank Account has a £0.00 balance.
As the GL has the correct balance, I need to post an entry that only updates the Bank Account Balance.
As mentioned above, to do this I’ll create a journal that debits and credits the 40050 code, but also creates a Bank Account Ledger Entry I can reconcile.
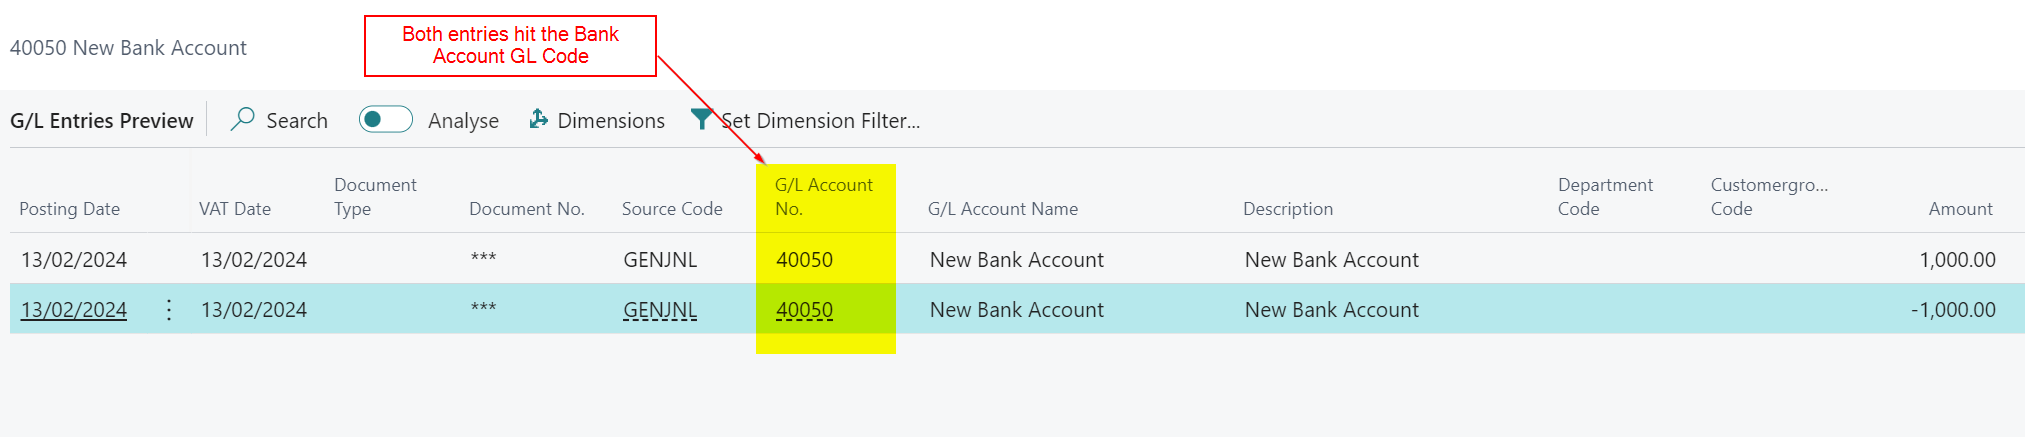
Therefore I’ll post the journal below, that posts to the Bank Account and balances to the Bank Account GL code
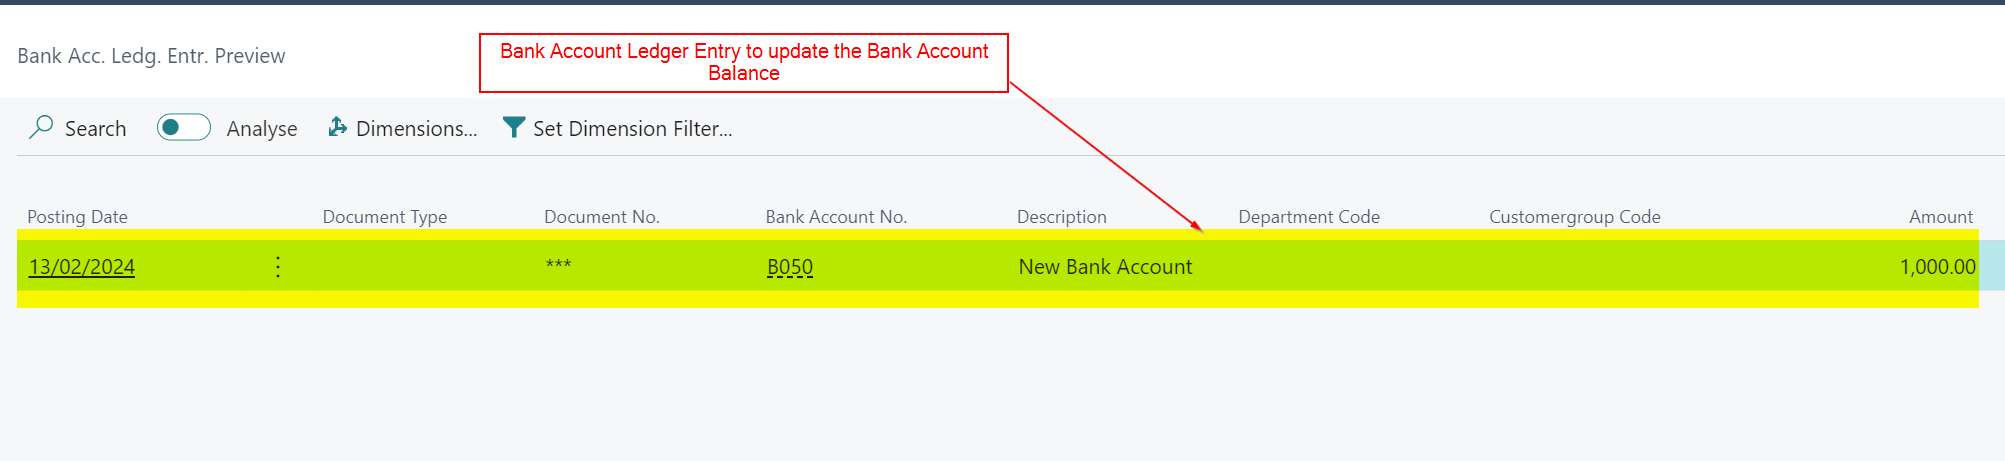
This creates GL entries that both debit and credit the Bank Account GL code but also a Bank Account Ledger Entry that hits the Bank Account
After posting this I have a Bank Account Balance that matches the GL balance
Conclusion
This is a quick and easy method for posting opening balance entries to Bank Accounts. This can be done either during or after you receive the General Ledger opening balances.
I hope this helps when posting your opening balances or retrospectively fixing any issues with the bank account.
Thanks for reading!
Want further help with Business Central?
If you’d like more help with Business Central, I also run Rapid365, which provides Business Central implementation and support services for UK businesses, supporting you through setup and go-live.
This is the third video in the video series “Making the most of your Business Central Trial”. This video series is intended to help new users on their journey with the Business Central Trial, although it may also prove helpful for those already familiar with Business Central.
In this video I go through how to assign the Business Central licences via the Microsoft Admin Centre. I then show how after assigning the licences you can add the users into Business Central manually using the “Update Users from Microsoft 365” or just ask the user to sign into Business Central which automatically creates their User record in Business Central.