Introduction
A client has multiple companies set up in Business Central, and trades with the same customers in many of these companies. Occasionally, a customer would pay cash to one company even though the Sales Invoice has been posted to a different company. They would make several adjustments in both companies to reconcile this. However, upon investigation, I found that this can be managed using the standard Intercompany functionality.
Pre-requisites
To demonstrate the solution, we’ll be using the Intercompany functionality. This needs to be set up beforehand, but the setup process won’t be covered in this post.
Scenario
As mentioned previously the scenario is that we have two Business Central companies and these companies trade with some of the same customers.
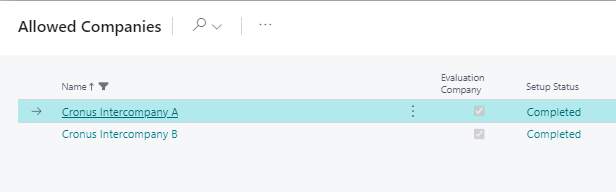
The companies in Business Central in my scenario are called “Cronus Intercompany Company A” and “Cronus Intercompany Company B”
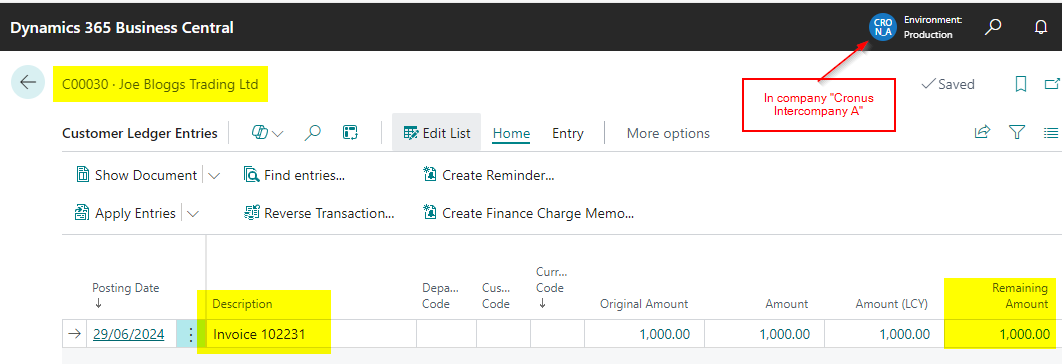
In this scenario, we have raised a Sales Invoice for £1000.00 in “Cronus Intercompany A” as shown below

This shows outstanding in the Customer Ledger Entries on the account of “Joe Bloggs Trading Ltd” in Cronus Intercompany A.
The payment to pay the Sales Invoice is then deposited by “Joe Bloggs Trading Ltd” into the bank account of “Cronus Intercompany B” rather than “Cronus Intercompany A”.
Solution using Intercompany Journals
In order to resolve this we need to do two things. The first thing is record the payment in Cronus Intercompany B and the next is close (apply) the open Sales Invoice in Cronus Intercompany A.
Therefore we will first record the cash in Cronus Intercompany B, using an Intercompany Journal as per below:
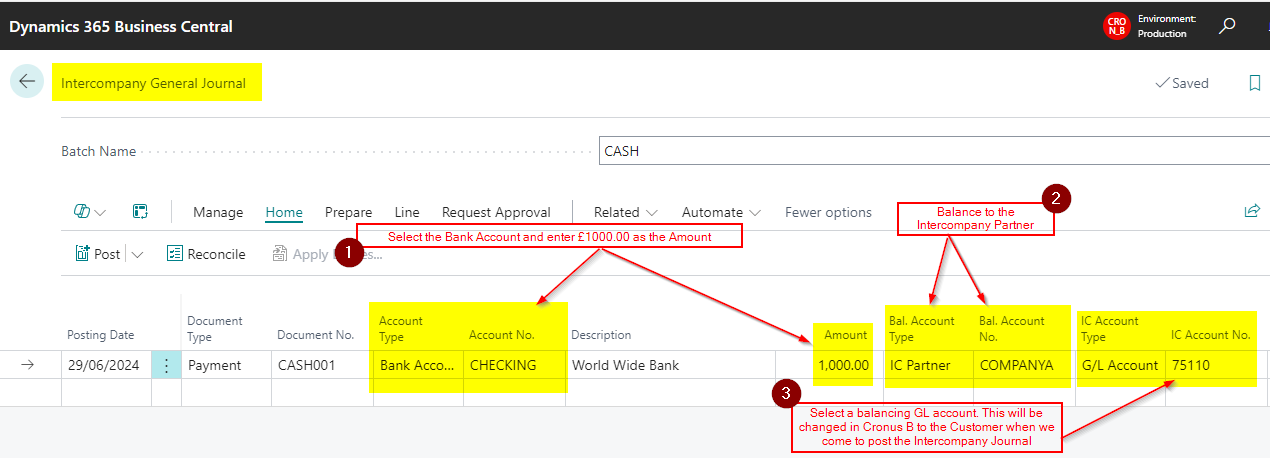
A quick summary of the steps above are as follows:
- Select a Document Type of Payment and Account Type of Bank Account and then pickup the relevant Bank Account. Then enter the value of the cash payment, in this case £1000.00
- Balance the line to the Intercompany Partner
- Enter a Intercompany GL account. (this will be changed to the customer “Joe Bloggs Trading Ltd” when we come to post the Intercompany Journal in “Cronus Intercompany A”)
The General Ledger Entries we get when posting this journal are as follows:
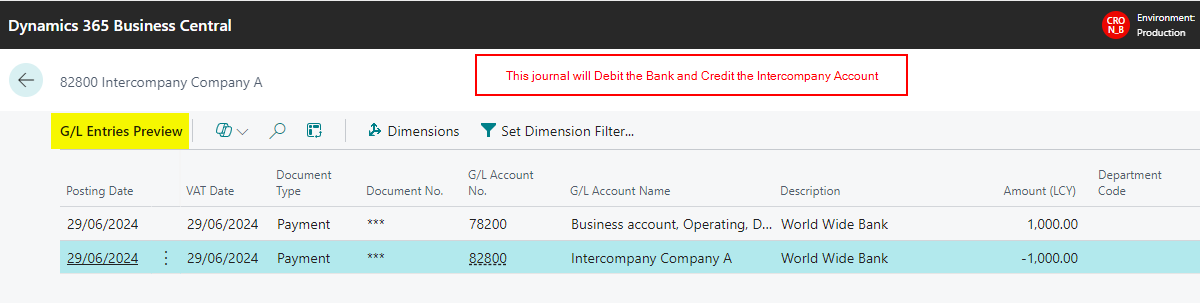
We also get a Bank Account Ledger Entry we can reconcile when we come to do the Bank Reconciliation
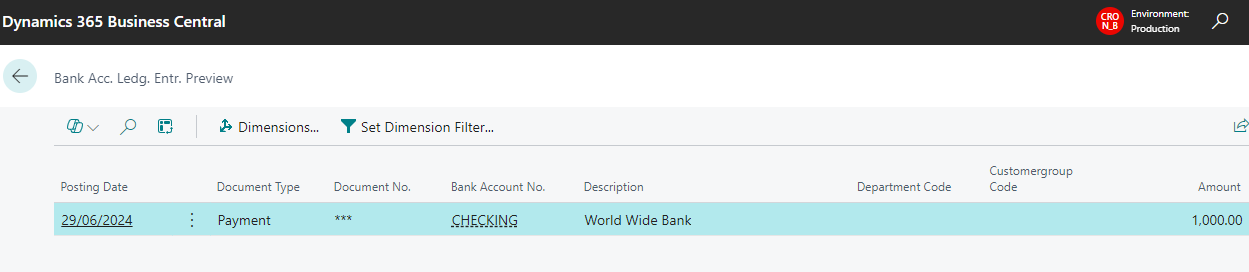
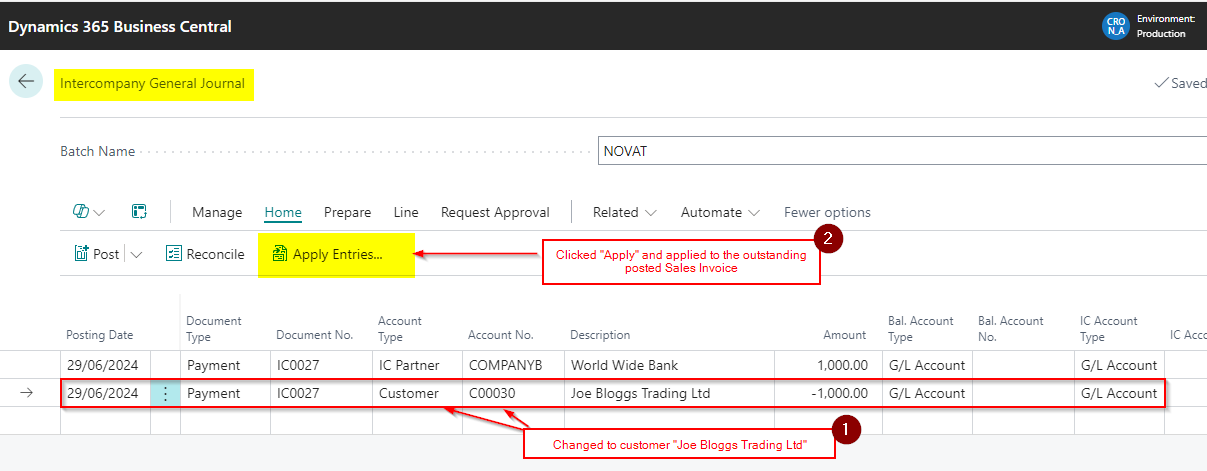
Once this has been posted we can log into “Cronus Intercompany A” and the Intercompany Journal is initially showing as per below:

I’ll now change that second line to the Customer “Joe Bloggs Trading Ltd” and also click “Apply” and apply the journal to the posted Sales Invoice.
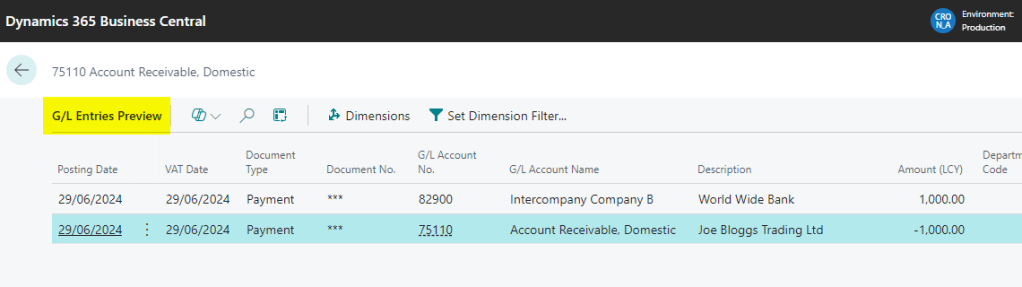
When I look at the General Ledger Entries I can see this is hitting the Intercompany GL Account and also Crediting my Accounts Receivable (Debtors Control)
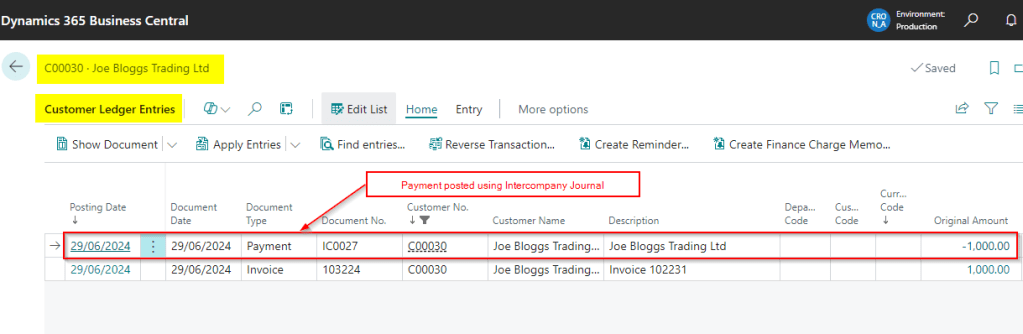
I also get a Customer Ledger Entry and Detailed Customer Ledger Entries to close the Sales Invoice on the customers account.
Therefore after posting this the customer account is as per below:
The process is now complete. The payment has been recorded in Cronus Intercompany B and applied to the Sales Invoice in Cronus Intercompany A.
Conclusion
This is a unique scenario however using the method described and demonstrated above we have shown how its possible to post a Cash payment in one company and apply this to a Sales Invoice posted in another company in two simple steps.
Thanks for reading!