Introduction
There may be instances when you receive payments from a customer and need to account for bank fees. This is especially common with certain credit cards, like American Express.
In this post, I’ll walk you through how to record both the cash received and the fee while applying the full invoice amount.
The Scenario
In this example, we have a sales invoice for £1,200.00, which the client has paid using American Express. American Express has deducted a £50.00 fee, resulting in only £1,150.00 being deposited into our bank account.
We therefore need to account for 3 things:
- The Cash Receipt of £1150.00
- The Bank Fee of £50.00
- Ensure the full Sales Invoice is applied
The third point is crucial, as the client has paid the invoice in full, even though we have only received a partial payment due to the bank fee deduction.
Walkthrough
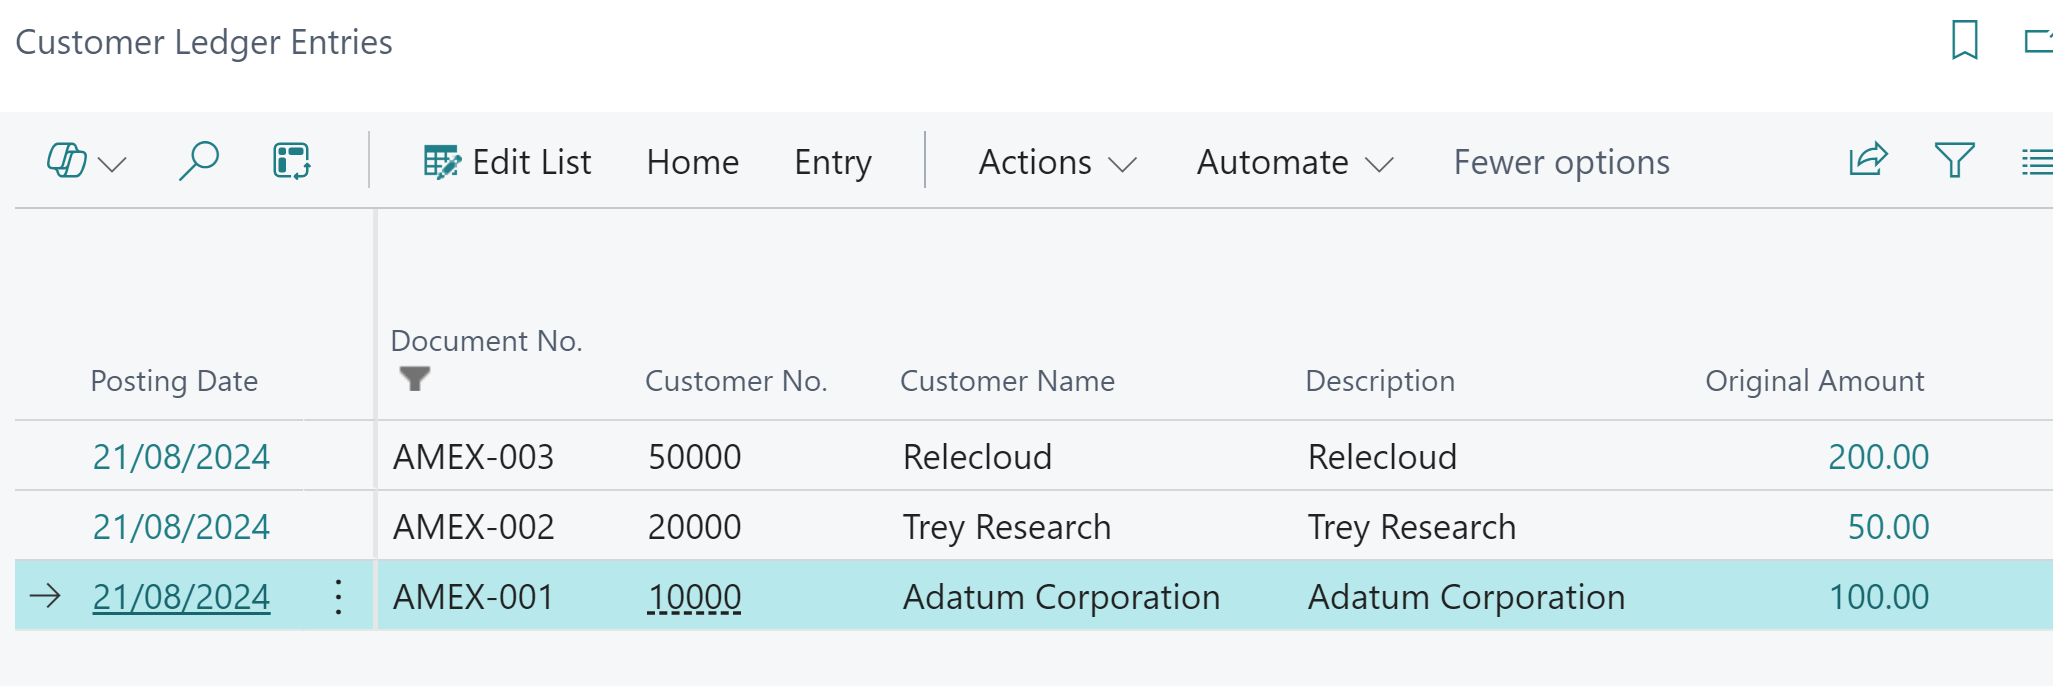
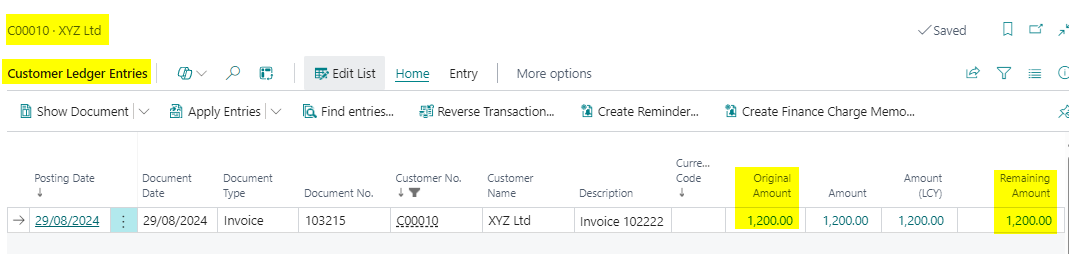
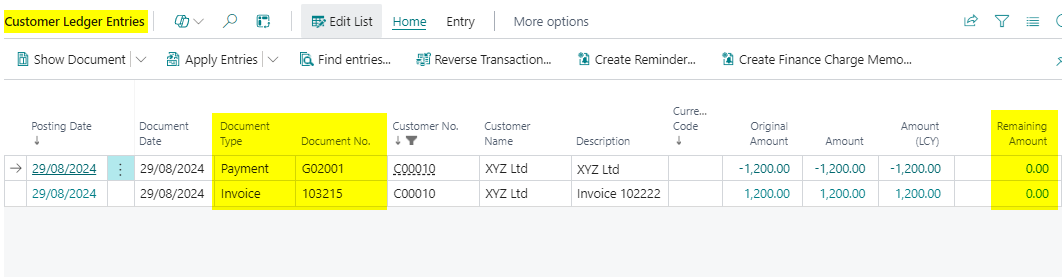
First, here’s the customer ledger entry for the sales invoice that the customer has paid. As shown below, the invoice is for £1,200.00 and is currently fully outstanding.
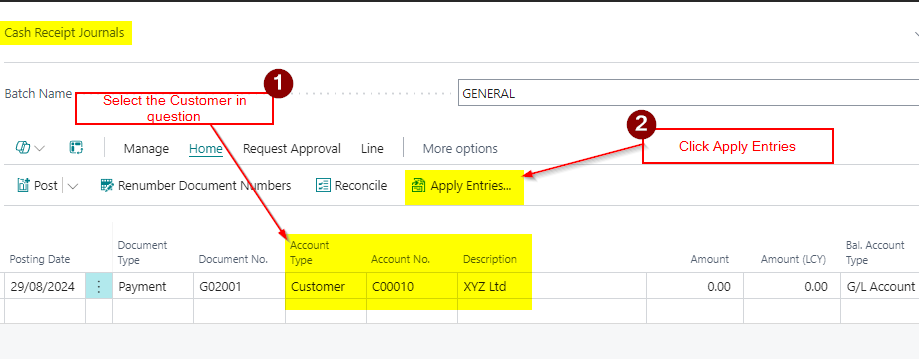
As with many tasks in Business Central there are a number of different approaches I could take when posting the cash. However I’m going to use my good old friend the Cash Receipt Journal.
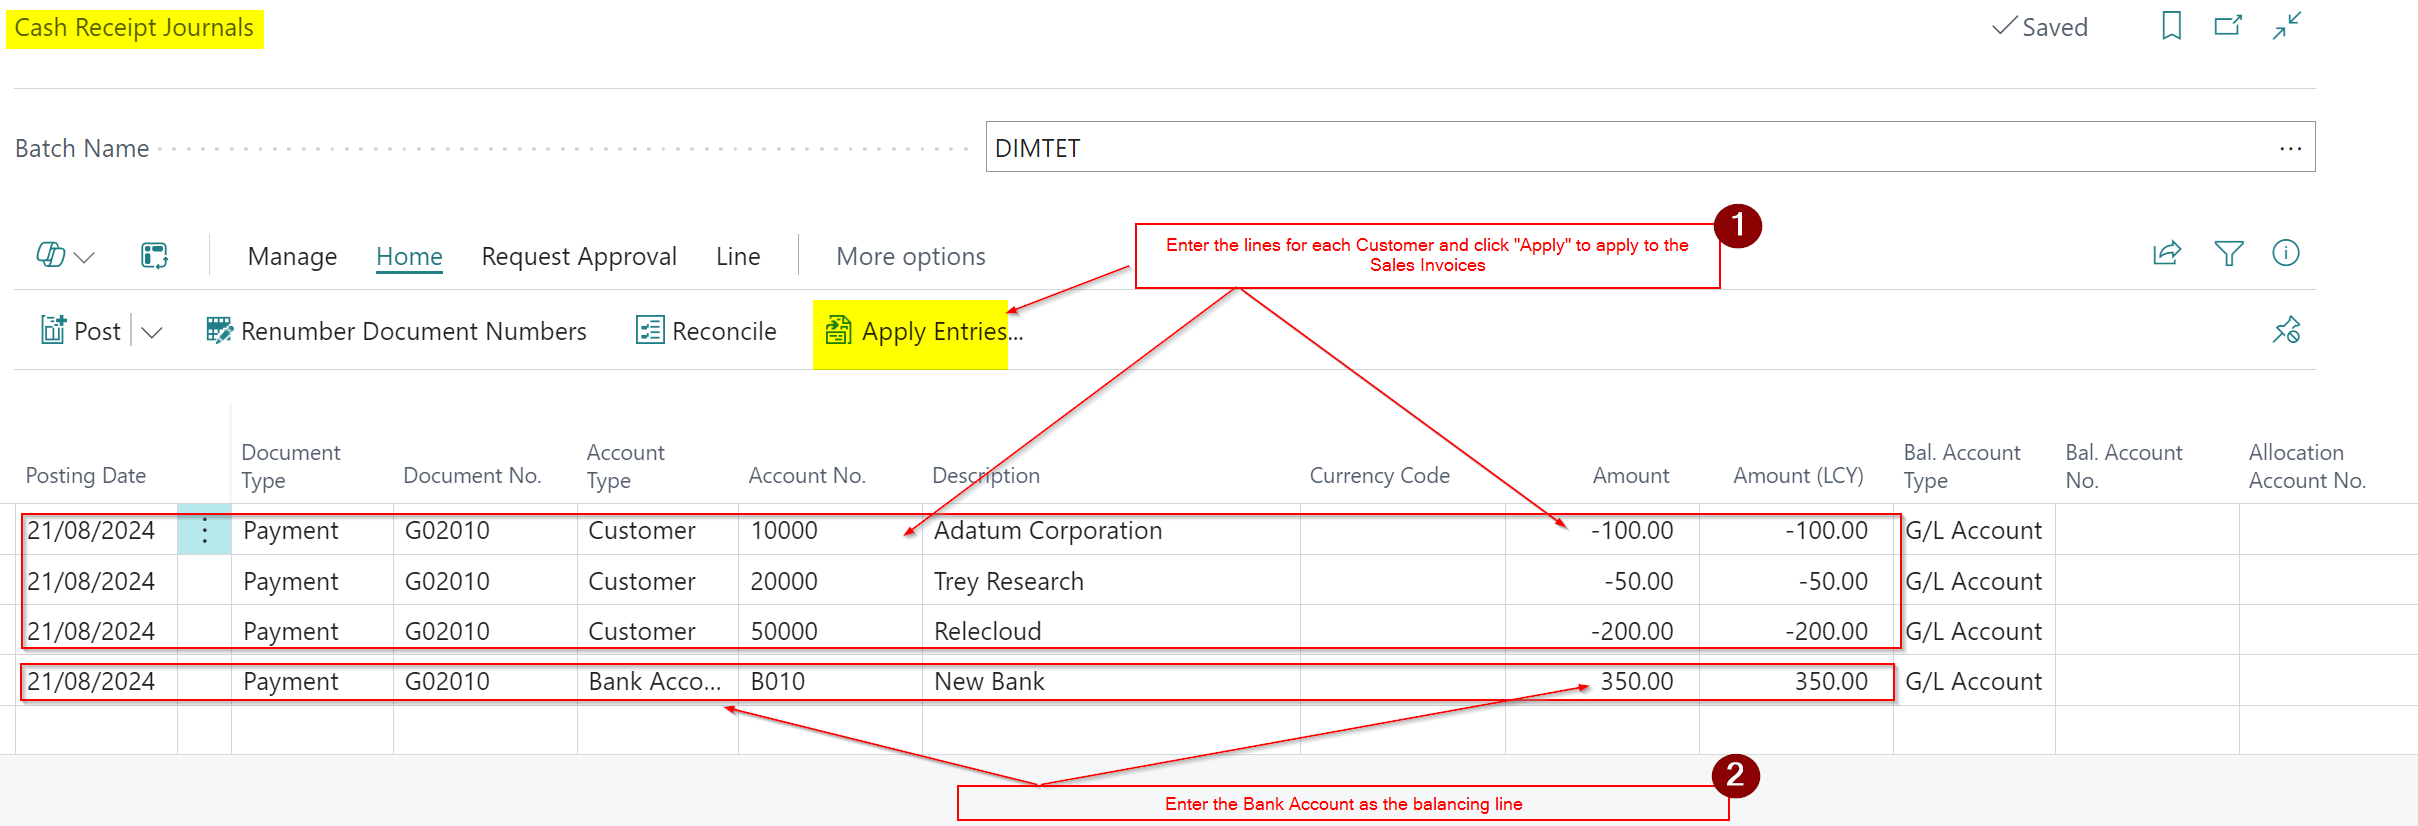
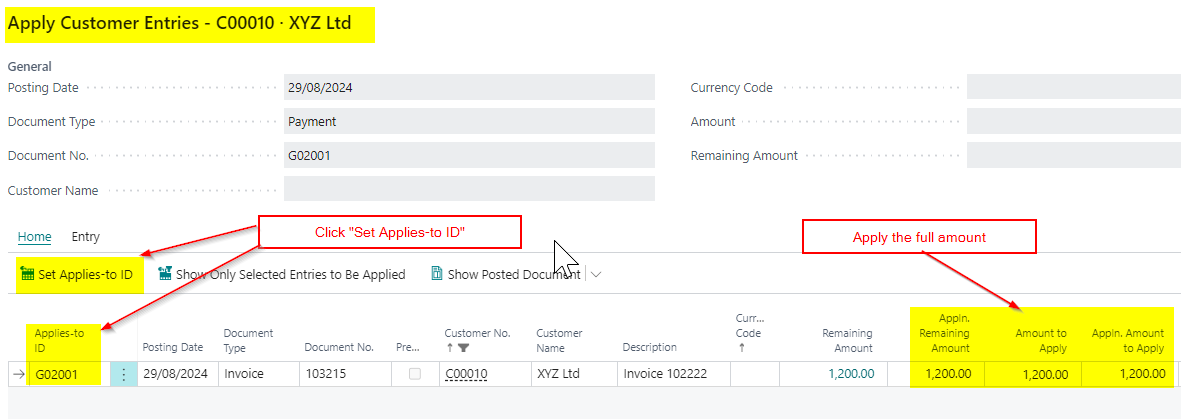
Once in the Cash Receipt Journal I’ll pickup the Customer and click “Apply Entries” as per below:
Next, I’ll apply the full amount of the Sales Invoice
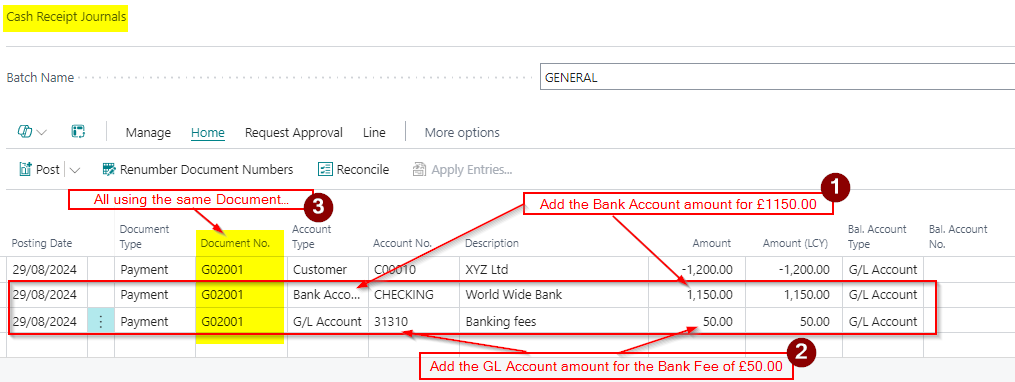
Then, I’ll add the payment amount of £1150.00 and the Bank Fee of £50.00 as part of the same document number:
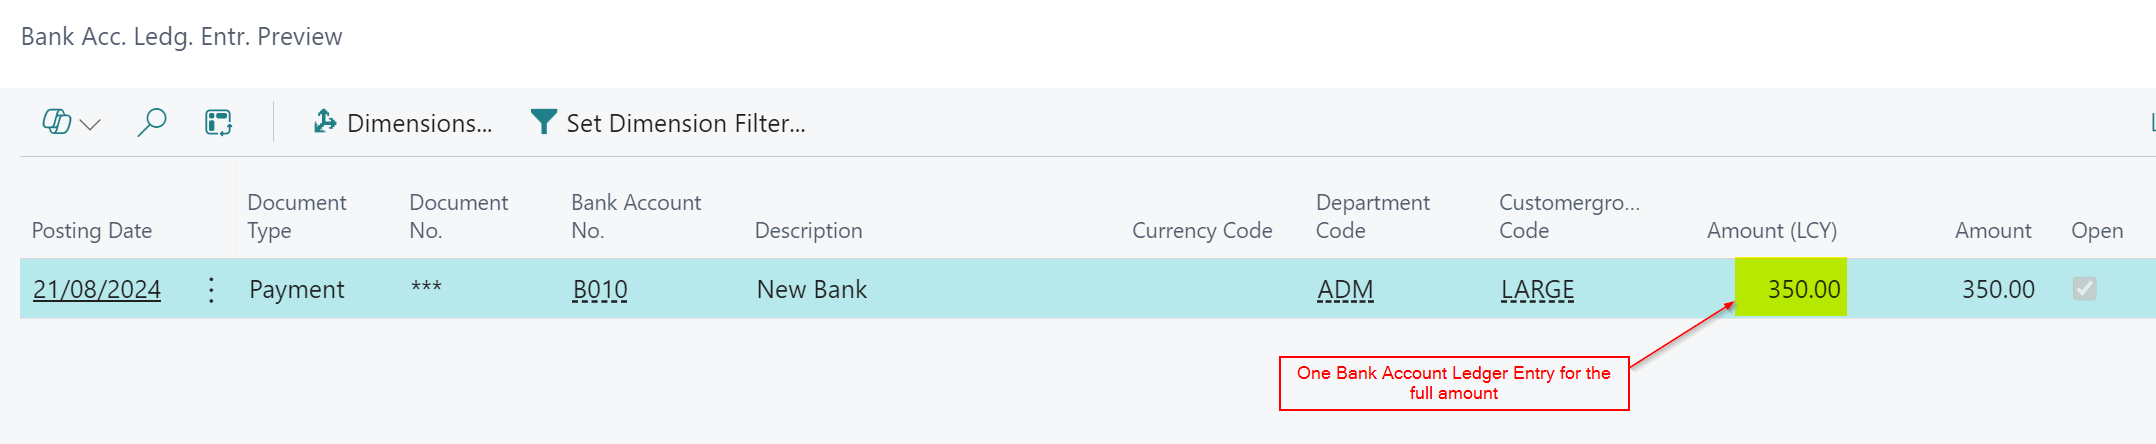
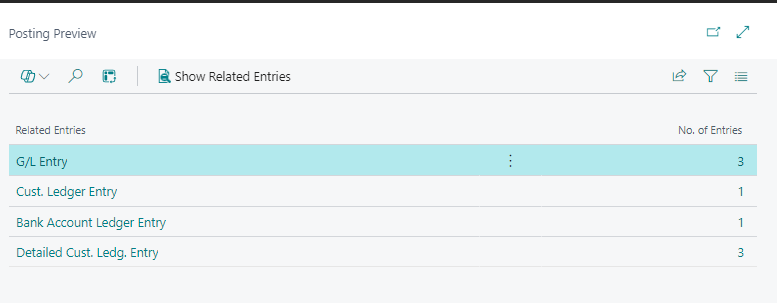
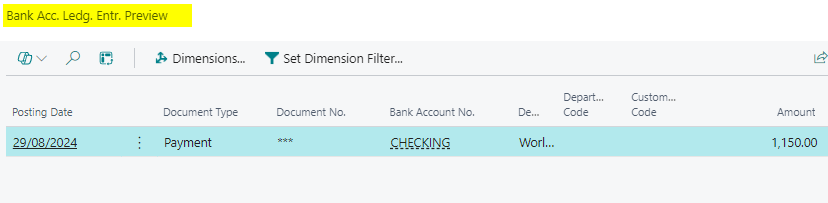
When I preview post this we can see the following entries
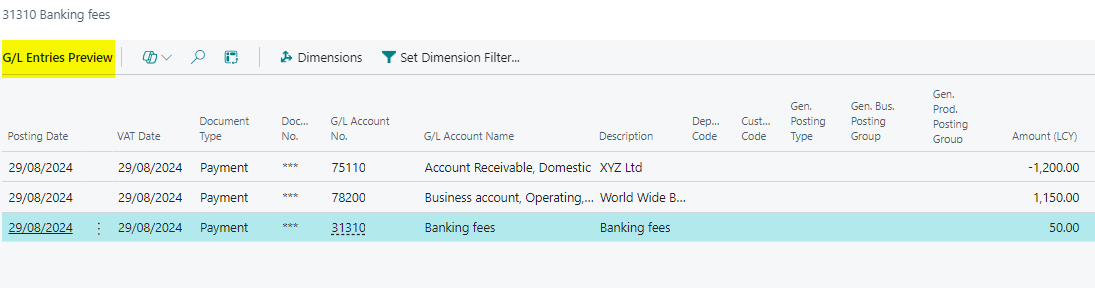
If we take a closer look at the G/L entries we can see Debtors being reduced by the full £1200.00, the Bank Account has an entry for £1150.00 and the Fee an entry of £50.00
We also have a Customer Ledger entry for the full amount along with a Bank Account Ledger Entry for £1150.00.

Finally, I’ll post the entry, and by reviewing the original Customer Ledger Entry for the Sales Invoice, we can see that it has been fully applied.
Conclusion
This post provides a straightforward method for handling bank fees on customer payments, ensuring that the sales invoice is fully applied and the correct amounts are recorded for both the bank reconciliation and bank fees.
Thanks for reading!