Introduction
Sometimes customers may not pay the full amount of invoices which can leave small balances on their account. At this point we can either chase our customers to pay the balances or alternatively we can write off those small amounts.
Business Central provides functionality called “Payment Tolerance” that allows you to write off the small balances when you are applying the invoices. However in order for this to work the cash receipt must be entered and posted in a specific way, otherwise the payment tolerance won’t be taken automatically.
In this post we’ll walk through a payment tolerance scenario showing the conditions where Business Central won’t automatically take the payment tolerance
Some Setup
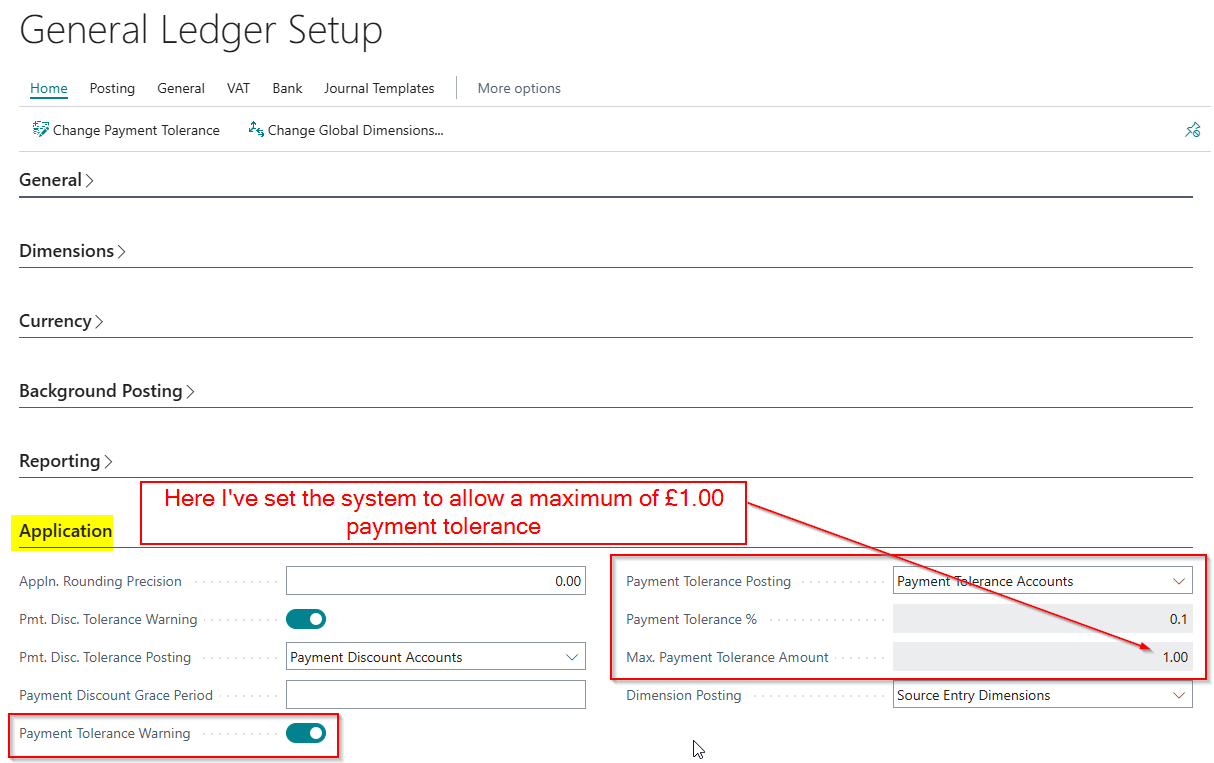
You can setup payment tolerances via the General Ledger Setup.
As per below I’ve set the system to allow the payment tolerance of 0.1% of the invoice value with a maximum tolerance of £1.00. Therefore if I were to post a Sales Invoice for £10,000.00 we’d still only be allowed a payment tolerance of £1.00.
Sales Invoice with Payment Tolerance
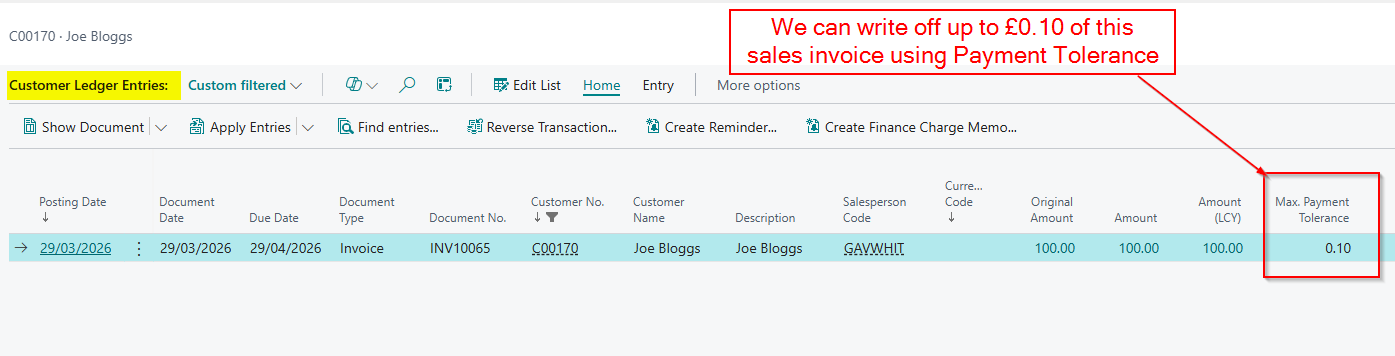
Next, I’ll post a Sales Invoice for £100.00 and as you can see this has a payment tolerance of £0.10 meaning if the customer were to pay anything up to £99.90 we can write off the difference automatically using payment tolerance.
Taking the Payment Tolerance (including the common mistake)
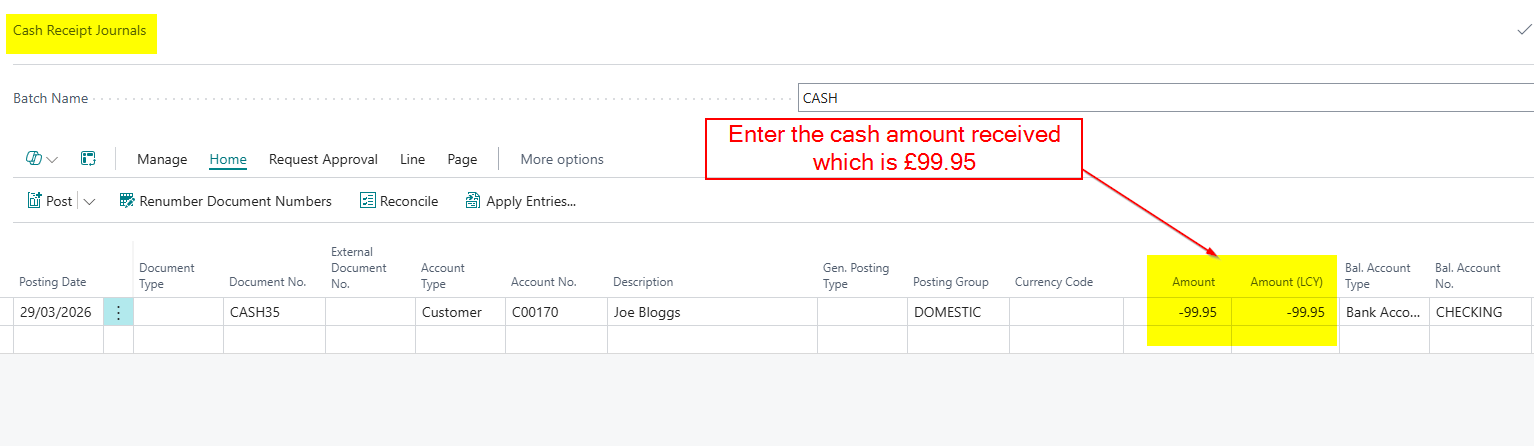
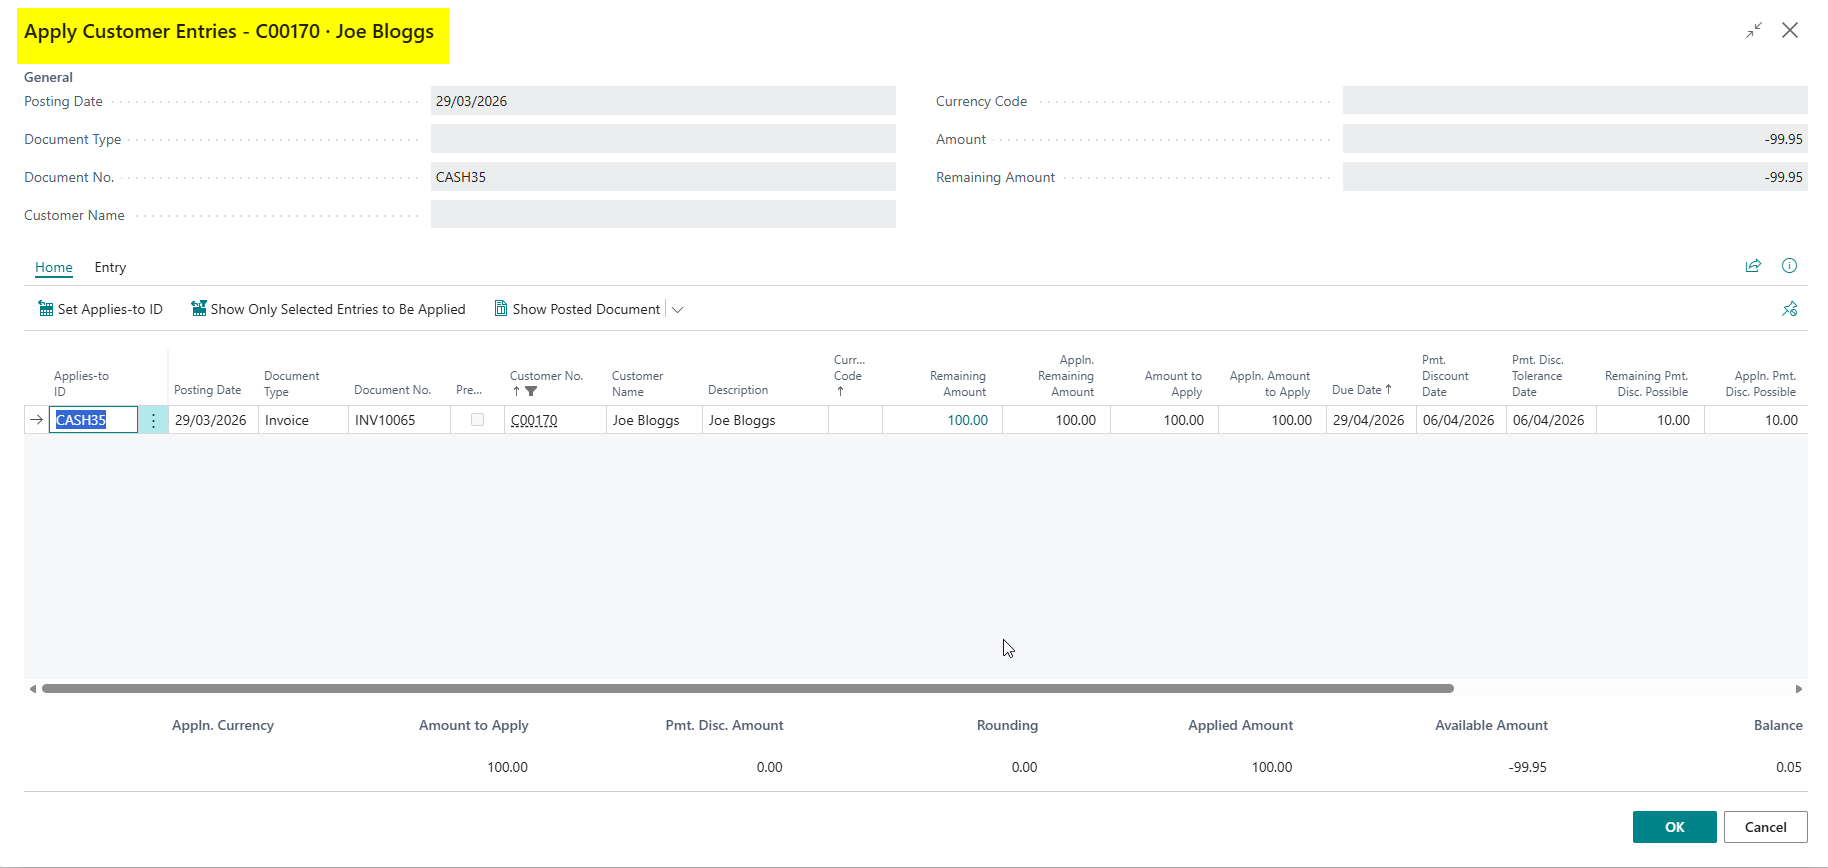
Now we receive payment from our customer however they have only paid us £99.95. As the balance is so small, we don’t want the hassle or potential harm to customer relationship, of chasing the remaining amount. Therefore we wish to automatically write off this amount.
To do this I’ll go to Cash Receipt Journal and enter the payment as per below:
Next, we’ll apply the payment to the invoice.
However after clicking OK, there is no payment tolerance message, and the GL entries don’t show a posting to the payment tolerance account?
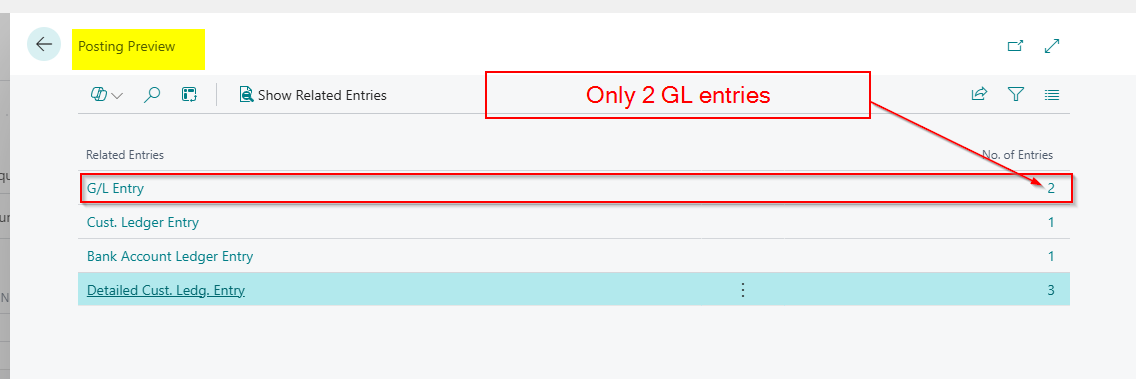
We appear to have done everything correctly, so why hasn’t the payment tolerance functionality worked?
Its a very subtle issue……have you spotted it? 😊.
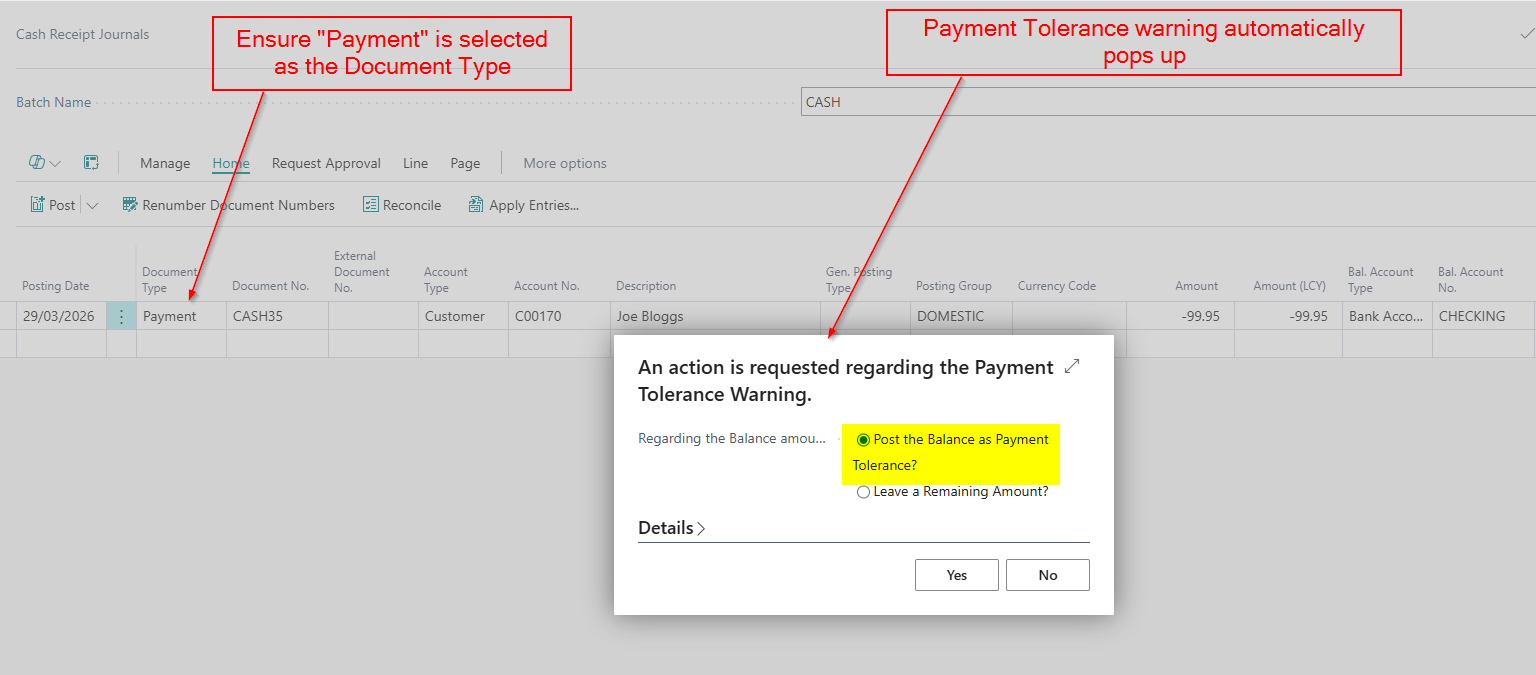
The issue is when I applied the cash in the first instance, I didn’t select “Payment” as my document type, and this must be selected in order for the functionality to work.
I’ll therefore delete and re-enter the cash receipt ensuring I select “Payment” as the document type and now I get the tolerance message.
I’m getting this warning because I toggled “Payment Tolerance Warning” in the General Ledger Setup. I can switch this off if I like.
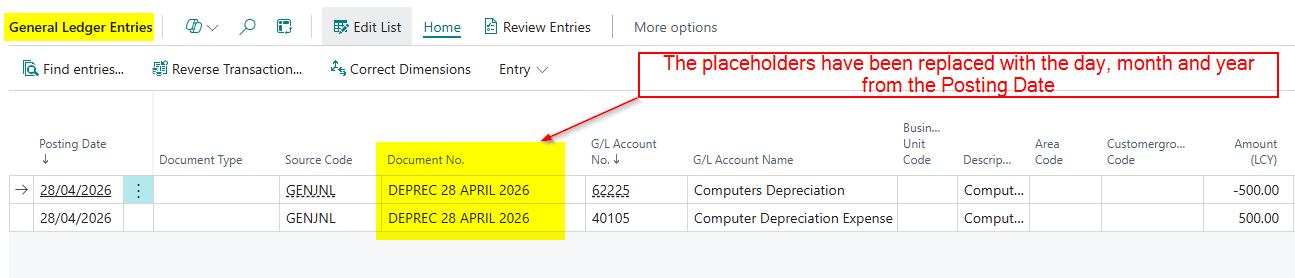
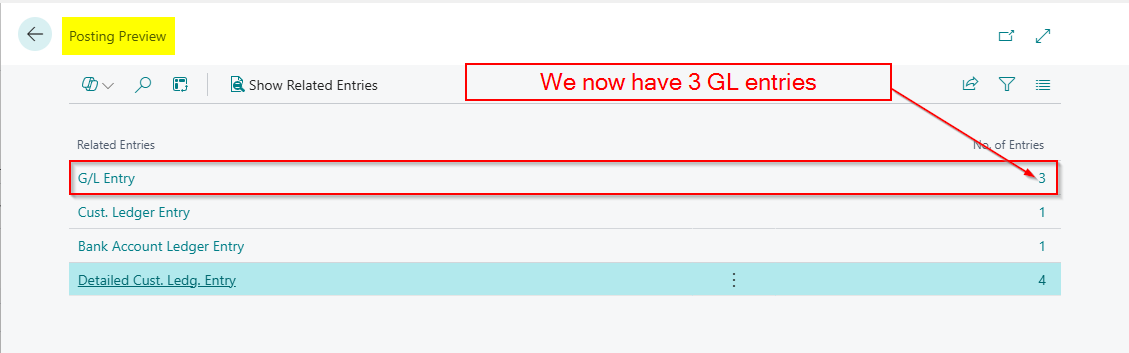
And crucially when posting the Cash Receipt I now have an extra GL entry for the payment tolerance.
Conclusion
This blog goes through the extremely useful payment tolerances functionality in Business Central.
It in particular highlights why, when you have seemingly configured payment tolerances correctly, the payment tolerance isn’t taken.
Thanks for reading!