Introduction
In this post, we’ll explore the various options available when running the “Close Income Statement” routine in Business Central, and we’ll also look at the outcomes of running each option.
This routine is used to close the income statement General Ledger accounts and transfer the balances to the retained earnings account as part of the General Ledger year end routine.
Depending on your needs, Business Central offers several ways to customise how these accounts are closed, and in this post, we’ll walk through each of these options, showing the results when the routine is run using the different settings.
Please note this post assumes you have followed any year end processes such as ensuring all General Ledger accounts are correctly set as either Income Statement or Balance Sheet and the Financial Year has been closed via the “Accounting Periods” page.
Option 1 – Post to Retained Earnings in Summary with no Dimensions
With option 1 we select the following options in the “Close Income Statement” page
- Post to Retained Earnings Acc. = Balance
- Dimensions = None Selected
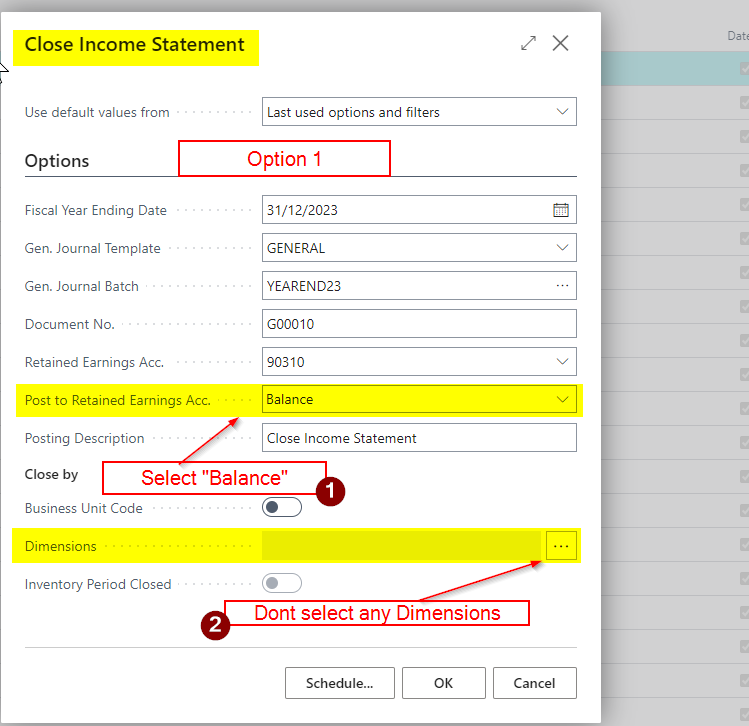
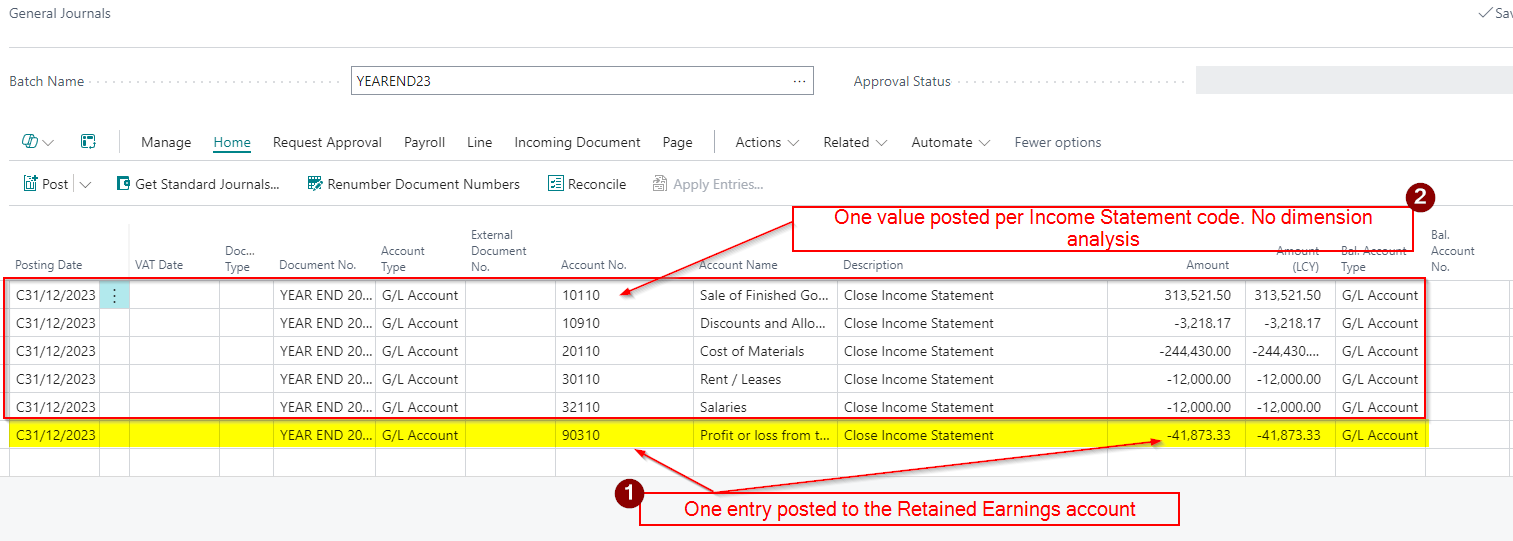
Using the options above the system closes each income statement at GL account level, without any breakdown by dimension. Therefore is I were to have multiple postings to an income statement GL account, and each posting had different dimension analysis, I’d just get one entry in my closing journal for the total balance of the income statement account, rather than a posting per dimension combination.
Additionally, as we have selected “Balance”, the system will make a single entry to the retained earnings account, consolidating all income and expense balances into one summarised posting.
The outcome of using these options in my demo data is shown below.
Option 2 – Post in Detail to the Retained Earnings but no Dimension Analysis
With option 2 we select the following options in the “Close Income Statement” page
- Post to Retained Earnings Acc. = Detail
- Dimensions = None Selected
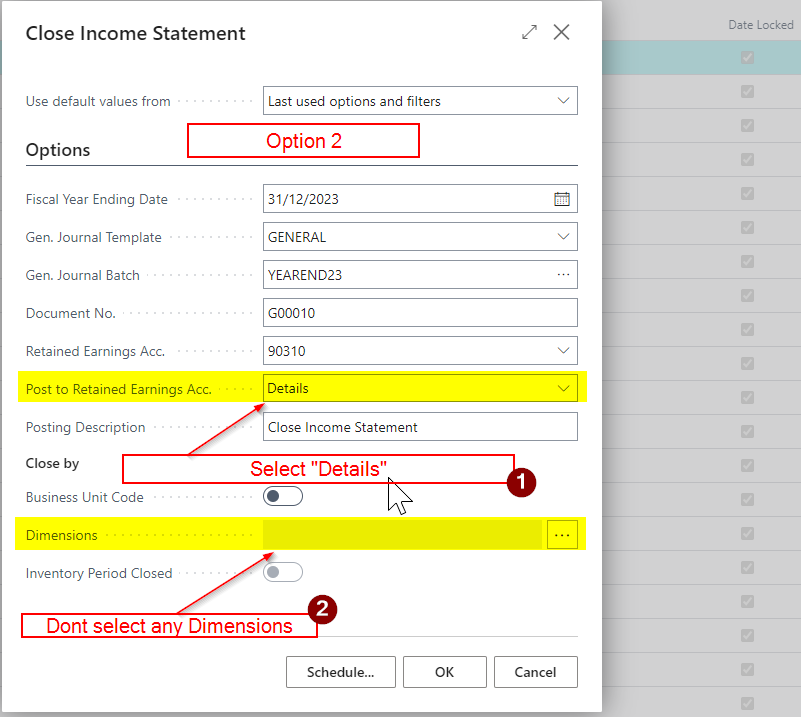
When you run the “Close Income Statement” process in Business Central and select “Detail” rather than “Balance,” the system posts an entry to the Retained Earnings account for each individual income statement GL account its closing. I’ll therefore get multiple entries (“Detail”) to the retained earnings account rather than a “Balance”.
However, as I’ve still not selected “Dimension”, I’d still only get one posting per income statement account, regardless of any dimension postings.
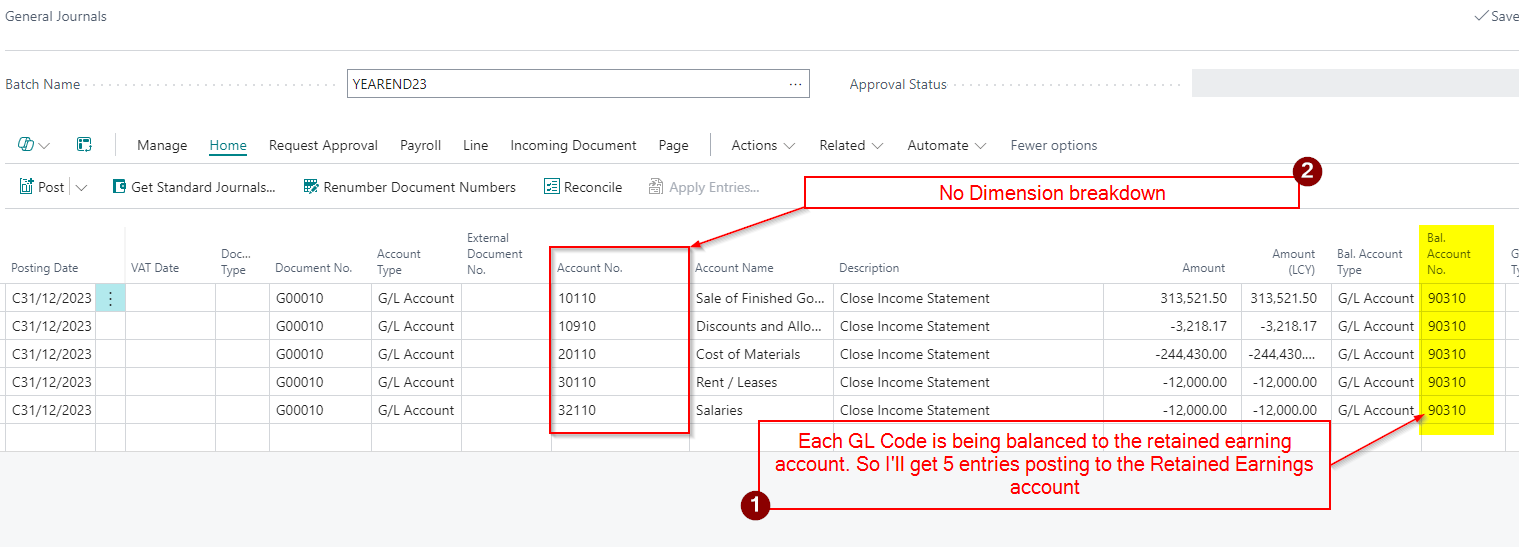
The outcome of using these options in my demo data is shown below.
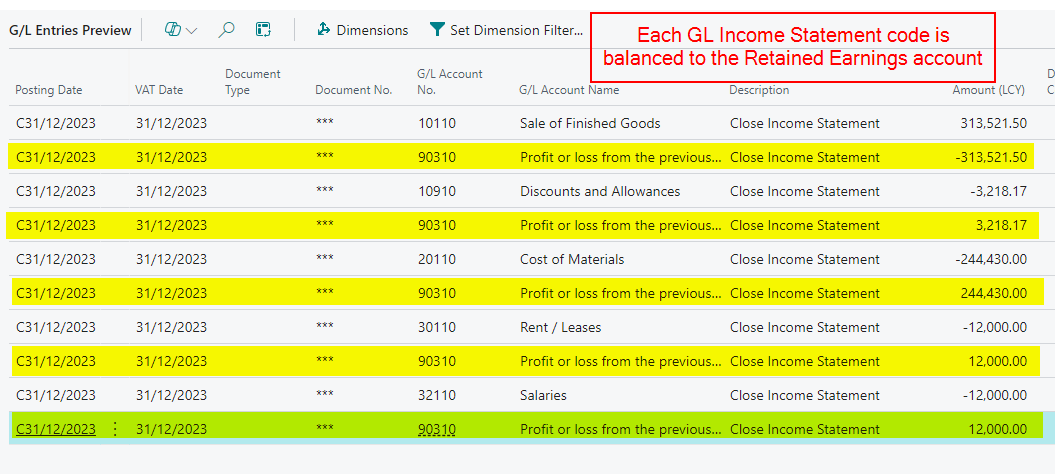
To highlight the additional “detail” posting to the Retained Earnings account, if I preview post this journal I can see the 5 posting to the Retained Earnings account rather than one entry.
Option 3 – Post in Summary to Retained Earnings and close by Dimension
With option 3 we select the following options in the “Close Income Statement” page
- Post to Retained Earnings Acc. = Summary
- Dimensions = All Selected
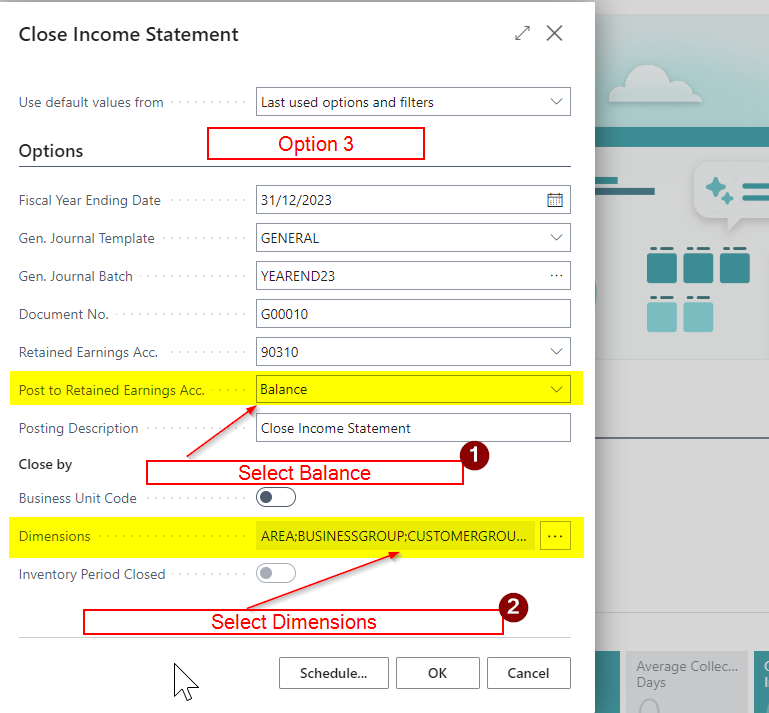
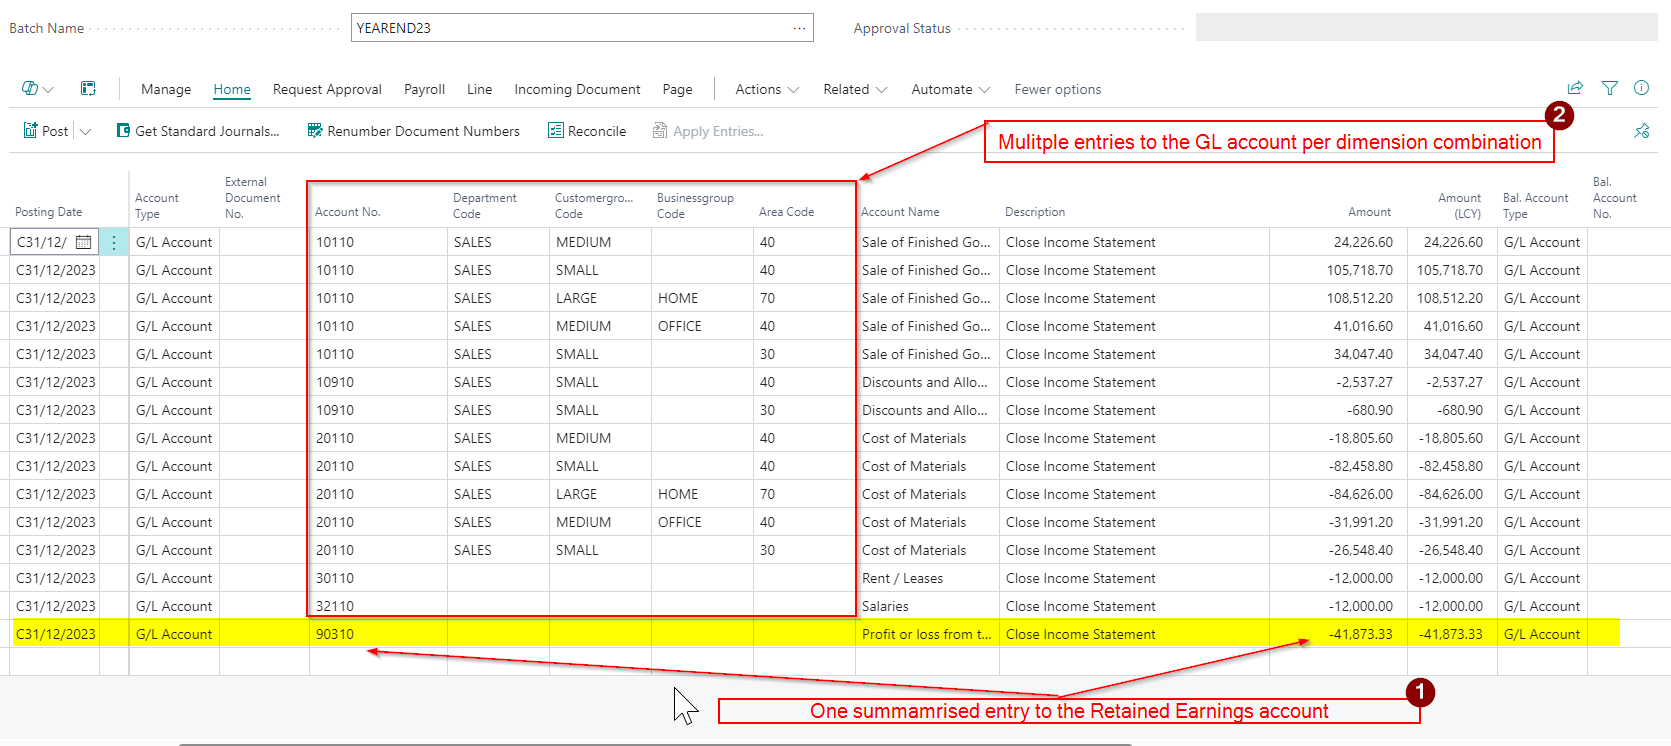
With “Balance” and dimensions enabled as per the above screen shot, we are now back to posting a summarised entry to retained earnings account, however we will now have breakdown of the GL posting by dimension for each income statement, creating separate entries per dimension.
The outcome of using these options in my demo data is shown below.
There are now multiple entries to the GL accounts per dimension combination all balanced to one entry to the Retained Earnings account
Option 4 – Post in Detail to Retained Earnings and close by Dimension
With option 4 we select the following options in the “Close Income Statement” page
- Post to Retained Earnings Acc. = Detail
- Dimensions = All Selected
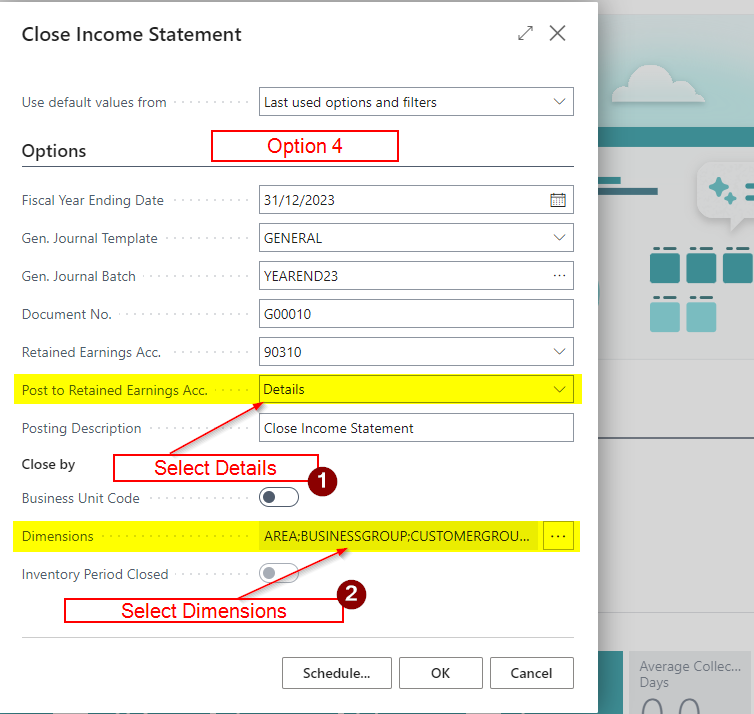
The final option we’ll look at when running the “Close Income Statement” process is to select “Detail” and tick “Dimension” as per the screen show above.
Having these options selected will post a separate entry to the retained earnings account for each income statement GL account (Detail) and further breaks down for each entry by dimension. (as we have ticked the Dimensions). This provides the highest level of detail.
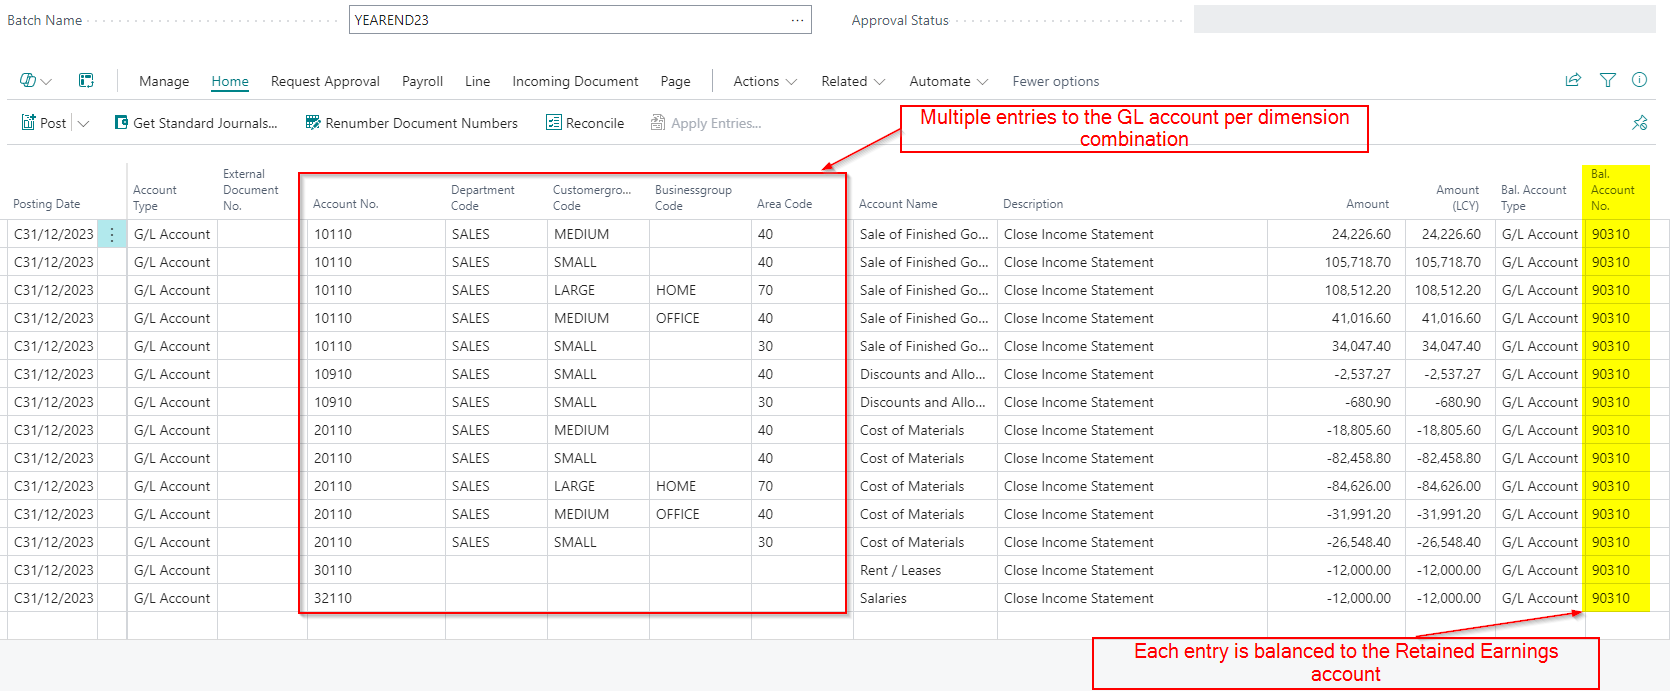
The outcome of using these options in my demo data is shown below.
Conclusion
As we can see the “Close Income Statement” routine in Business Central offers several options to customise how income statement balances are posted to retained earnings.
Whether you choose to post a single summarised entry to the Retained Earnings account, or want more detailed posting, each method allows for different levels of analysis and reporting.
Thanks for reading!