Introduction
The most common Business Central licences are the Premium, Essentials and Team Member licences. These are the paid subscription licences that are manually assigned to users so they can work and process data in Business Central.
However there are also lots of other less common licences for Business Central which can be automatically assigned to users with certain roles in your Microsoft 365 tenant, two of which are the free “Internal Administrator” and “Dynamics 365 Administrator” licences.
In this post we’ll take a look at what these licence types are, how they are assigned, and why they are useful.
Licence Configuration
To view all the different licence types in Business Central you can go to the “Licence Configuration” page in Business Central. Below is a screen shot of this page showing all the different licence types.
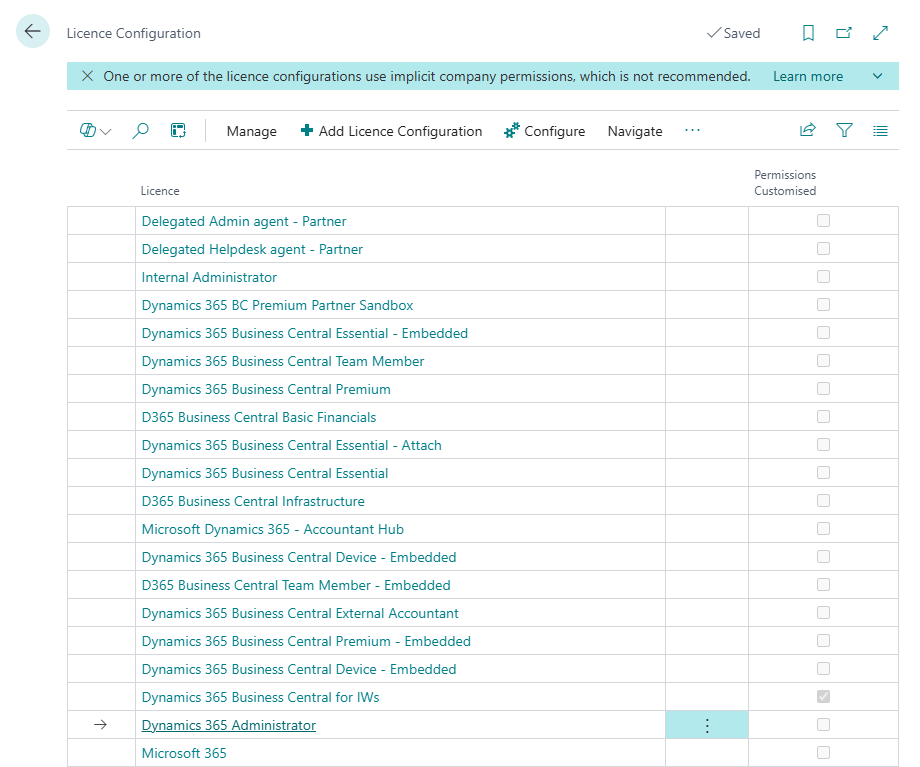
Its unlikely you’ll see the majority of these in your Business Central environment, however I want to focus on a couple which are more common, and enable users who don’t have a paid subscription licence to Business Central to perform some very important tasks.
If you have a partner its likely you’ll see the “Delegated Admin agent – Partner” or “Delegated Helpdesk Agent – Partner” licence assigned to your partners users 😊
The “Internal Administrator” Licence
In the list of Licences above we can see the “Internal Administrator” licence. This is automatically assigned to anyone who is a “Global Administrator” in your Microsoft 365 Tenant when they click the URL to access Business Central.
For example here in my demo tenant I have a user called “Global Admin” who has been assigned the Role of “Global Administrator”

However they haven’t been assigned a Business Central licence

However when they have subsequently accessed the Business Central tenant via the URL they have been automatically created as a User in Business Central and assigned the “Internal Administrator” licence.

This is a free licence that gives the user the ability to do limited tasks such as manage users and create/assign permissions to users etc. (they also have read-only access to all areas of Business Central)
This is great as I don’t have to pay for a licence for an IT Administrator to do security related tasks in Business Central 😊
The Dynamics 365 Administrator Licence
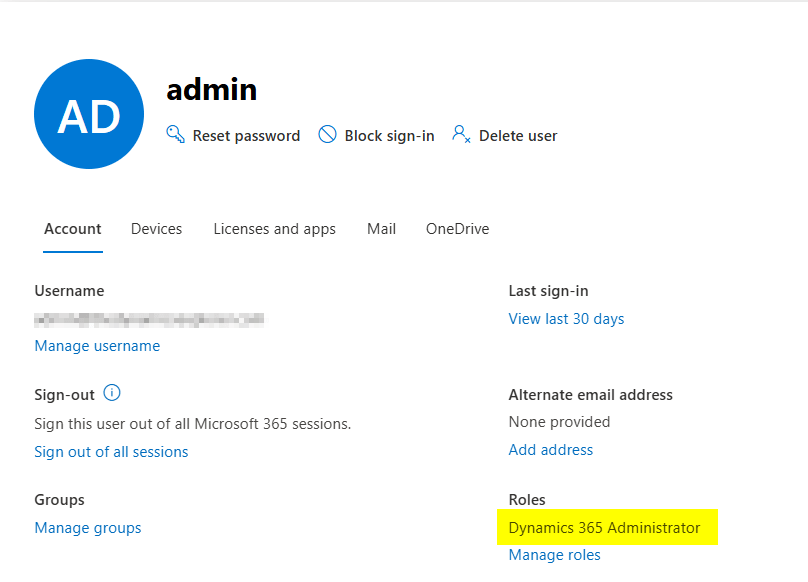
The “Dynamics 365 Administrator” licence is automatically assigned to anyone who is a member of the “Dynamics 365 Administrator” role in your Microsoft tenant when they access Business Central.
For example in my demo tenant I have a user who has been assigned the “Dynamics 365 Administrator” role in my Microsoft tenant.
Again this user hasn’t been assigned a Business Central Licence:
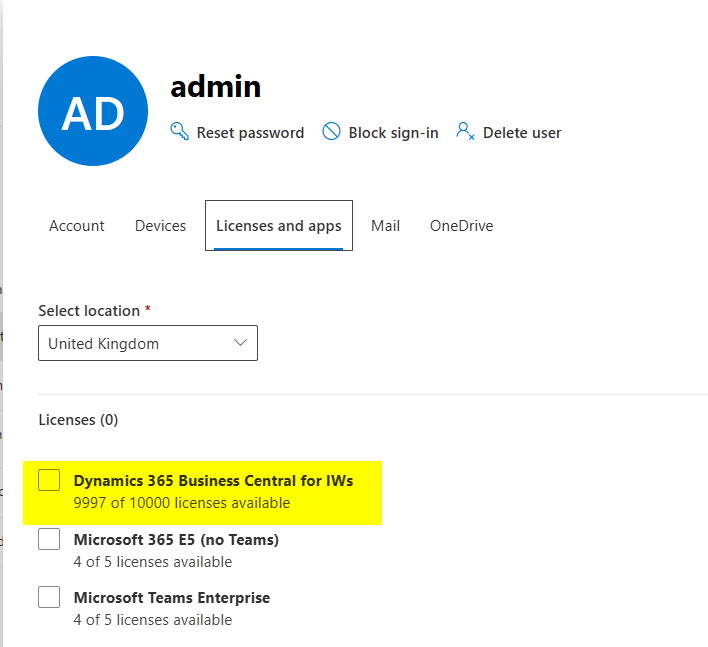
However when they clicked the URL to access Business Central they were automatically created as User in Business Central and assigned the “Dynamics 365 Administrator” licence:
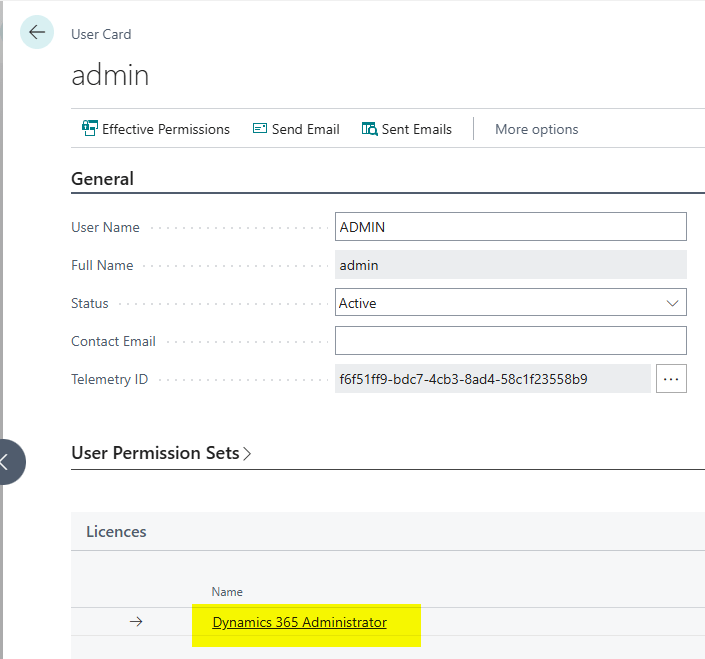
Again this gives them the ability to perform limited tasks such as managing users, assigning users permissions and creating new permission sets etc.
Its important to note that you clicking the option “Update users from Microsoft 365” on the “Users” page in Business Central won’t automatically pull these users in Business Central. Users with the roles “Global Administrator” and “Dynamics 365 Administrator” have to click the URL to access Business Central and they are then automatically created and granted the licence.
Conclusion
As we have seen administrators of the Microsoft tenant get some access to Business Central for administrative tasks. This is an amazing feature because it allows us to avoid paying for additional licenses for IT administrators while enabling them to take on administrative responsibilities for Business Central including assigning permissions and creating permissions sets.
As an additional bonus this also enhances the segregation of duties within our accounting system as we can remove administration permissions from all the day-to-day users of Business Central 😊 .
Thanks for reading!