Introduction
Microsoft recently added a new feature to Business Central called “Add fields from related tables in Analysis mode”. This is one of the most talked features to arrive in Business Central in a long time, and is rightly receiving rave reviews in the community.
Coming from a Dynamics GP background myself, I couldn’t help but notice its similarity to the much loved “Smartlist” feature in Dynamics GP.
In this post, I’ll compare these two features highlighting their similarities, explore their capabilities, and share real world examples of how I’ve used Business Central’s new feature to solve some reporting challenges.
Smartlist in Dynamics GP
Smartlist is a much loved tool in Dynamics GP that offers a central location where you can report and search on all aspect of your company data.
I’ve captured an image of this tool below
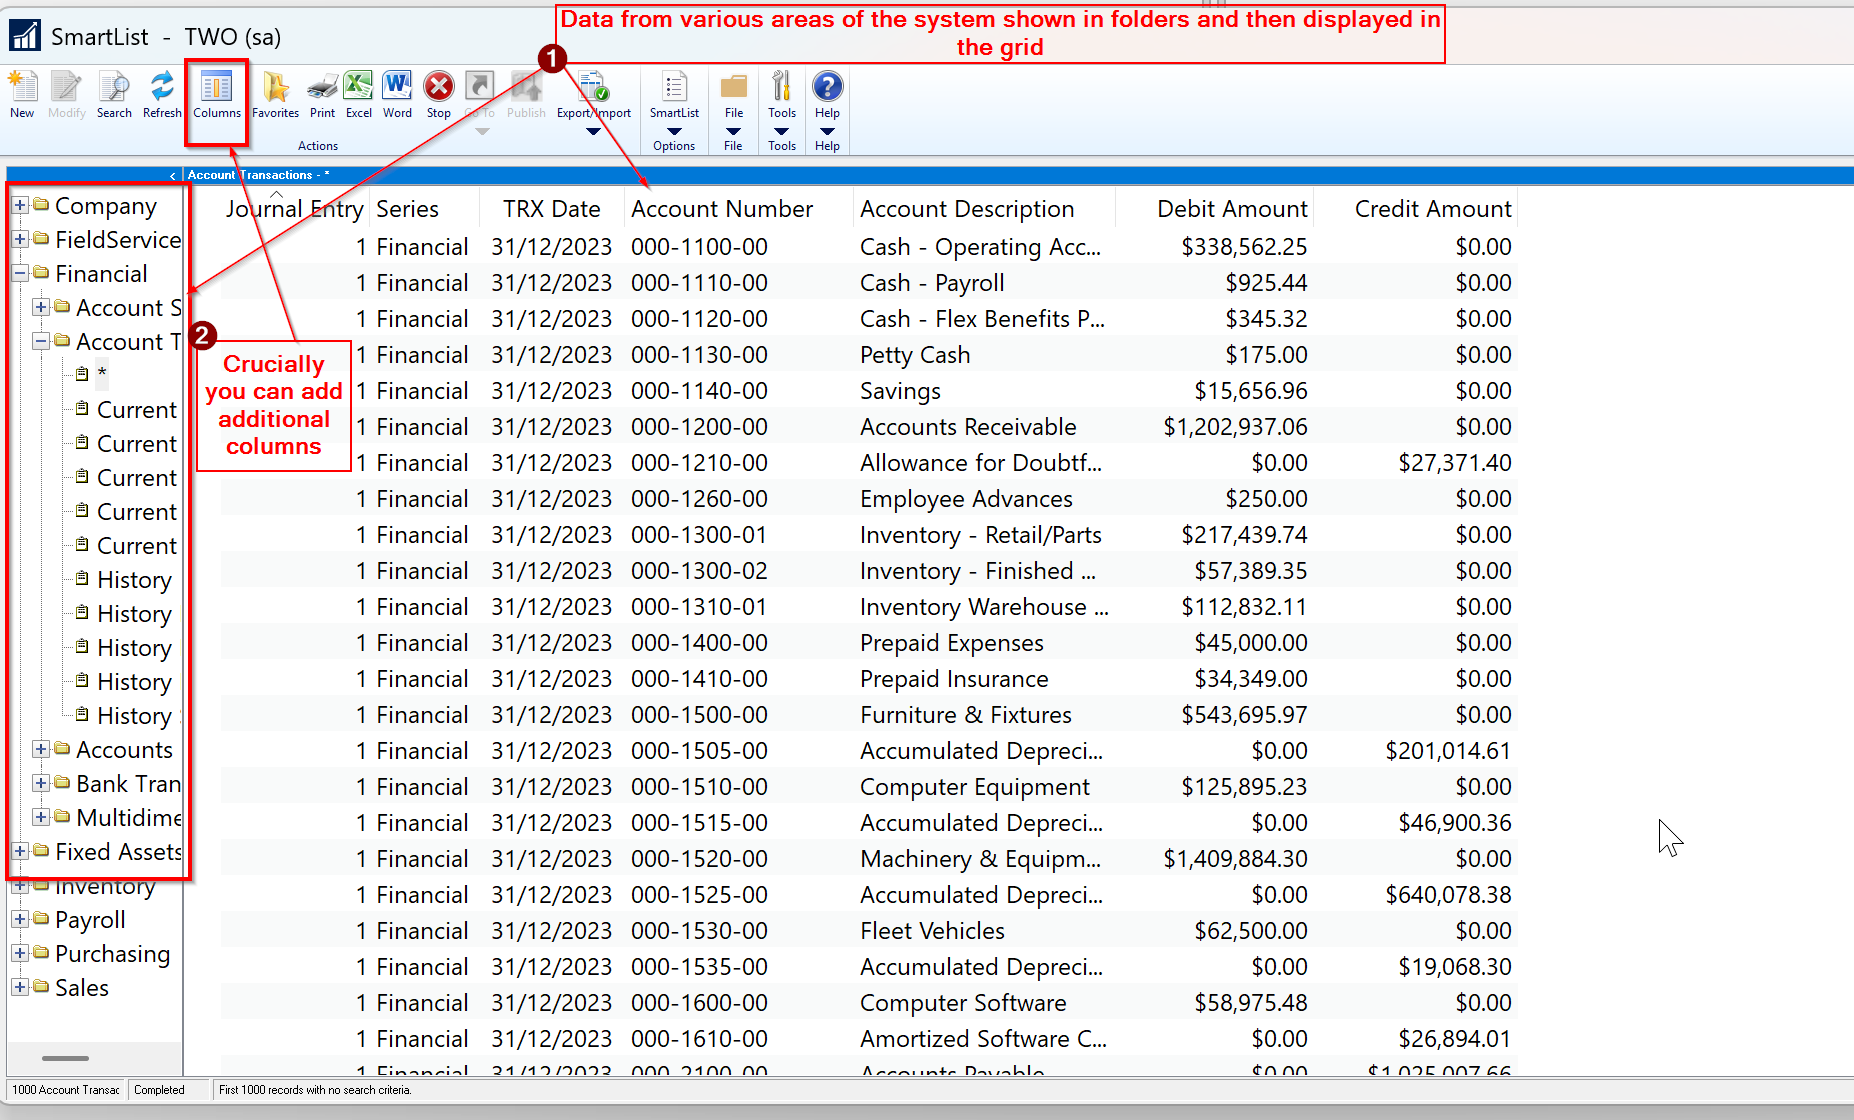
As you can see, the various areas of the system such as “Sales”, “Purchasing” and “Financial” are listed in the left hand pane as yellow folders, and you can select them to view the data.
Crucially you can also add additional columns to the view and search and then export the data to Excel. You can also save “favourites” so you don’t have to recreate these views again.
Additionally, you can also use a feature called “Smartlist Designer” which enables a user to create their own Smartlist, joining tables together so they can view data from more than one related table.
This is a really powerful set of tools that you can use to generate reports, right in the standard product, without the need for any additional reporting tools.
Introducing “Add fields from related tables in analysis mode” in Business Central
I must admit as much as I loved Business Central when I first made the move, I did miss the reporting capabilities that Smartlist gave me.
Although I love the various analysis views in Business Central, and how I can export data so easily from pretty much any page, I’d often find myself struggling for some crucial fields to include on the list pages, that I could easily get using a Smartlist in Dynamics GP.
However it seems some of these challenges are over with the introduction of “Add fields from related tables in analysis mode” 😊.
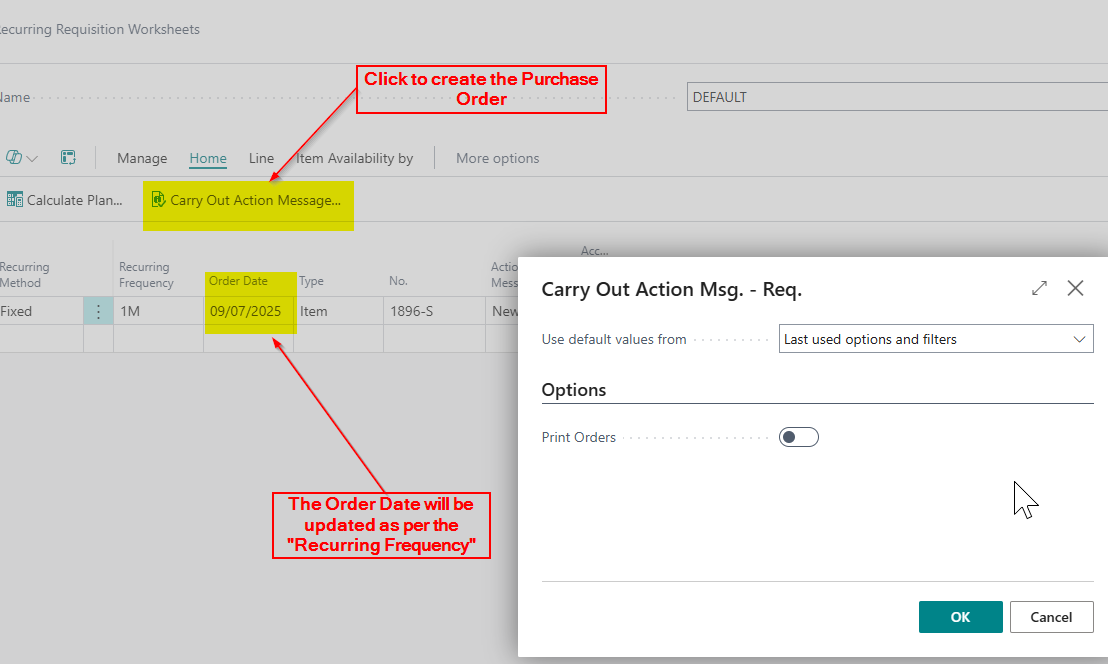
To use this feature you must first activate it via the “Feature Management” page.

With this feature enabled, when you access a List Page in Business Central and click the “Analyse” button you can add additional columns 😊. (just like Smartlist)
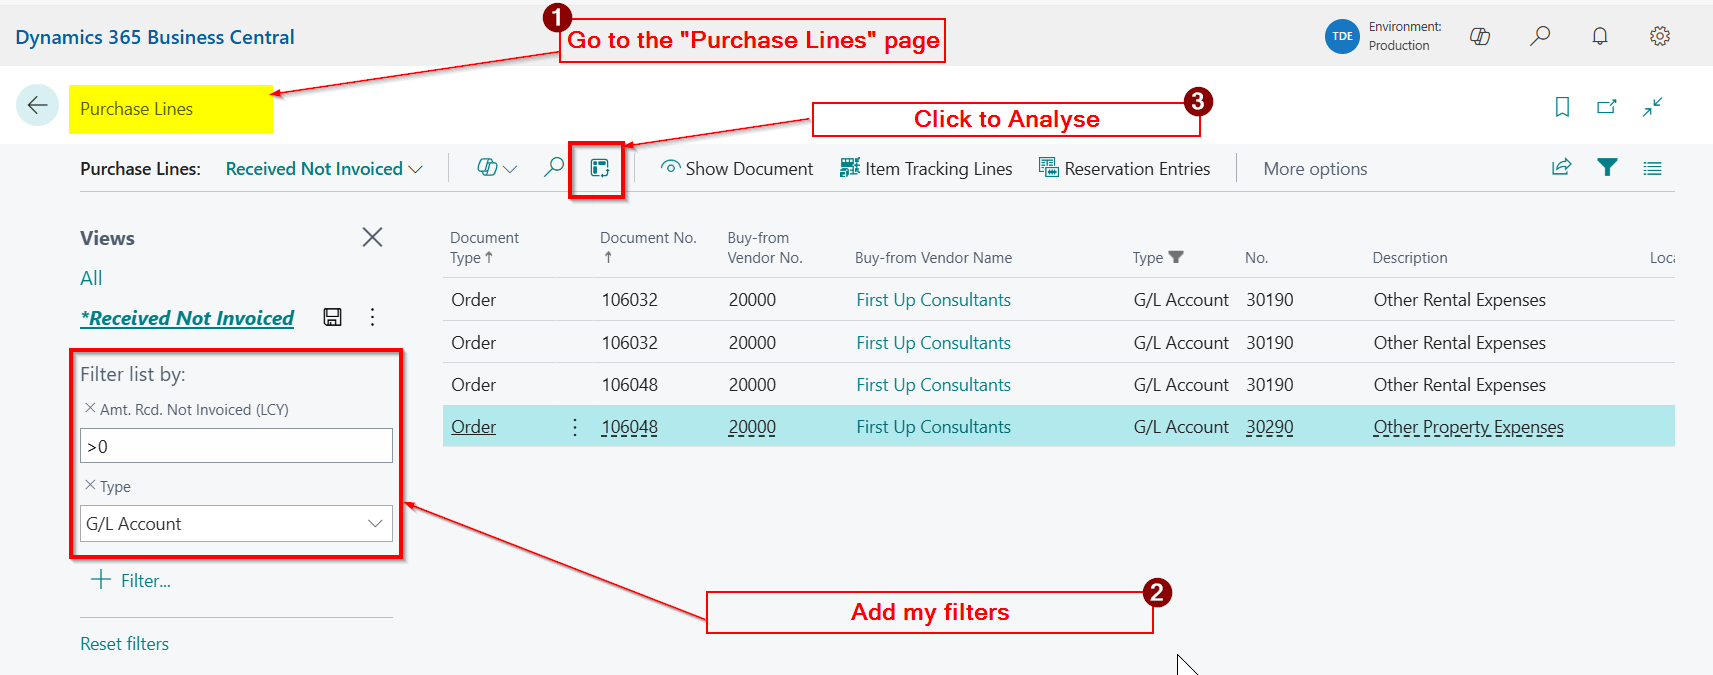
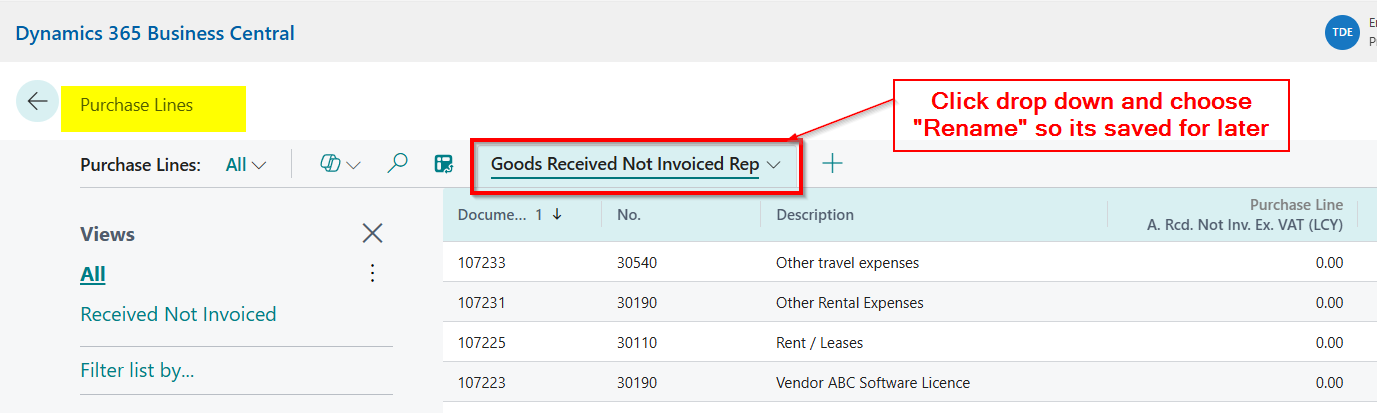
For example, I recently needed to add the “Amt. Received Not Invoice Excl VAT” to the “Purchase Lines” page so I could create a “Goods Received Not Invoiced” report.
To achieve this I went to the “Purchase Lines” page, added my filter, and then clicked the “Analyse” button
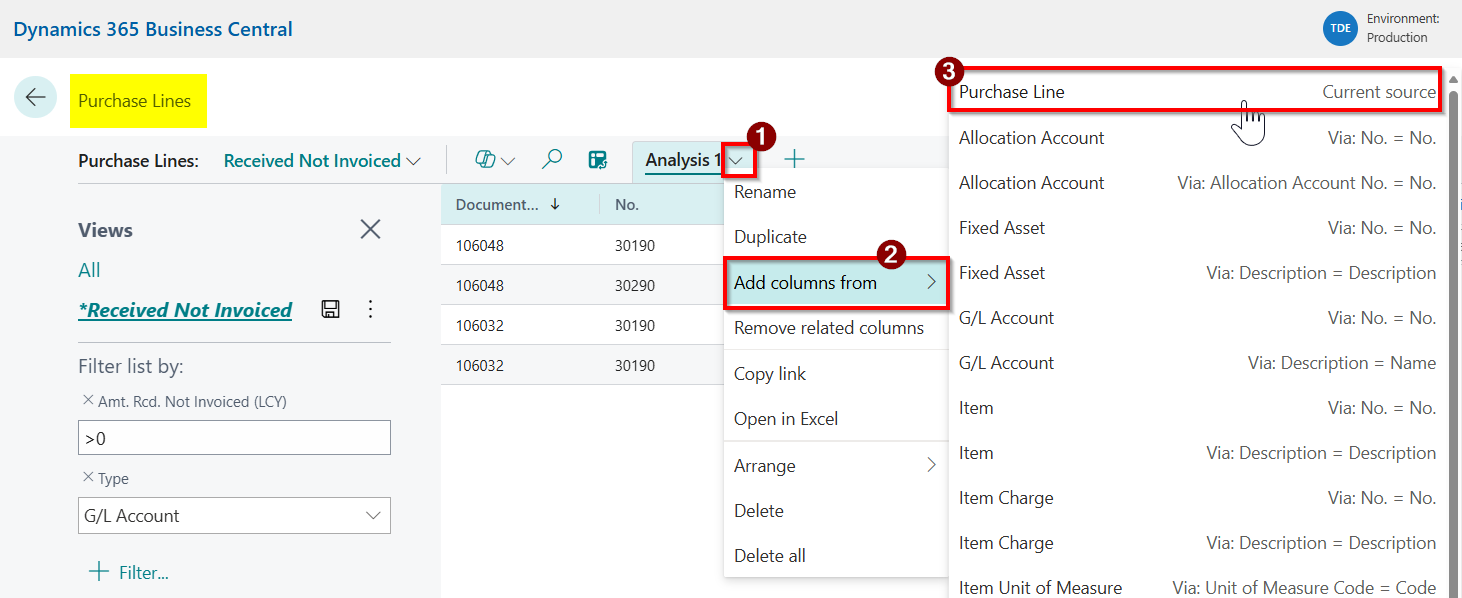
Next click “Add columns from” and then selected “Purchase Line”
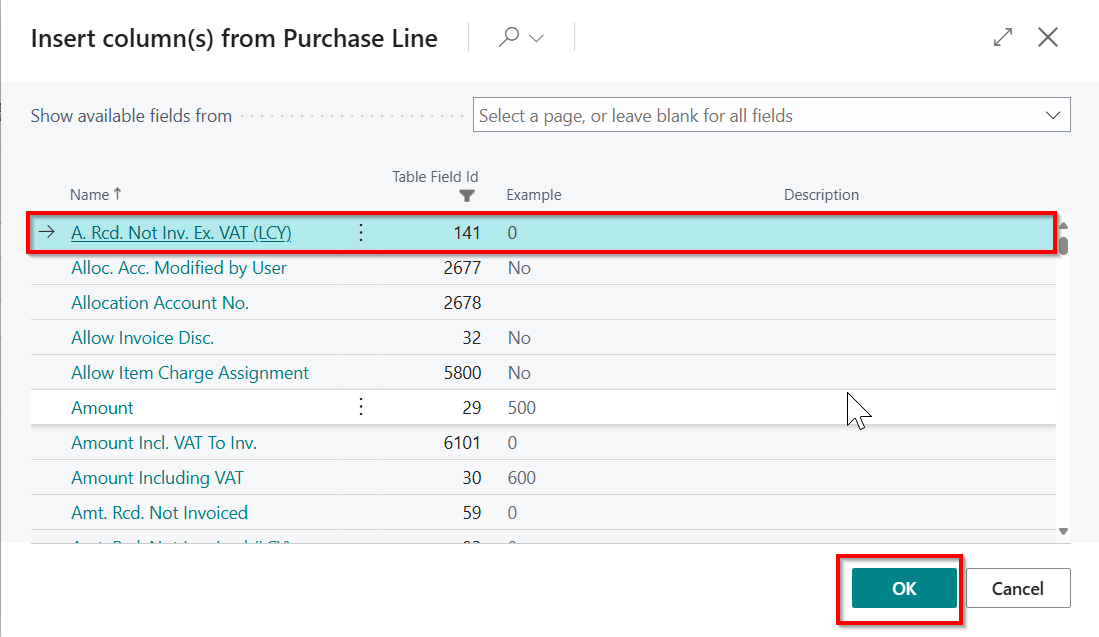
Then select my column and click “OK”
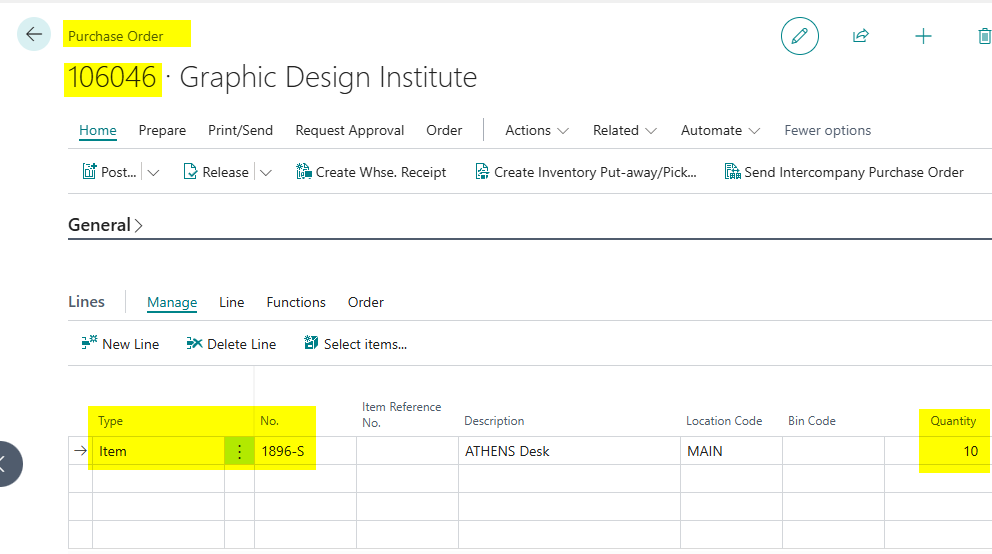
The column now appears with a reference to the table it was added from:
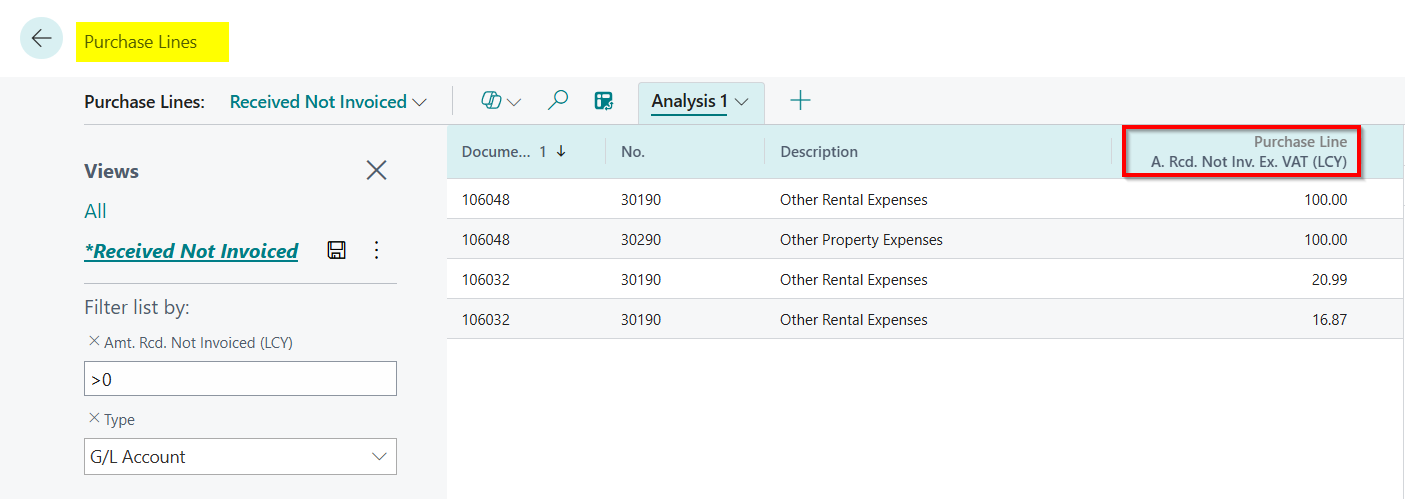
Finally I can save it as a “Favourite” so I don’t have to keep recreating it. (just like Smartlist)
Amazing!! I’ve managed to create my report without stepping outside of Business Central. No third party tool needed!
And there’s more…
However, in this instance, we’ve only just scratched the surface.
In the example above I added a column from the table the page is based off, which you could argue I could get using other more traditional ways, such as via “Personalisation” or “Customisation” on the role.
I blog about adding extra fields via Customisation here
The real power of this functionality comes when you want to include data from other related tables. (Much like Smartlist Designer. Do you see the similarity now 😊)
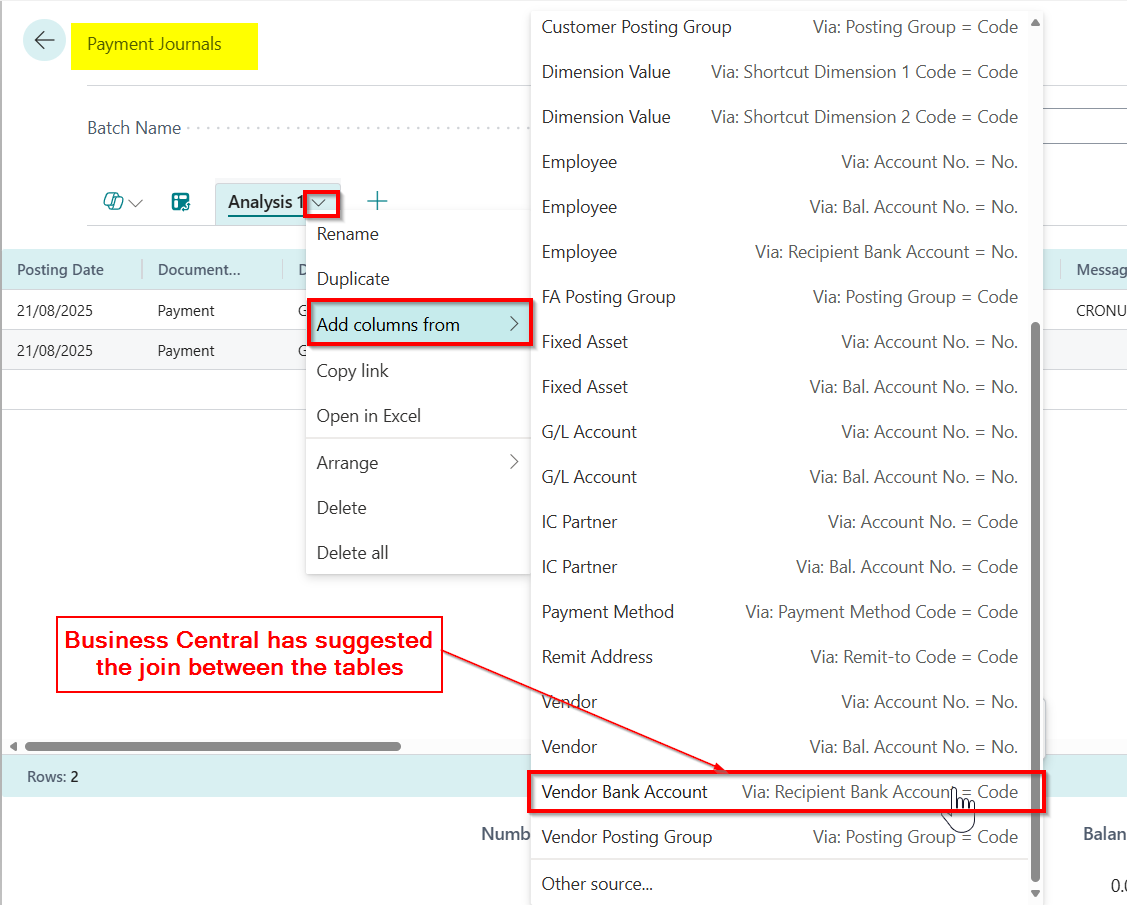
For example I recently had to add the “Bank Account” and “Sort Code” to a payment journal for a user.
To do this I went into the “Analyse Mode” on the Payment Journal and clicked “Add columns from” and selected the relevant table
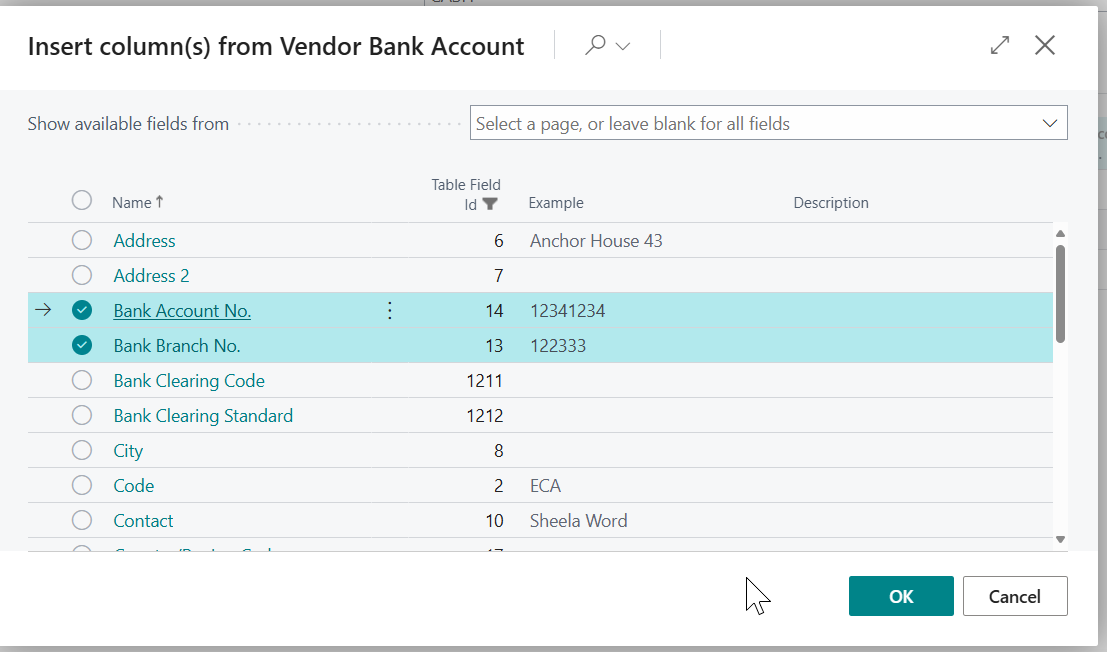
Next I select the relevant columns
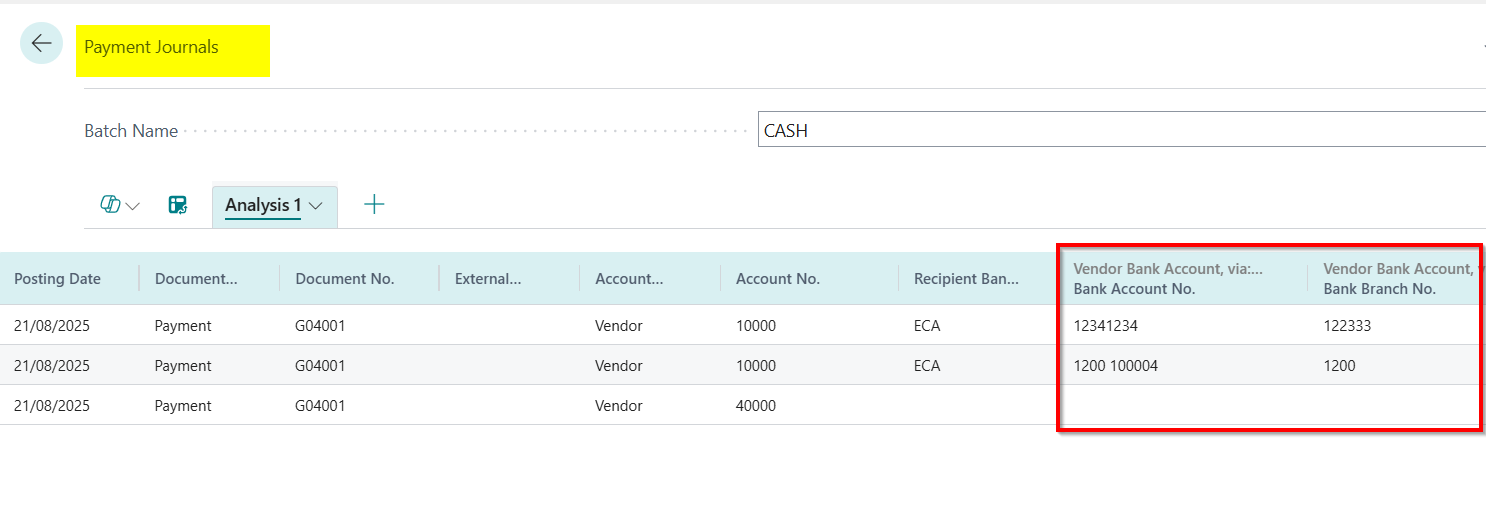
And click OK and the columns are displayed. (I could then save it like I did in the first example)
You can even create your own links by selecting “Other source…” and linking to tables that Business Central hasn’t suggested. This opens up all sorts of possibilities for reporting.
Conclusion
This is an amazing feature that has so much potential to make life easier for users of Business Central. Lots more reporting requirements can be fulfilled without the need for third party reporting tools.
Although its a little different to Smarlist in Dynamics GP, there are many similarities that I believe will make it a highly appreciated enhancement to Business Central for many users transitioning from GP to BC, as well as for those contemplating the move.
Thanks for reading!