Introduction
A client recently had a situation where they wanted to give a customer a discount as a goodwill gesture for an Item they had previously shipped and invoiced, as the customer wasn’t entirely satisfied with the Item.
However, when raising the Sales Credit Memo, they selected the inventory item and noticed the system had generated Item Ledger Entries to return the item to inventory. This was incorrect because the customer was keeping the item, they were just issuing their customer with a credit note due to an issue with the item and delivery.
In this post, we’ll explore two methods we can use to issue a credit note for an item without returning it to Inventory, and show how using an Item Charge proves to be the most effective.
Scenario
The scenario we have is a client has received delivery of an Item, in this case an Athens Desk, however it arrived late and they have complained and requested a discount for their inconvenience.
As a gesture of goodwill we are going to give them a 10% discount in the form of a Sales Credit Note.
There are a couple of ways we can deal with this. We could create a credit note and post directly to a GL account, or alternatively we could create a credit note and use an Item Charge.
We’ll first work through a scenario using a G/L Account and see why this might not be the best choice for this particular situation.
Credit Memo using G/L Account
First, we will create a Sales Credit Memo using a G/L account.
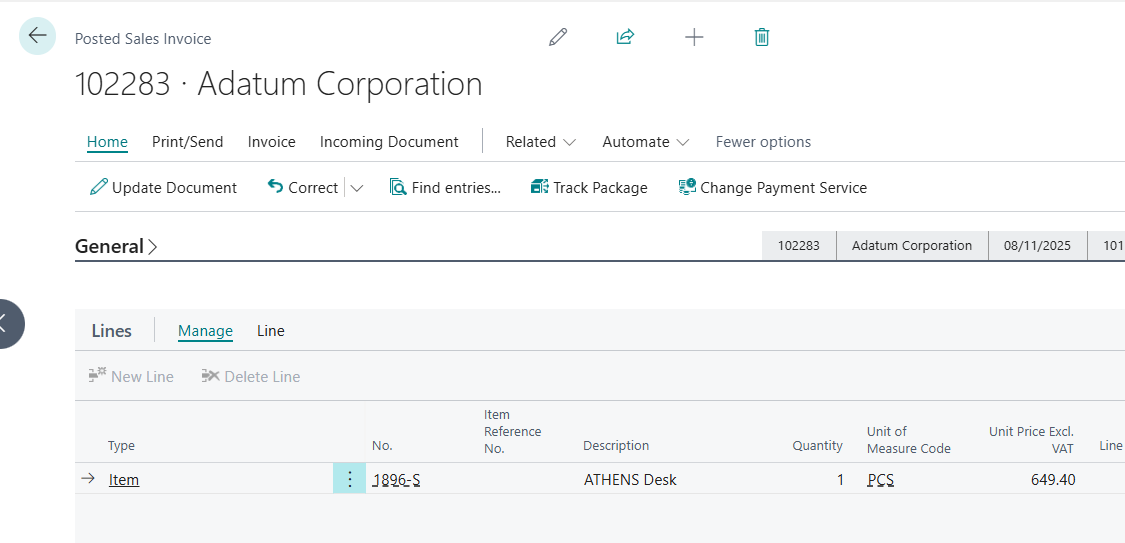
Below is the Sales Invoice for the Athens Chair that is to be credited.
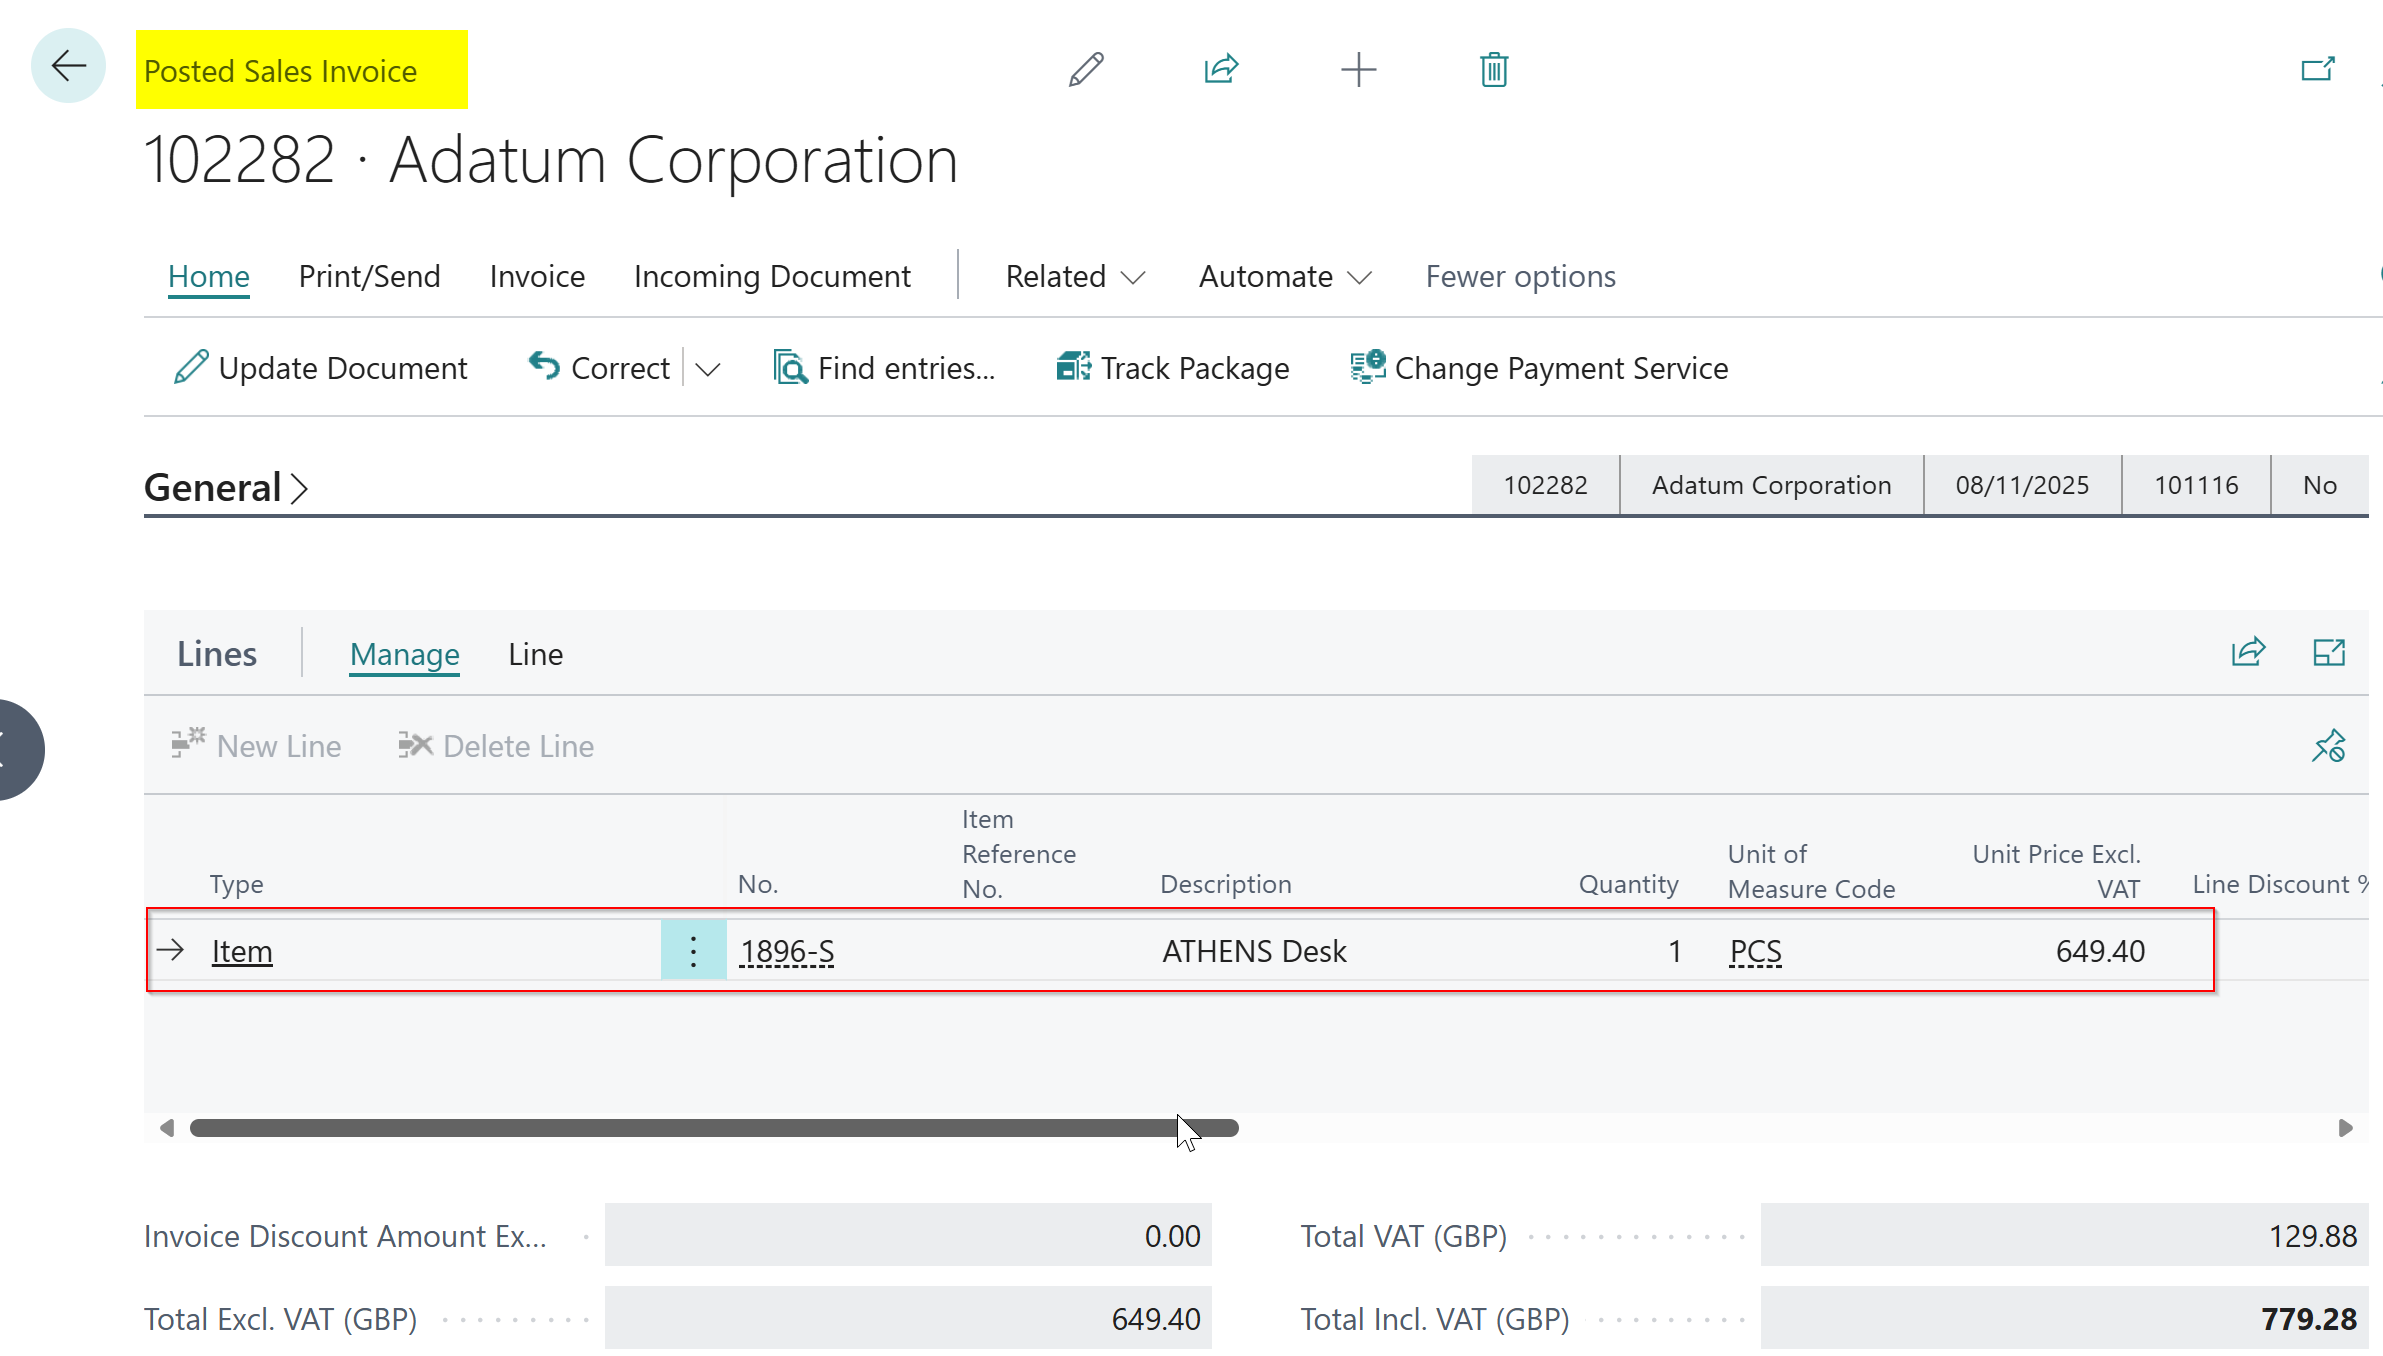
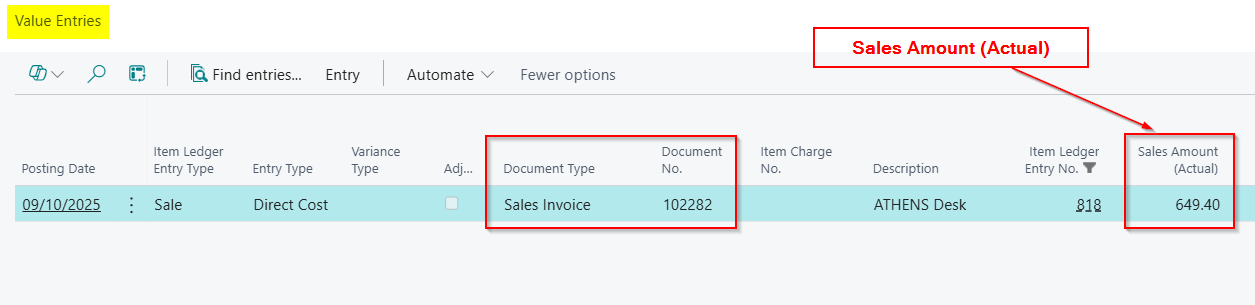
Importantly, when we posted this Sales Invoice it created the following “Item Ledger Entry” to record the reduction in Inventory. This also shows the “Sales Amount (Actual)” as £649.40 which is retrieved via the Value Entry.
Please note the “Sales Amount (Actual)” shown on the Item Ledger Entry is actually a Flowfield that links (flows) back to the Value Entry. The Item Ledger Entry records the Inventory quantity movement for the transaction, whereas the Value Entry records the Inventory Values for that movement.
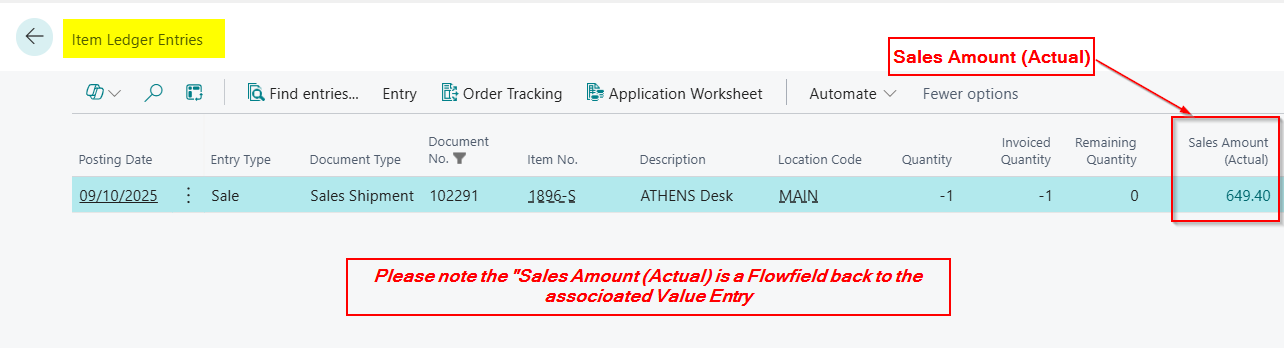
Please note the Sales Shipment number associated with the Sales Invoice is recorded on the Item Ledger Entry.
The Sales Invoice has also created the following “Value Entry”, which records the “Sales Amount (Actual)” which is linked to the above Item Ledger Entry
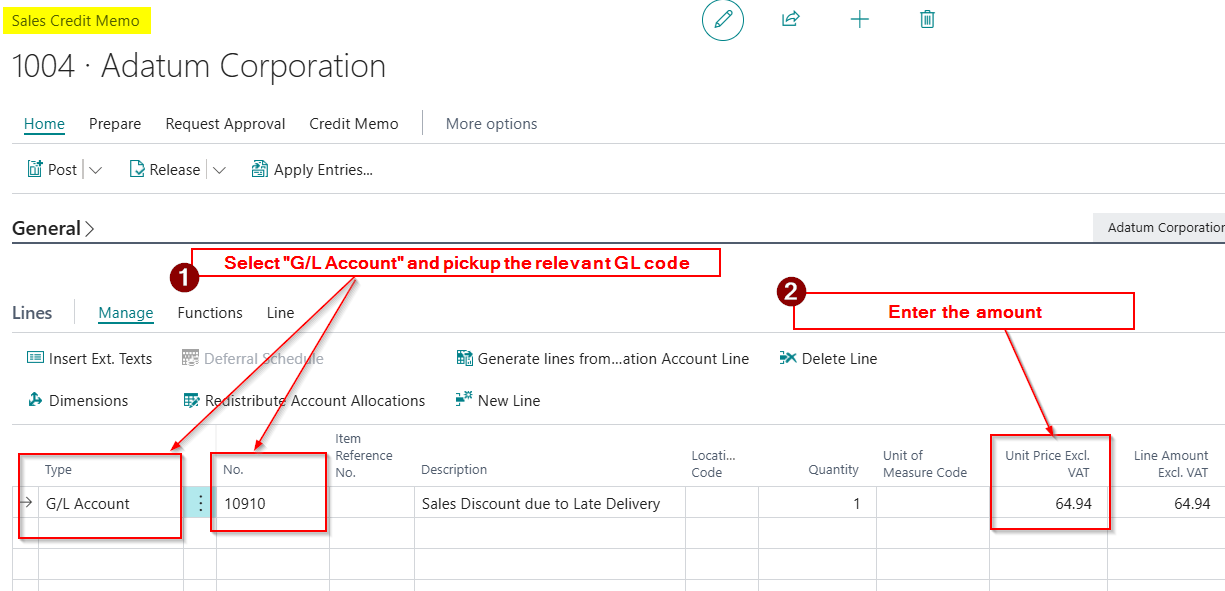
To raise the Credit Note, I’ll go to “Sale Credit Memo” and select the relevant Customer and enter the line as per below.
Here I’m picking up “G./L Account” as the Type and then selecting the relevant GL code and entering the amount.
This will generate the following entries:
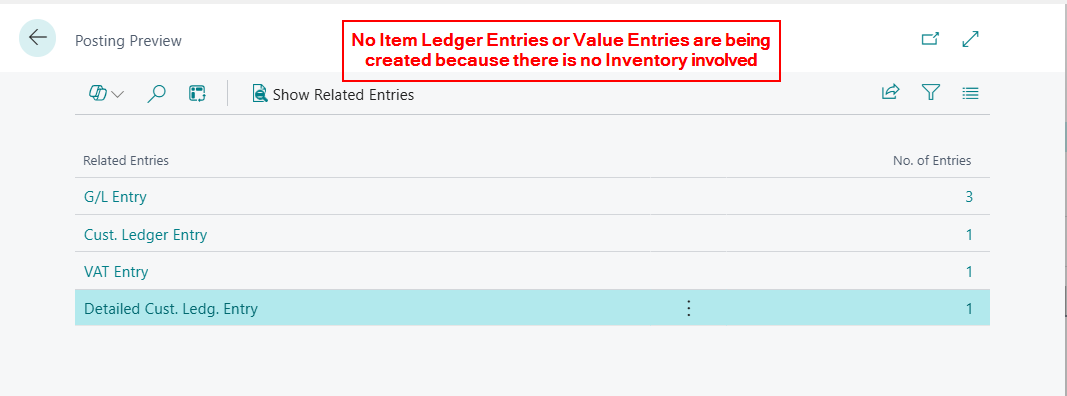
As you can see there are no Item Ledger Entries being created, which is great, as we don’t want to adjust Inventory quantities, however there is also no Value Entry.
Therefore although the ledgers are correct, as the GL Entries have hit the relevant accounts, and the Customer Ledger Entry was created, if we look at the original Item Ledger Entry the “Sales Amount (Actual)” is unaffected.
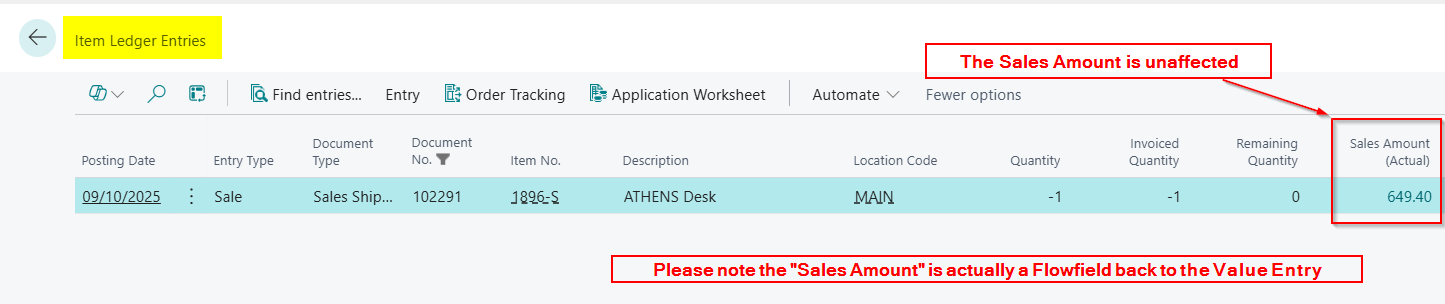
Therefore if we are to use Inventory tables like Value Entries or Item Ledger Entries in reports the values for Sales Amount for this Sales Shipment / Invoice are incorrect.
Credit Memo using Item Charges
Another method we could use to raise the Credit Note is by using an Item Charge rather than a G/L Account.
When using an Item Charge in the Sales Credit Note we can then link (assign) the charge back to the posted transaction(in this case the Sales Shipment associated with the Sales Invoice we need to Credit). This will create a Value Entry and therefore be reflected on the Item Ledger Entry unlike the previous example when using a G/L Account.
Let’s walk through this example below.
First I’ll post another Sales Invoice for an Athens Chair as per below:
This has created a new “Item Ledger Entry” and “Value Entry” however they are the same as the previous Sales Invoice so I wont show these here.
I now want to credit this Sales Invoice, but this time using an Item Charge.
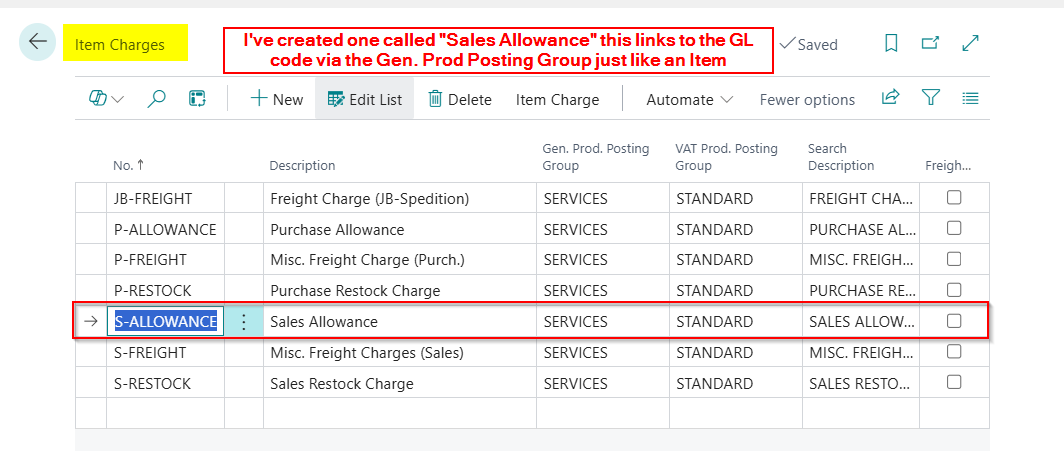
In order to do this I’ll create an Item Charge as per below:
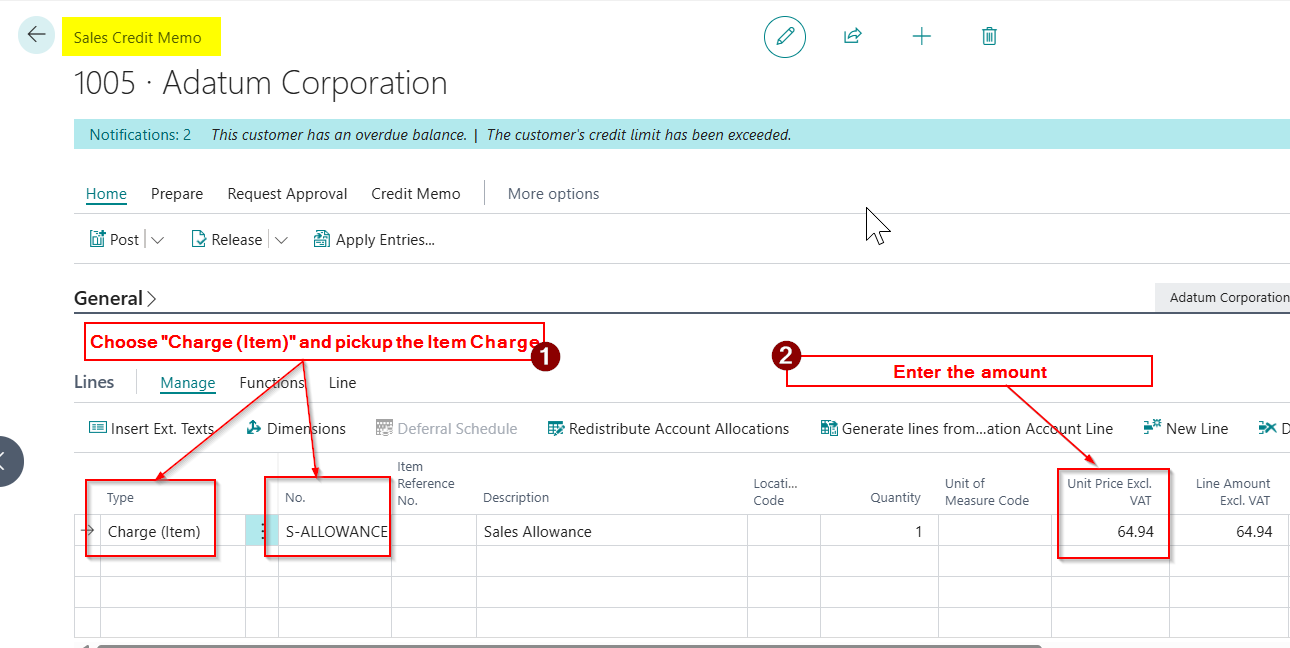
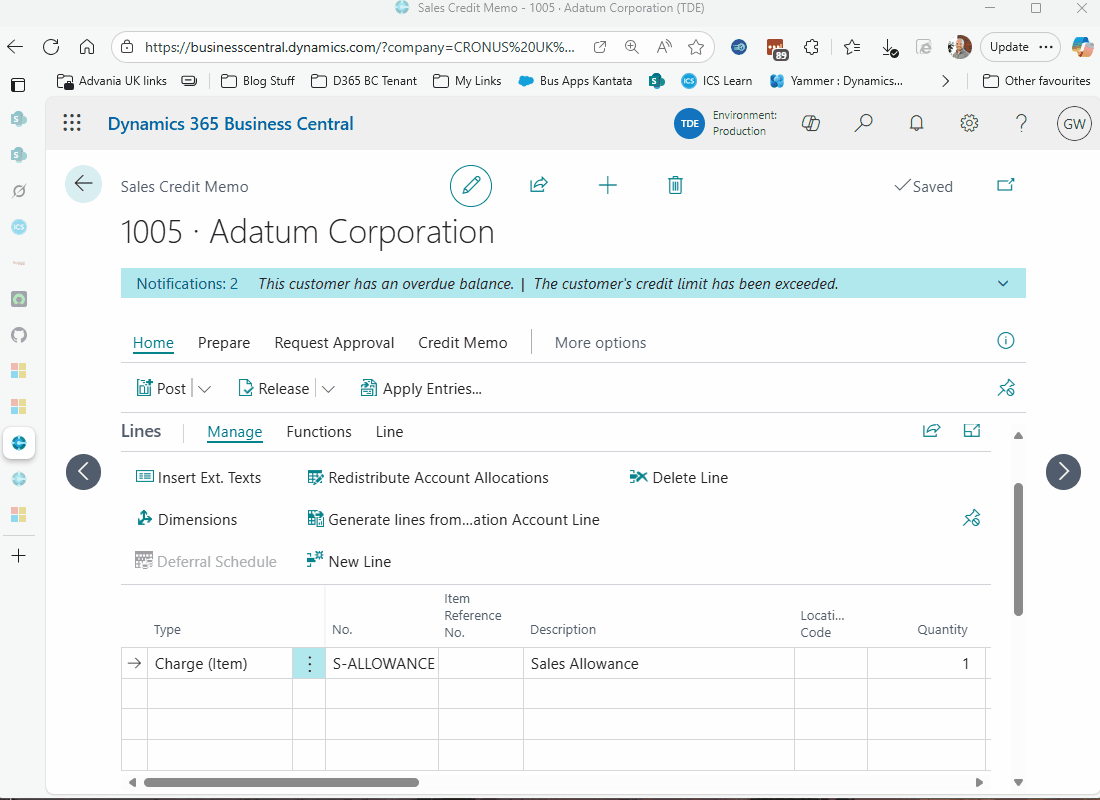
I’ll now create a new Sales Credit Note and pickup the Item Charge and enter the amount.
Finally I’ll link, or assign, the charge to the posted transaction. (in this case the Sales Shipment associated with the Posted Sales Invoice)
This involves selecting the line, clicking “Item Charge Assignment”, finding the relevant Sales Shipment associated with my Sales Invoice, and then assigning the charge to the Sales Shipment.
This clip shows how I do this below:
Now when I post this transaction I get similar entries however I now have a Value Entry
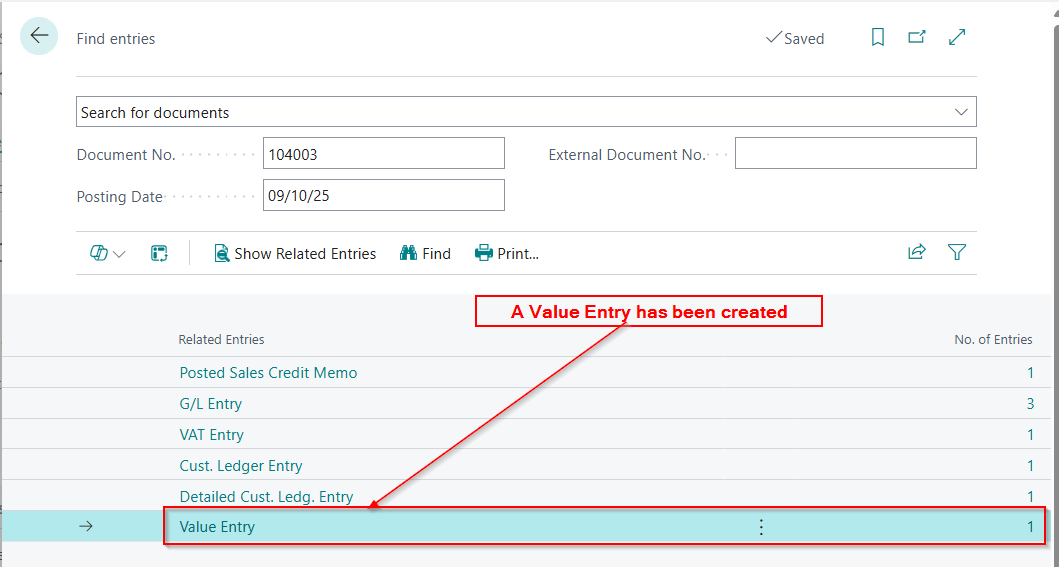
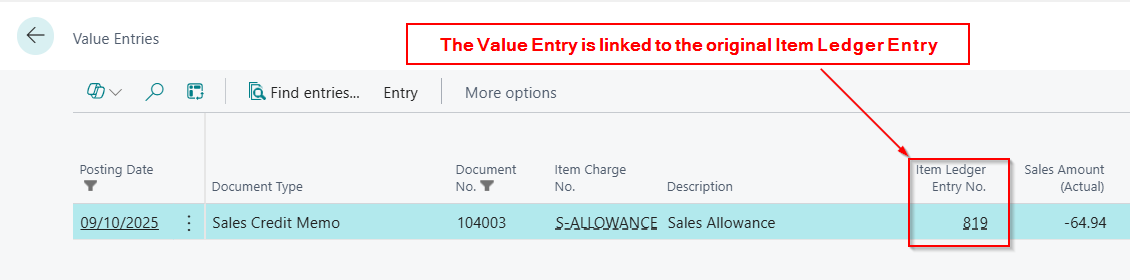
On closer inspection the Value Entry is for £-64.94 and crucially its linked to the Item Ledger Entry
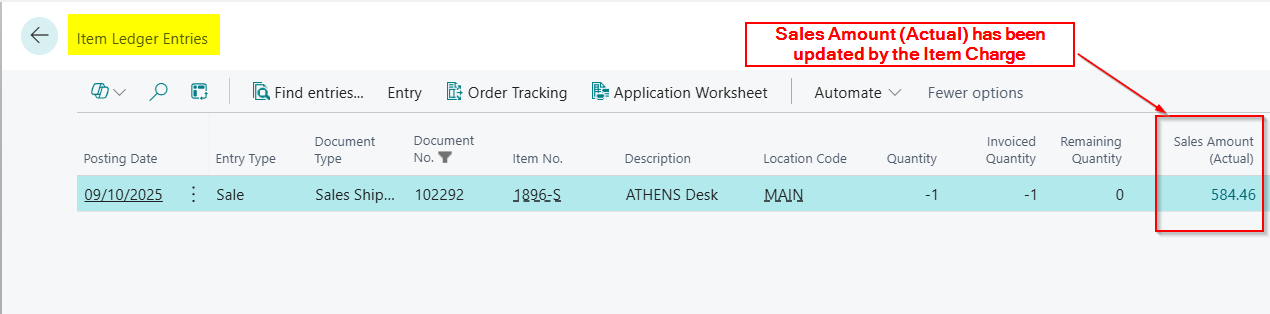
So now when we go look at the Item Ledger Entry for this Sales Shipment the Sales Amount has been reduced.
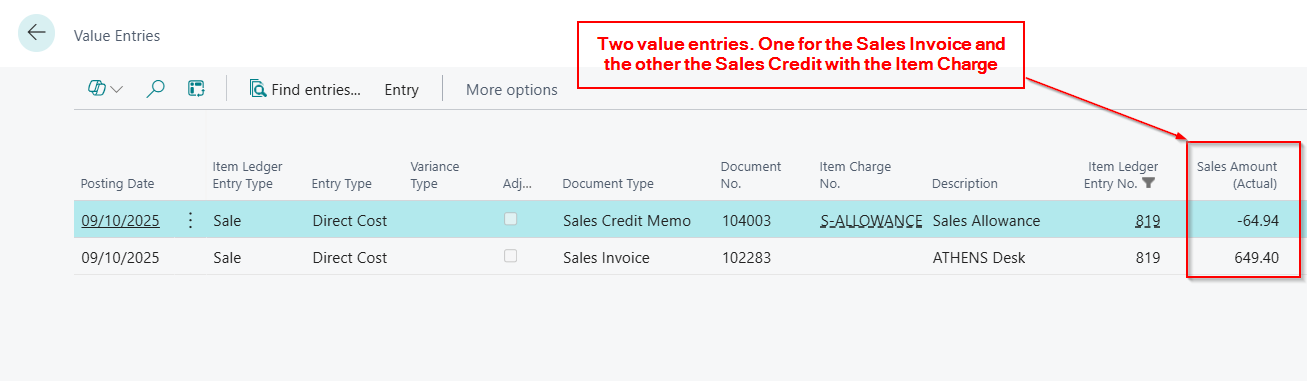
And if we drill down on the “Sales Amount (Actual)” to the Value Entries we can see the two value entries. One is the original Sales Invoice and the other the Item Charge we just posted:
We now have an accurate “Sales Amount (Actual)” being recorded in Business Central.
Therefore any reports based on the Inventory tables will reflect the accurate values.
Conclusion
In this post, we’ve walked through two methods to issue a Sales Credit for an item in Business Central without returning it to inventory.
We first looked at using a G/L Account, which is straightforward but doesn’t update the Item Ledger Entry’s “Sales Amount (Actual),” which can cause issues with inventory related reports.
We then looked at using an Item Charge, which we linked to the original Sales Shipment. This ensures the Sales Credit is reflected in the Value Entries and accurately adjusts the “Sales Amount (Actual).”
In my opinion this makes the Item Charge approach the better choice for maintaining precise inventory records and reliable reporting.
Thanks for reading!