There are many different ways to post the cash receipts you receive from customers in Business Central.
In this post we’ll explore three methods for posting Cash Receipts, the first two being the most common ways to post Cash Receipts, and finally a method that can be used in combination with the Bank Reconciliation to help streamline the process. When demonstrating this method, we’ll not only post the Cash Receipt, but reconcile it at the same time.
Please note, there are other methods for posting cash such as Payment Reconciliation Journals however that is outside the scope of this post.
Method 1 – Cash Receipt Journal
The first method is using the Cash Receipt Journal. I find this is the most common method, and has been a part of Business Central / Dynamics NAV for as long as I can remember.
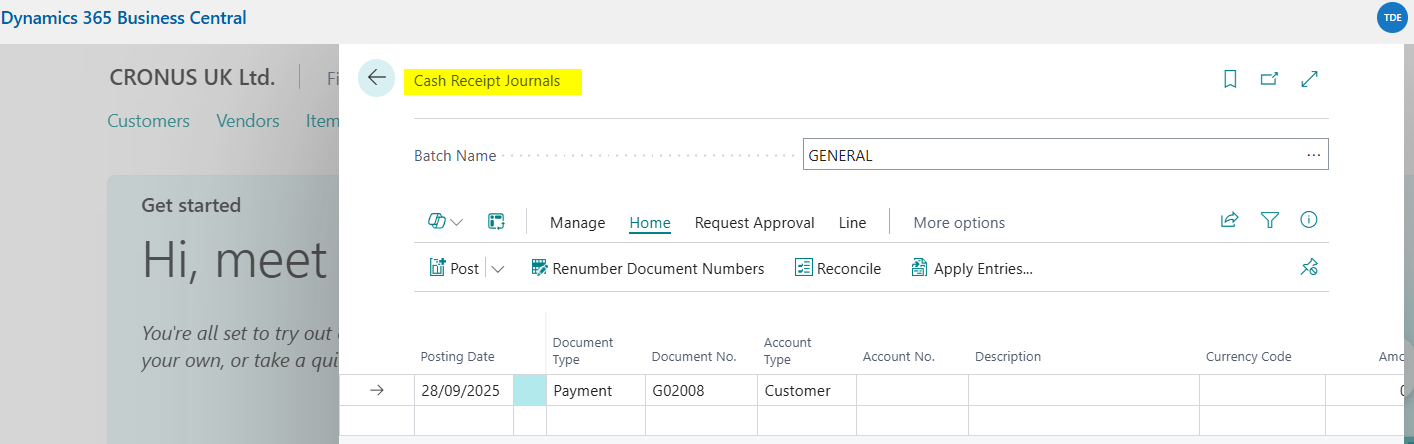
To do this you search and then open the “Cash Receipt Journal” page.
You then select the relevant batch you wish to create and post the Cash Receipts in. (I’ve chosen a batched called “CASH”, which I’m balancing to my Bank Account)
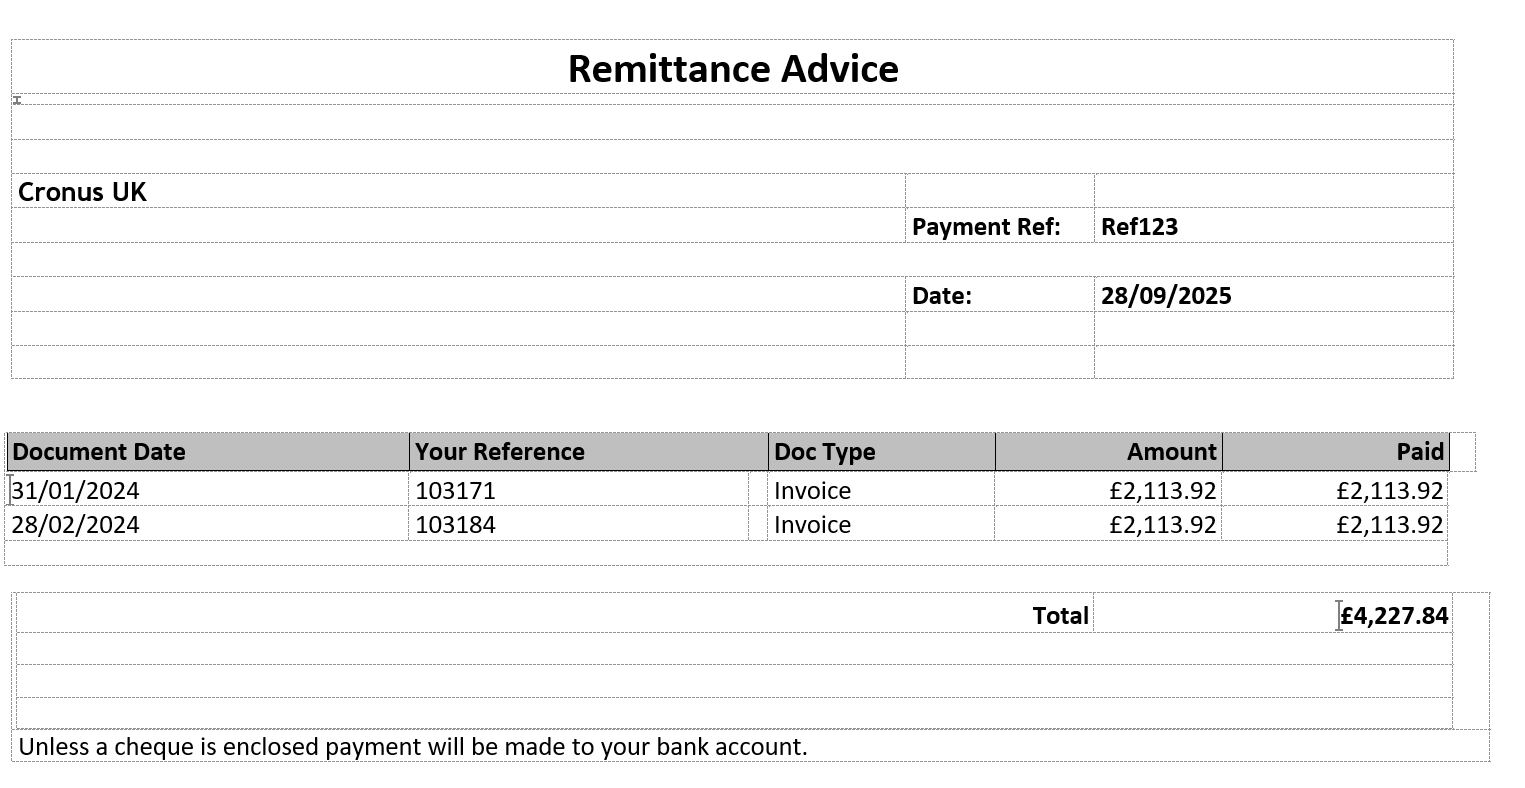
Now I’ll enter the Cash Receipt using the following Remittance Advice that the Customer has sent:
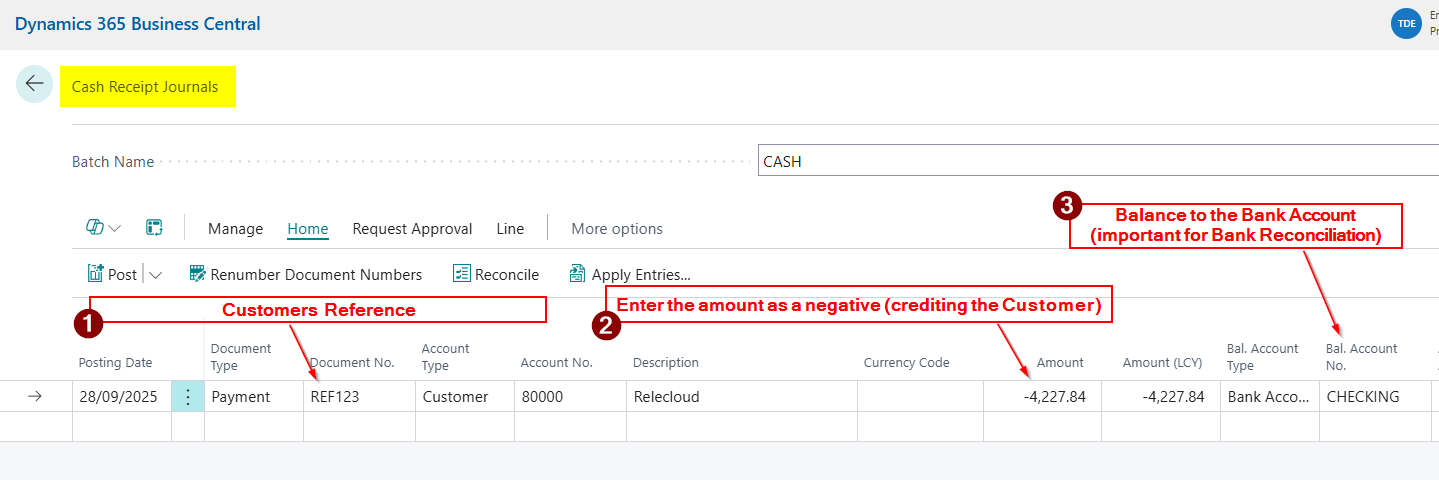
Using the information detailed in the Remittance above, I’ll enter the Cash Receipt as per below, entering the Customers Reference, the Amount (as a negative) and ensuring the journal line is balanced to the Bank Account:
Note that entering the Amount on the journal line as I’ve done above, isn’t required at this stage. You can leave the Amount as 0.00 and when you apply the Cash Receipt the amount is updated automatically for you.
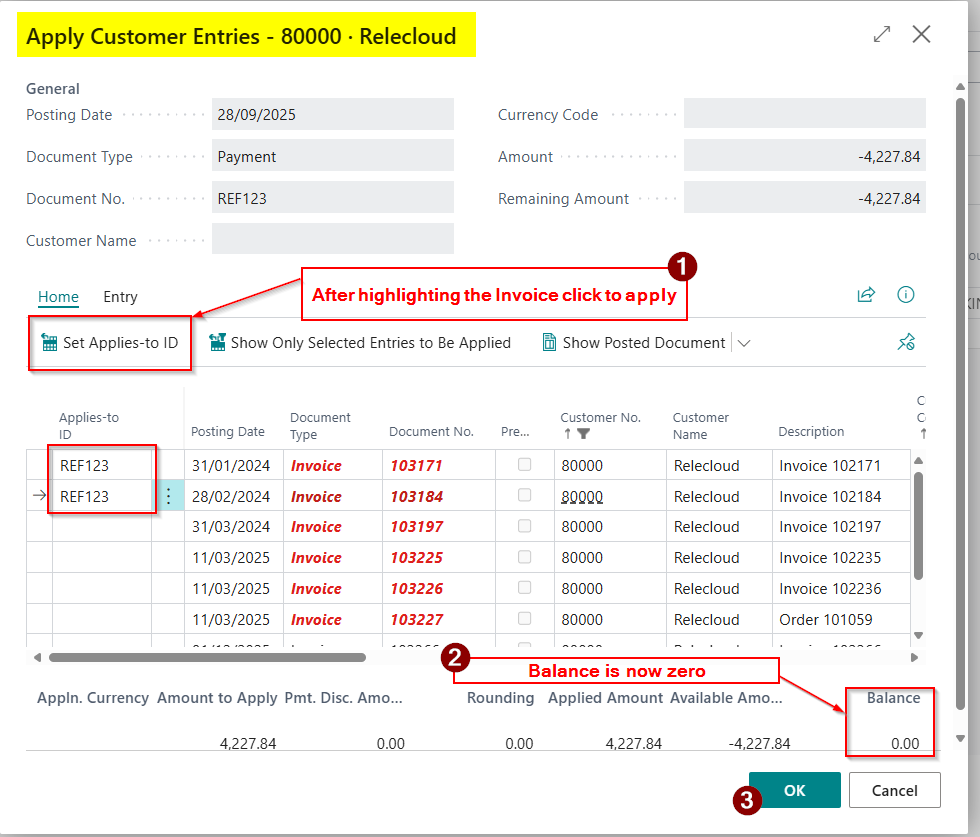
I choose to enter the Amount on the journal line because I find it serves as a control when I apply the invoices, allowing me to confirm that when the Balance is zero on the Apply screen, I know I’ve applied everything correctly.
After entering the Amount I’ll click “Apply Entries” and apply the cash to the invoices
Once finished I’ll post the Cash Receipt Journal.
There is one important note to this process. If you want to use the “Bank Reconciliation” feature of Business Central you must balance to the “Bank Account” rather than balancing directly to your Bank General Ledger code. This is because by balancing to the Bank Account the system will create “Bank Account Ledger Entries” that you can reconcile in the Bank Reconciliation.
Method 2 – Register Customer Payments
The next method is “Register Customer Payments”. I’ve seen this used by clients who are used to ticking the invoices when they are applying them. If this is the case, then this method is found to be much more intuitive.
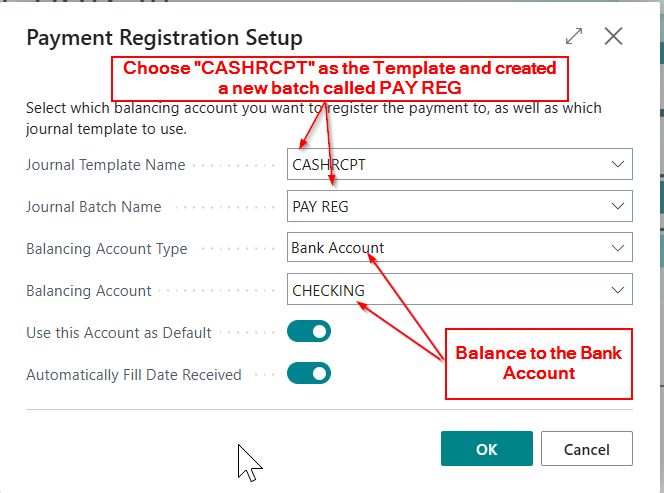
This feature requires a little setup, therefore prior to posting the cash, you must open the “Payment Registration Setup” page and complete the setup.
Therefore I’ll for search for “Payment Registration Setup” and enter the setup as per below:
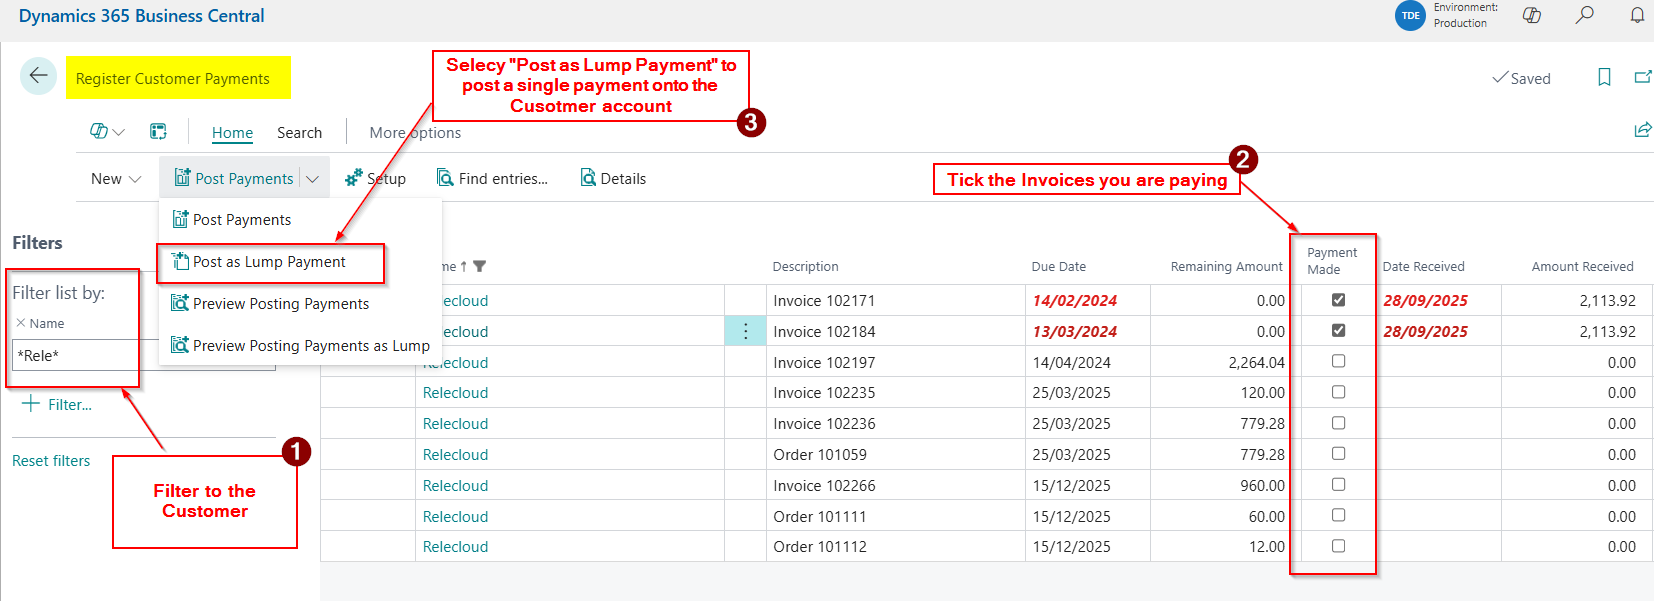
I’ll now go to the “Register Customer Payments” page and post the payment assuming the same Customer Remittance as earlier.
Note, when you open the page the system will initially list all outstanding transactions. I therefore filter to the Customer and then using the remittance tick the invoices that are being paid before selecting “Post as Lump Payment” to record the cash in Business Central.
You can click into “Amount Received” and alter the amount received if a transaction is part paid
As I mentioned previously, some users love this approach, as it seems quicker and more intuitive.
Method 3 – Post Cash Receipts as part of the Bank Reconciliation
The final method I’ll go through is posting the Cash Receipts as part of the Bank Reconciliation process.
I personally like this method as most customers will pay via bank transfer, therefore you can combine the process of reconciling the bank with posting Customer cash. (and any other cash transaction such as direct debits and standing orders or bank charges as I’ll demonstrate below) .
This method assumes you can import your bank statement into Business Central.
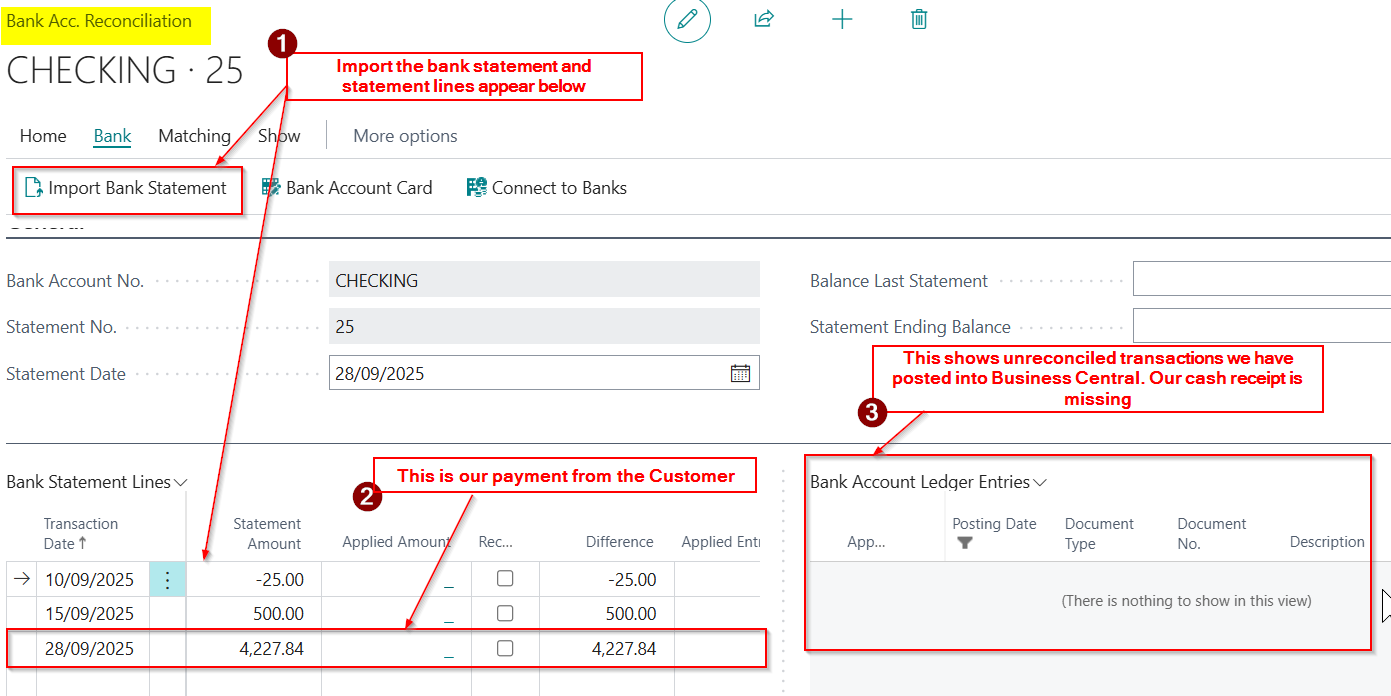
The first stage is to open the “Bank Account Reconciliation” page, and click “New” to create a new Bank Reconciliation, and import the bank statement
After importing the bank statement, we now have our Cash Receipt showing on the bank statement side (the left hand side) however this hasn’t yet been posted in Business Central, so there’s no corresponding “Bank Account Ledger Entry” on the right hand side.
As the cash hasn’t been posted we now have two options.
Option 1: We can exit the bank reconciliation, and use one of the methods we have mentioned previously to post the cash receipt and apply it to the Invoices.
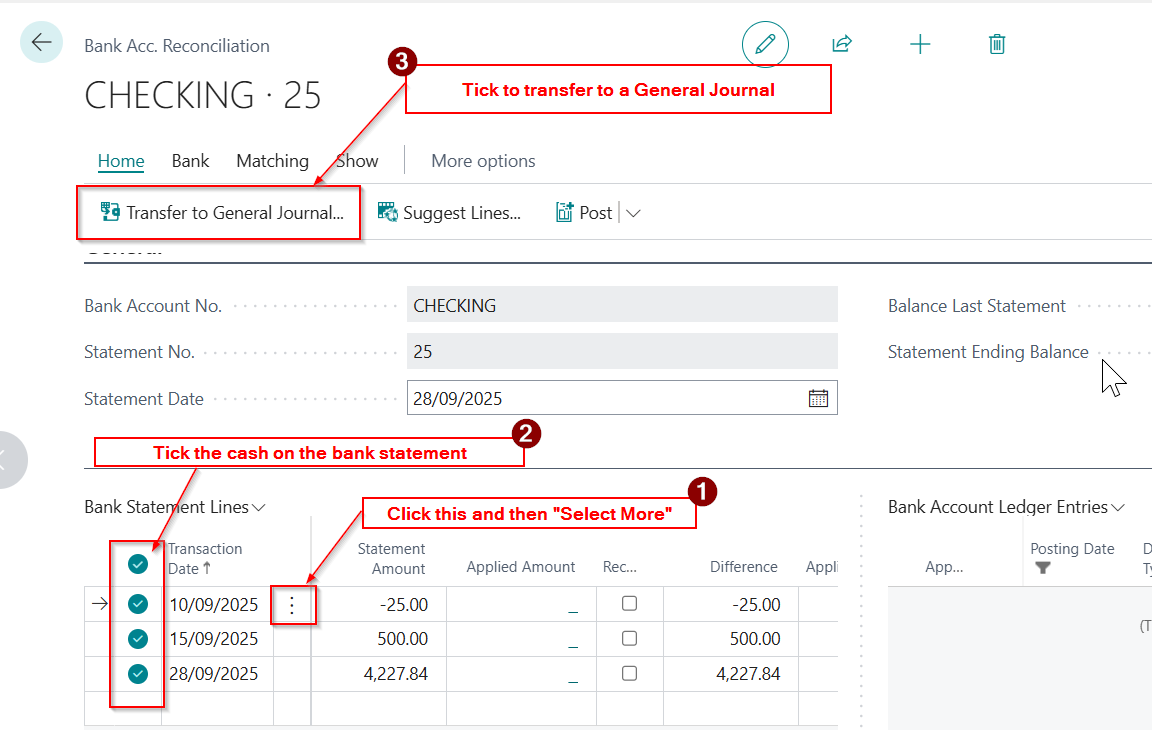
Option 2: Alternatively we can post the Cash Receipt straight from the Bank Reconciliation page by selecting the cash receipt and choosing the “Transfer to General Journal” option.
For this example we’ll choose option 2, and post straight from the Bank Reconciliation. In fact we have two other cash transactions on the bank statement we need to post as well, so we’ll post all three entries on our bank statement.
To do this we’ll select all three entries on the Bank Statement and select “Transfer to General Journal”
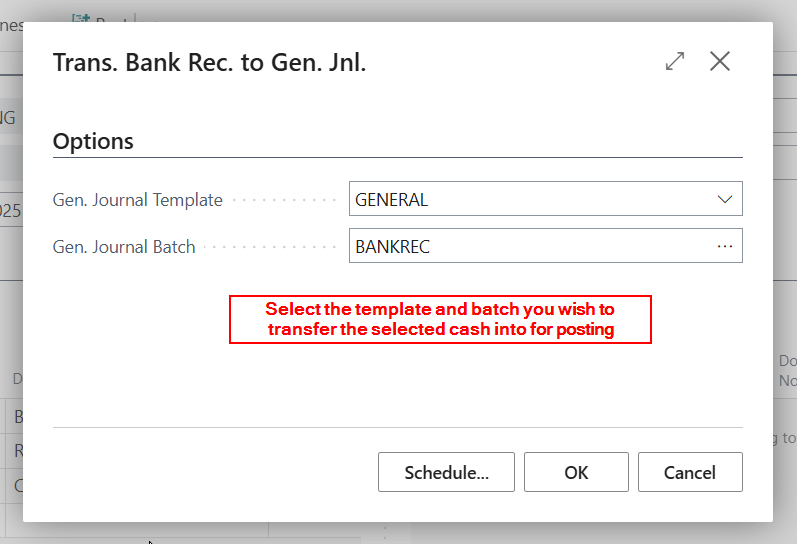
After clicking “Transfer to General Journal” the system will ask which batch you wish to transfer the selected transactions into for posting. In this case I’m choosing “General” as the template, as I want to use the “General Journal” page, and “BANKREC” as my batch.
For clarity, you can click on the ellipse button next to “Gen. Journal Batch” and create a new batch. This is how I’ve configured my “BANKREC” batch
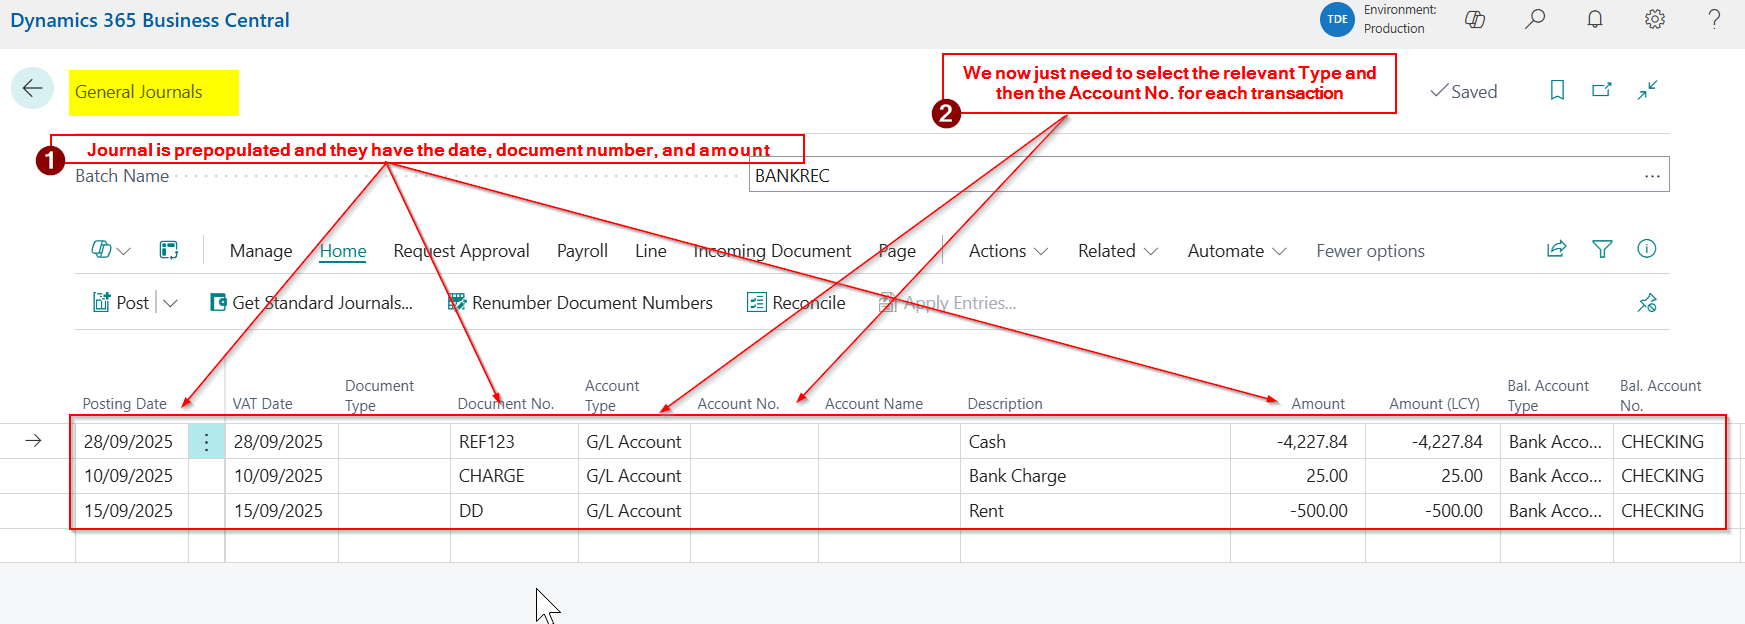
After clicking OK on the “Trans. Bank Rec. to Gen. Jnl.” page the system opens the “General Journal” page automatically and its prepopulated with the three transactions we highlighted.
Therefore all we have to do enter the relevant codes for the three transactions 😊.
I’ll therefore enter the relevant details for each line as per below:
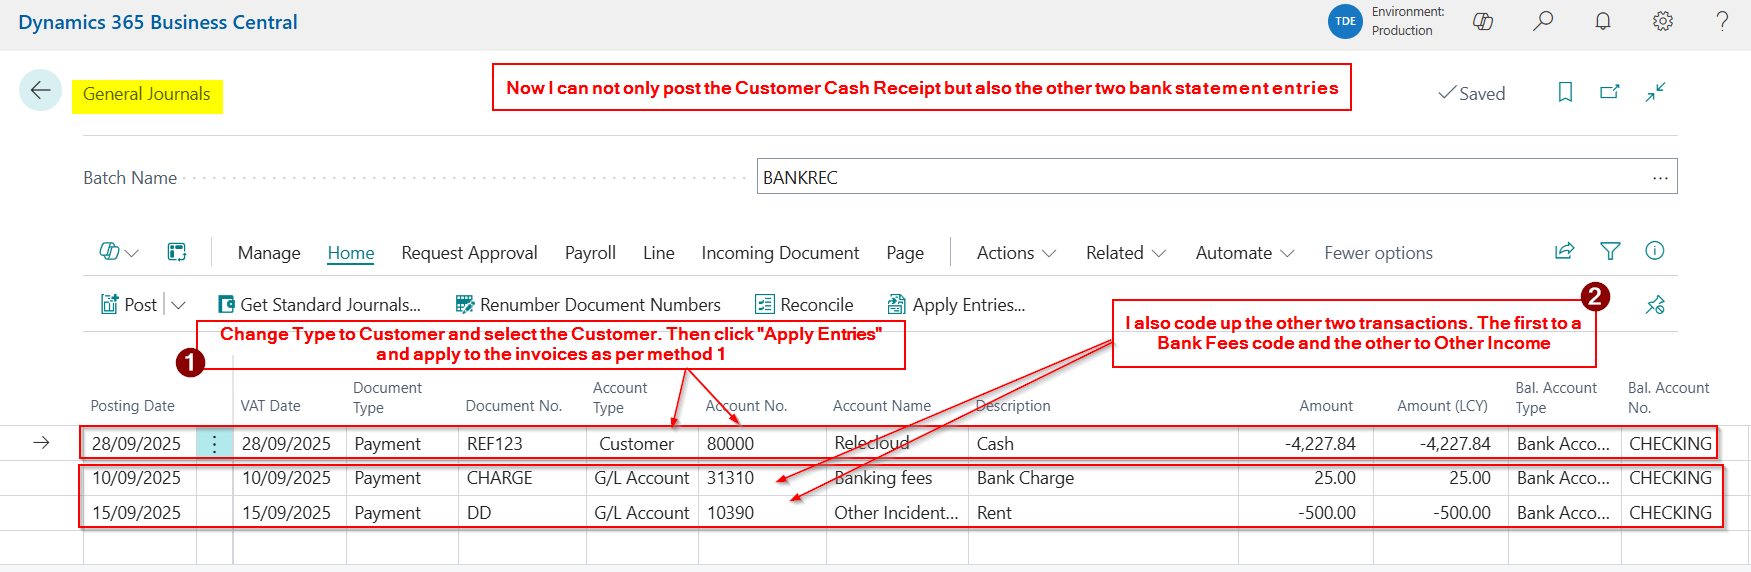
As you can see I’m posting my cash receipt from Relecloud by selecting the first line in the journal, choosing “Customer” as the Account Type and then picking up my Customer “Relecloud”. I can even apply to the invoices by clicking “Apply Entries”
What’s amazing about this is I can also enter the GL codes for the other two bank statement entries. I simply pickup the relevant GL codes 😊. (in this example I choose “Banking Fees” for the Bank Charge and “Other Income” for the Rent)
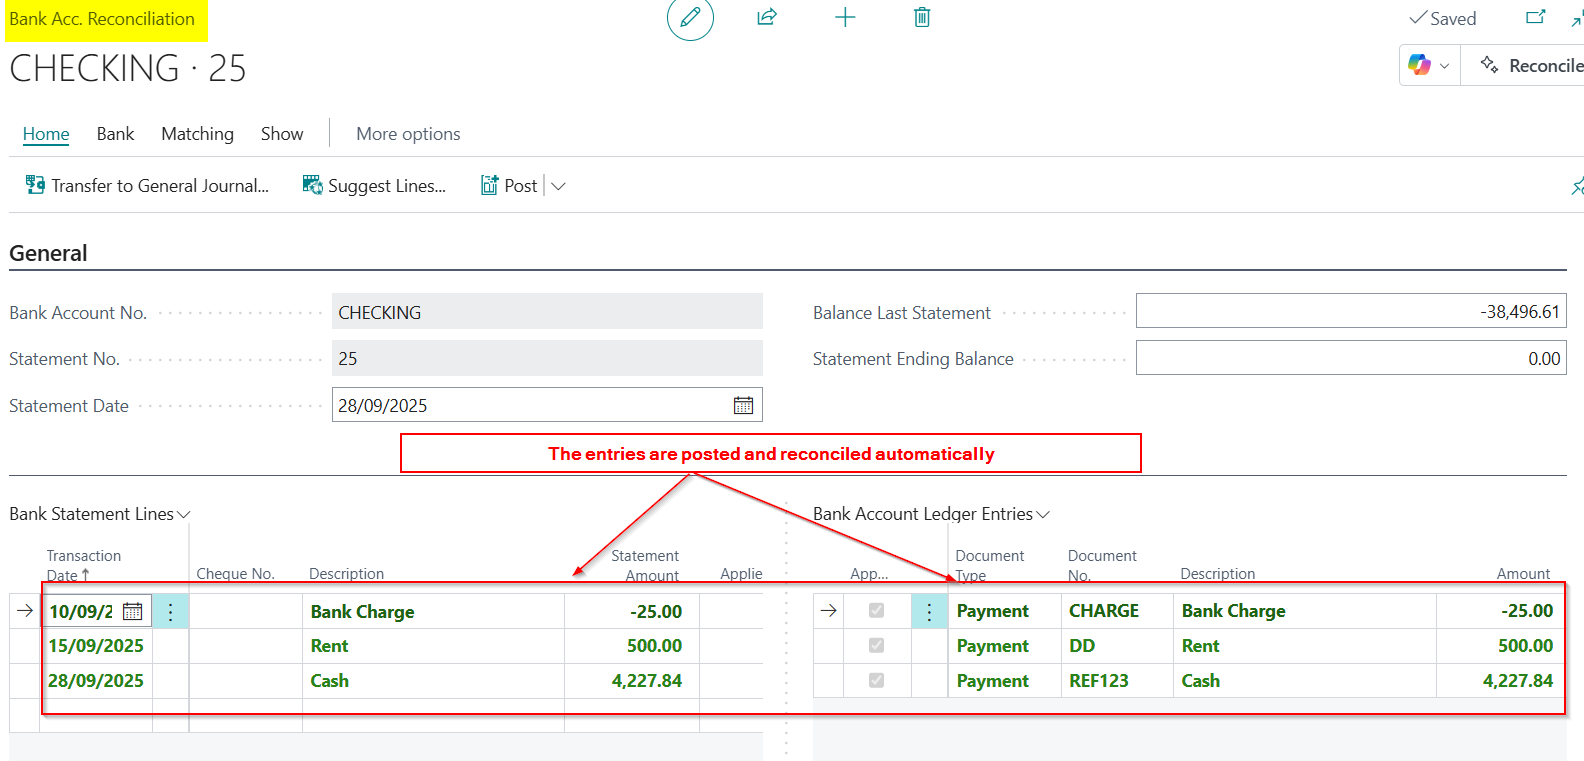
Finally, I can click “Post” to post the journal, and when I exit the “General Journal” page it takes me back to the Bank Reconciliation with both lines reconciled.
I can now continue with my Bank Reconciliation and complete this task as well.
In my opinion this is not only an amazing way to post the Cash Receipts, but its a great way to post all bank related transactions.
Now, rather than splitting the processes of entering Cash and Direct Debits etc, and the bank reconciliation you can combine them. This can potentially save time and errors 😊.
Conclusion
This post shows three ways to enter cash receipts in Business Central. The first two are more conventional ways for posting cash, and are methods I recommend when users are first starting out with Business Central. This is because it gives users a good feel for how the Business Central is working, which is crucial when starting with a new system.
The last method shows how the process can be combined with the bank reconciliation for greater efficiency and I find users do start to use this method once they are comfortable with posting processes in Business Central.